1 year ago
The apron of the working area, which decorates the space and protects the walls from contamination, is a bright and significant element of the kitchen. On the design of the apron, you need to use beautiful, reliable and practical materials.
Most often for a kitchen apron choose a tile that has interesting design. In addition, it must be resistant to adverse effects of various external factors.
Characteristics and dimensions of tiles for the purpose of an apron

At present, tile producers can offer the facing material of the most diverse format. The most popular is a small square tile with a size of 10x10 cm. In addition to such tiles, you can find many other sizes - square tiles, whose flank is 16, 20 and 30 cm, as well as rectangular models 30x10, 30x20 and many individual people.
To the material, which will form the work area, high demands are made, and its specifications should be very good: they must persistently withstand the effects of high temperatures, fat, moisture, as well as aggressive chemicals that are part of the detergent team.
Now, manufacturers are producing a kitchen tile for a curtain with improved performance and increased density. This tile is specially designed for (avoiding use as a finishing material in the kitchen, as it is characterized by increased resistance to aggressive environments and special strength. The collection of such tiles for decorating the kitchen apron will be an excellent solution.
Designing of tiles
The finishing of the working area is needed not only for that, then) to (s) protect the walls from moisture, grease and soot, but also serve as an original element of the decor. Tiles should be stylish and attractive, in harmony with the design of the ceiling, floor, walls and even with a kitchen set.
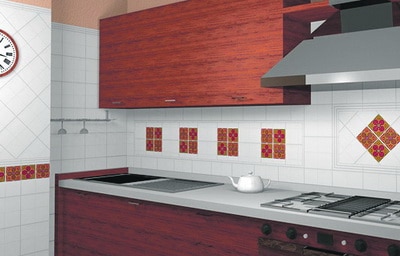
Depending on the general stylistic decision, the apron can be made in the form of a multi-colored brickwork, a mosaic cloth or a strip made of tiles of various textures.

Modern interiors suggest such a make-up of the working area, which will contrast with the color with other elements of decoration. Amen interesting solution can be a mirror finish or a panel with a picture. And there can be (there are) such variants.
Beautiful facing material of exclusive, modern or classical design will help you to transform the kitchen space and is able to bring a special mood to its interior.
Criterion for selecting tiles

In order to finish the surfaces in the kitchen, you must choose an easy-care and hygienic material. Embossed surfaces almost always accumulate shlupen, dirt and grease, so try to choose a glossy or matte tile that has a smooth texture.
The main criteria for selection include strength to moisture and to heating, because under the influence of harmful factors, the rationing of the apron in your kitchen should not lose its aesthetic appeal and its functionality. Selecting the facing material is necessary in accordance with the color solution of the interior and with the style of the room.
Color resolution (question
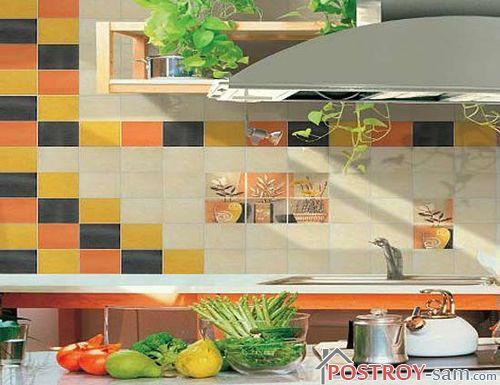
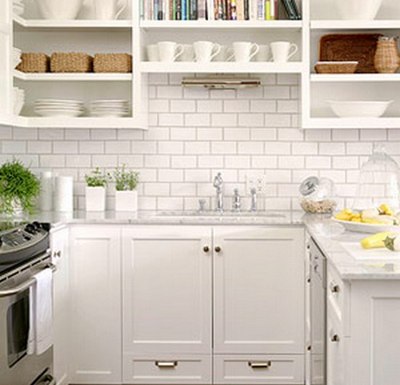
White finish, which can create a sense of purity and freshness, is a universal solution, suitable essentially for any interior. Very often bright tiles are supplemented by various colorful inserts. The new interior allows the decoration of white tiles with removable vinyl stickers.
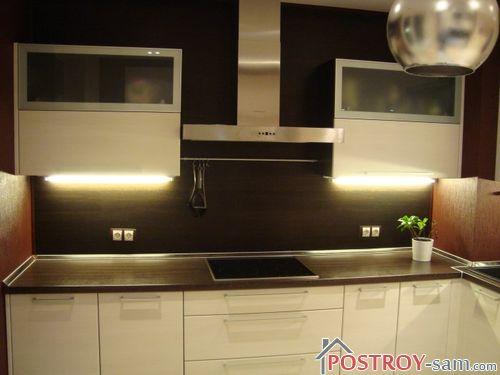
At the present time in the kitchen is very popular furniture of various shades of color wenge: through chocolate to golden.
A reasonable solution is to choose a finish that is pretty little by the tone of the furniture. Noble color can emphasize the refined style of the interior, but also bring the atmosphere of modernity and classics. Finishing the apron may not be a bit like each other in tone, you do not have to try to accurately repeat the color of the furniture. This will make your interior more multifaceted and interesting.
Materials for fashionable apron
A tile with a kitchen purpose on an apron is a certain standard, as it is a pretty practical fit. But at the same time, we have a large variety of both the tile itself, say, and other materials, which are often used in finishing the workspace for the kitchen.
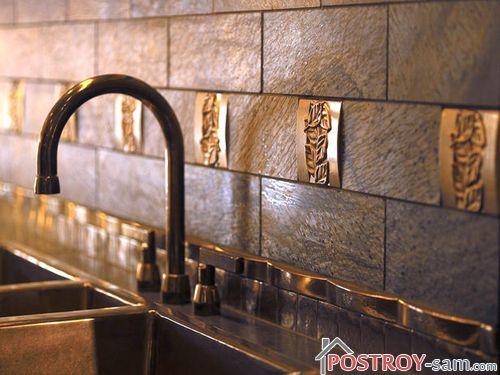
Ceramic tile
The best option for decorating the kitchen apron is its rustic ceramic tiles. Ceramics are easy to clean, it is resistant to high temperatures, grease, moisture, and again has high strength characteristics. And a wide variety of colors, sizes and textures make ceramic tiles the most popular design material. Content - make the correct markup before stacking and successfully pick up borders and background.
Once again, one popular solution for decorating the work area is glazed tile, which has a whole range of good performance properties:
- ease of care;
- durability;
- resistance to physical and chemical effects.
A rich assortment will allow for each person to choose an option that is suitable for the interior of his kitchen.
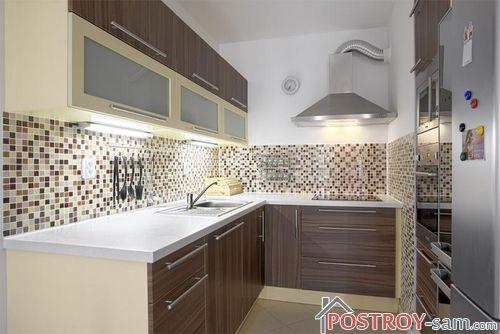
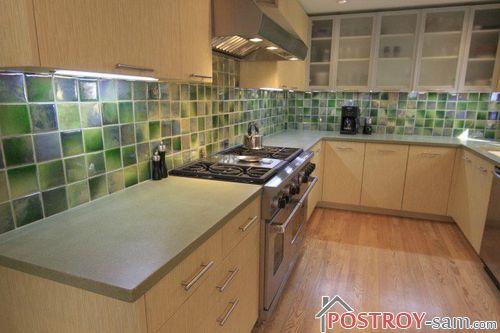
An excellent alternative to the tile, be the design of the working area in the kitchen, can become a mosaic. Mosaic from stone, glass and smalt can give your interior a presentable and noble edition. Also with the help of small fragments, you can draw not only straight, but also curved surfaces.
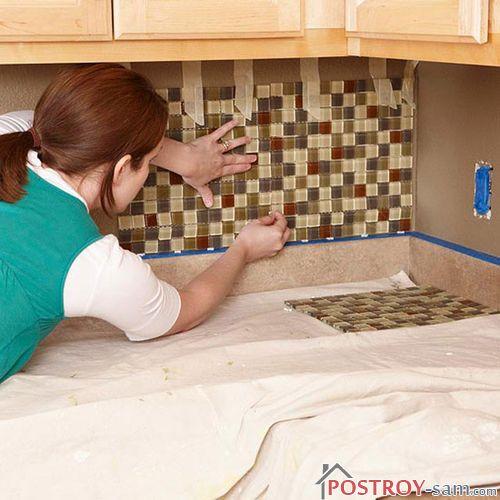
The mosaic drawings are produced by the producers pasted onto the mesh. You only need to fix them on the wall, and then work with moisture-proof grout seams.
Tile for brick

Add to the interior a note of coziness will help the finishing material, made in the form of small bricks. Varying the texture and shades of the tile, you can get the necessary effect, which can then be applied in the interior.

For example, the bricks with steel shine will look great in the avant-garde style, glossy and narrow bricks will fit modern interior, and imitation of the aged surface will be an excellent solution for the kitchen in the style of bluegrass.
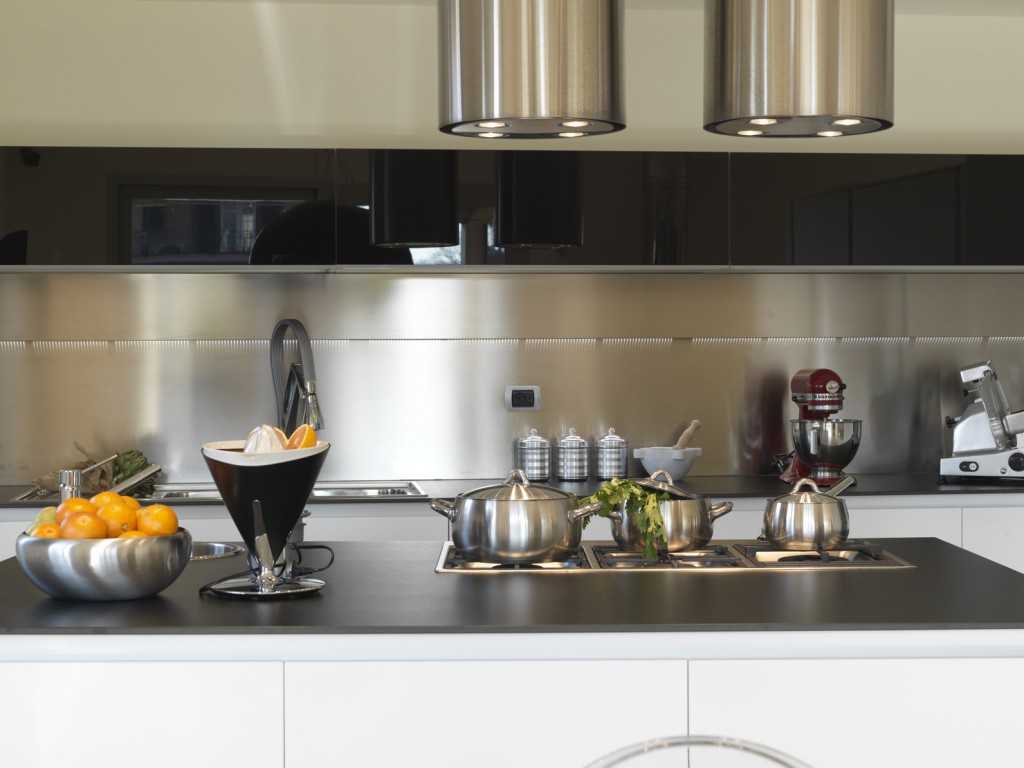
Metal apron

One of the attributes of modern design is metal marmorization. But many believe that the metal finish does not contribute to the comfort of keeping the kitchen. To metal trim looked in the working area organically, you need to put together the right environment around it. The metal finish looks good with furniture that has glossy facades, decorative plaster and wooden floors.
Spanish tiles

The leader of the market of finishing materials is the Spanish tile, produced along the newest technologies and possessing the highest quality. Decorated with a tile curtain will look at your kitchen luxuriously, and serve it full for many years.
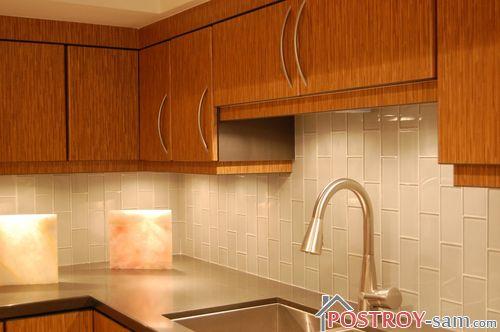
Glass tiles
This kind of finish is fully practical and very attractive, since the glass is resistant to a variety of aggressive detergents, moisture resistance and heat resistance.

In its beauty Sudan is very versatile. It will look great on the apron of glass with colored inclusions or - or engraving, as well as matte or tinted glass.
Apron made from MDF
Unless in your kitchen there is a kitchen set made of MDF, in this case it can be supplemented with an apron of the same material. Of course, a wood oven, compared to glass and ceramics, is not so practical, but sympathy has good resistance to mold, moisture and mechanical impact.

Laying tiles for aprons
Ideally, the facet of the apron should coincide with the border of the furniture, but in practice it is difficult to implement such a song, especially if the facing is done before buying furniture. Why is it most rational to do the laying so that the lining and the tiny lining come to the cabinets from below and from above.
If you install furniture standard sizes, in which case the distance from the floor level to the apron should be approximately 85 cm, and the degree of the working area should be 60 cm. The wall on which the exhaust hood is to cease should be faced to the border on which the hanging cabinets will be occupied.
Suspended structures have a standard height of 60 cm, so the height of the lining will be 120 cm. If you take into account that the lumen of the hood is about 60 cm, then the width of the lining at this place is fully 70 cm (excess centimeters will go behind the side cupboards).
Lining though stacked in various ways, but the simplest version of styling is made aimlessly:
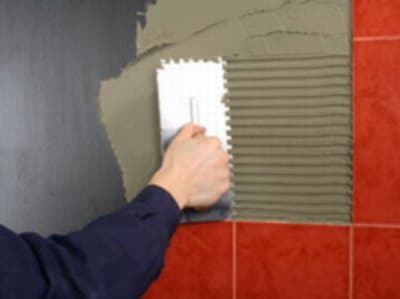
- First you need to remove the old finishing material, align and plaster the wall.
- Subsequently, the boundaries of the future laying should be delineated.
- After that, the entire appearance must be primed.
- Next, you need to attach a metal profile or a wooden twist on the bottom line, placing it horizontally with the help of a building level.
- Today, you can dilute the adhesive composition as described in the manufacturer's instructions.
- Then it is necessary to put glue on a wall and to make by means of a notched trowel for an adhesive glue grooves.
- After this, you need to lay the first row, checking the level of error-free laying. Between the facing elements should be installed plastic crosses, which will serve the service for the formation of seams.
- Next, it is necessary to lay out the entire working area behind the row, and in order to complete it, it is necessary to remove all traces of glue very carefully.
- The facing indicatrix should be left to dry for about a day, after which it is necessary to lay out all the crosses and clean all the seams from the glue residues. Then, near the aid of a rubber spatula, it is necessary to treat the seams with a moisture-resistant grout, which includes antifungal additives.
- In some cases, the grout completely dry, you need to thoroughly wash the entire surface. In some cases, the joints can be further processed with a varnish formulation. This is done in order, then) to (s) create a more monolithic surface.
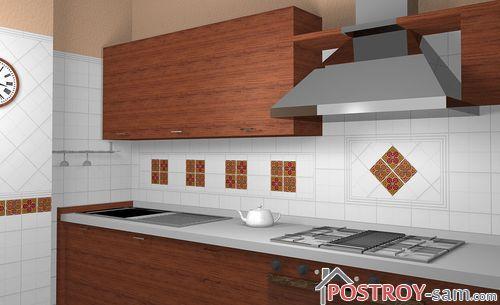
Tile 10x10 for the working area
Most often ((i) cases for decorating an apron in the kitchen use a square tile with a roundabout way of 10 cm, since it is easier to work with small facing elements, forming either an intricate composition or a monophonic canvas. , in which the whole cook is performed.
You can lay out the background with tiles of neutral color, and then fill it with desyudeport or decorative inserts. Also small elements can be arranged together with larger tiles. By means of such alternation of different-sized parts, it is possible to flick the original mosaic cloth both on the whole surface of the apron and in one part of it.
Decor of tiles

True masters can collect such patterns that will amaze with the play of shades and the intricacy of the drawing. From the original solutions, one can distinguish an unusual ornament, which is created from fragments of a tile, which has a different color and texture.
On the standard cladding, executed in neutral tones, at least paint colorful images with the help of special paints and stencils.
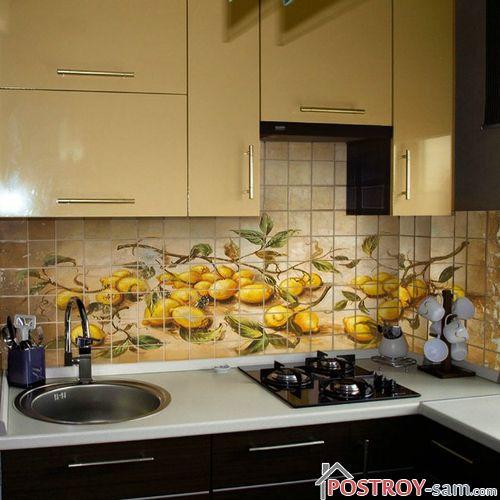
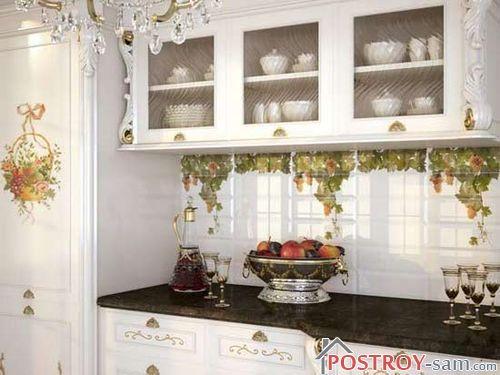
The most popular topics about the cuisine are fruits and flowers. One of the most accessible and simple options in (types of kitchen is considered the decoration of the facing material with different vinyl stickers.
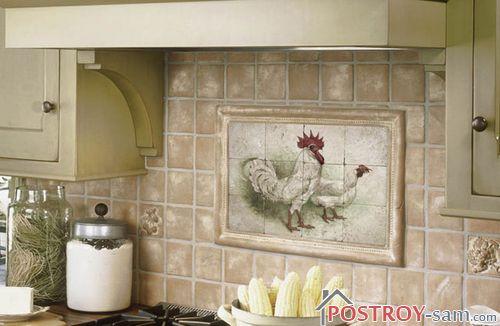
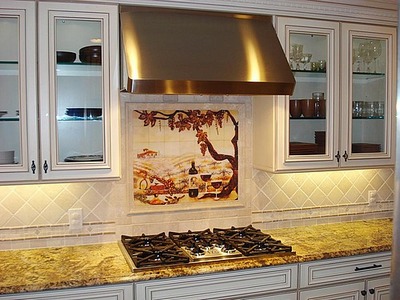
Also zanishyak will look in the interior of the panel. Now you can easily find ready-made tile sets with floral compositions, still lifes and landscapes. This stained-glass window can be combined with a simple tile.
Original ways of styling
In addition to the traditional method of laying, some time the tile is laid in straight rows, there are also more original ones, where the decorative layers fit quite differently. For example, a mirror or glass tile only knows and stacks chaotically, while receiving an unusual visual effect.
An interesting solution is to rebuild the tiles in staggered order or diagonally. In this case, the original dressing is created using tiles of different sizes and colors.
You can create an unusual composition by placing decorative elements under different angle of inclination. And it's good. Ant. You can not even rotate perpendicular elements with tilted.
But special application of an apron in an original way will require some skills from you, so in case you decide to make a complicated composition in the kitchen, it's better to rest for help to a professional, because if he has the necessary equipment he will be able to realize all work quickly and efficiently.
Tile 10x20 for the working area
Tiles on the kitchen on an apron, which has a size of 10x20, is most often performed in the original range, with various patterns and ornaments.
As the main finishing material, very often stylish elements come into effect, which are perfectly suited to produce from them imitation of brickwork or various drawings.
The tile is an elongated warehouse used to create curbs that frame the surface of square elements.
Designing a work area using a beautiful and practical tile material is an excellent way to increase the comfort and functionality of the work area, and in turn, giving the interior of your kitchen more elegance, style and attractiveness.
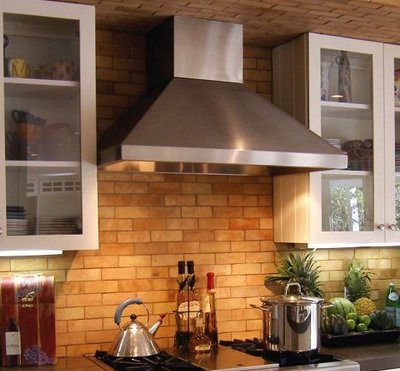
One of the most important elements of the design of the kitchen is an apron - part of the working wall between the pendant and the floor cupboards. This zone is most polluted, especially in the washing area and slab, therefore, along with the aesthetic requirements, the materials for decoration are subject to stringent requirements for practicality. Only then the apron for the kitchen can be considered good, when it is pleasant to look at and easy to take care of.
Of what do
A few decades ago and the question of what to make an apron in the kitchen did not arise: if lucky to find a tile, made of it, if not - just painted with oil paint. As one of the options - glued conventional paper wallpaper, which were covered with varnish. That's the whole choice. Naturally, the tile in this case is the best possible option.
Compound apron for kitchen - from tiles and mosaic
Today, the choice is much broader. There are both traditional tiles, and many other materials on the apron for the kitchen:
- Ceramic tiles and mosaic.
- From tempered glass with applied photographic printing.
- Stone and materials based on it (granite, for example).
- Plastic and plastic panels.
- Metal.
Despite the abundance of materials, ceramic tiles are still the most popular. And all because it is in a very wide range of colors and sizes. The second most common is an apron made of plastic - it's easy to take care of, and it's also inexpensive. Because it is popular. In third place, perhaps, a kitchen apron made of glass. And all because it gives unusually wide opportunities for design and design. Its only drawback is high cost. All other ways to design the wall of the work area are not very popular. Some because of not the best qualities (MDF, for example, does not like moisture and heat) or the complexity of mounting on walls (granite and stone). Nevertheless, all these materials can be used.

Dimensions
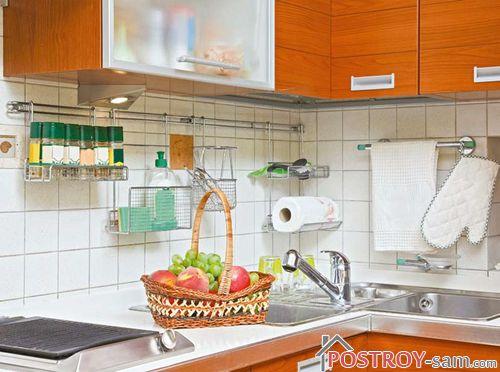
On the length of the usual questions do not arise: the whole wall or part of it, which is occupied by the kitchen set, requires special care. Because with the length of everything is simple. But the width of the lined area should be more open space. That is, the finish should start below the countertop level of the floor cupboards and end above the level where the suspended cabinets end. This stock is desirable in the area of 5 cm. More or less depends on the size of the finishing material, in particular ceramic tiles.
Since there are no cabinets above the stove, the apron at this place is made higher. And again: its width should be such that the sideboards hung from the sides are lying on the tile with its side. So it's more convenient to clean up.
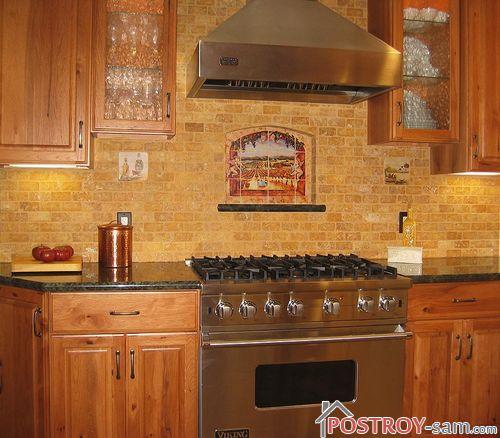
Tile apron
The most traditional form of finishing the working wall in the kitchen is ceramic tiles. It is good because it is easy to clean and has a long service life. Modern technology allows you to make it of different shapes, colors and sizes, which gives a lot of opportunities for design.
The disadvantage of the tile apron in the kitchen is the complexity and length of installation, the high price for the tile itself and installation work. The disadvantage is the presence of a large number of seams. They are rubbed with special compounds, but it is the seams that get dirty and lose their appeal first of all. It is necessary to remove the old grout and again to process them new.
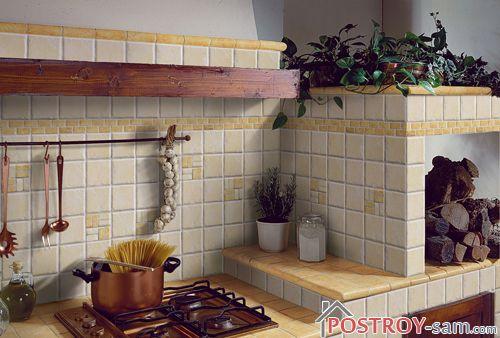
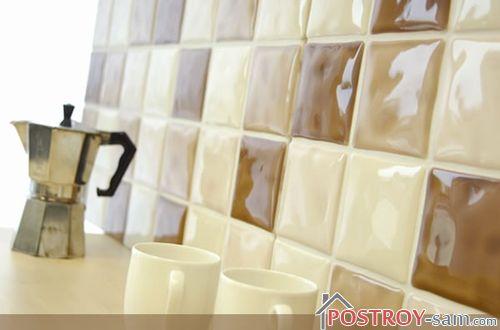
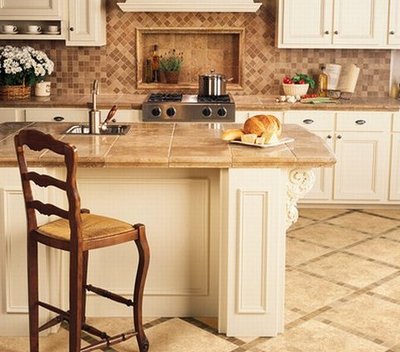
Nevertheless, it is the apron of tiles most often made in kitchens. The tiles can be small in size - a square with a side of 12-15 cm.
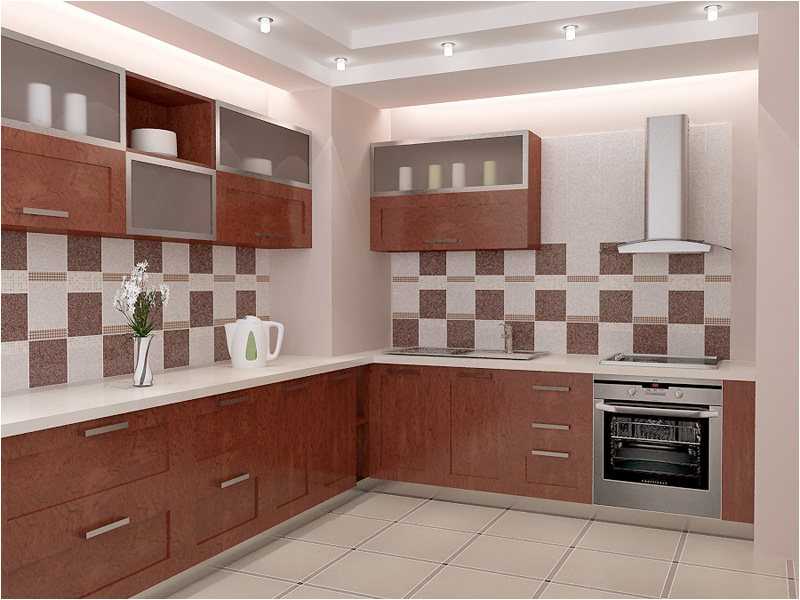
There is a tile in size more resembling bricks: a rectangular shape. This form of tile is also called a "boar". To stack it is more difficult - more seams, but the look of the apron turns out to be interesting. You can find a "brick" model, but you can make a blue or green color. All look not bad.
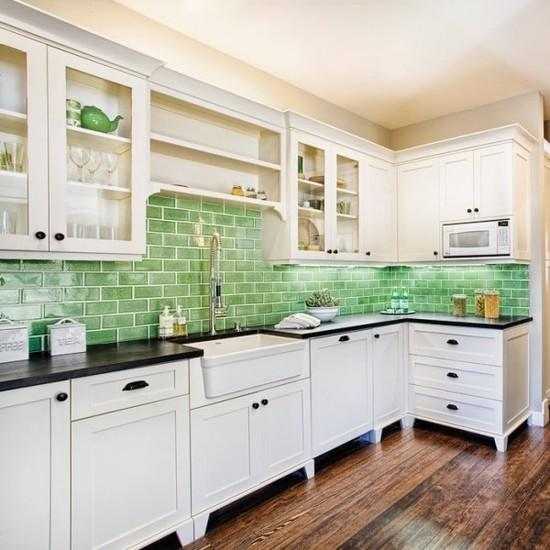 Dark blue tiles in a white kitchen - contrasting and unusual
There are large-format ceramics. It can have dimensions with a side of 60-70 cm. And it can be both square and rectangular. You can choose a model that one unit will cover the entire height of the apron. It's good that such an apron has fewer seams.
Flowers on the walls are pretty
There are collections of tiles of different non-linear forms, with patterns. They look, of course wonderful, but in the care it is more difficult: all the slits, irregularities and bends are more difficult to erase than a flat surface. Another drawback of such a tile is a high price, much higher than average. If all this does not scare you, keep in mind that you need to order it with a margin of about 10%. Firstly, waste is inevitable when laying, secondly, there is a fight when delivering, thirdly, if you make a few mistakes in calculations, you will have to wait again for a long time, and not the fact that such a tile will be. Many collections are issued in very limited quantities. And they simply can not be. For the same reason, it is always necessary to leave a few pieces for repair. A few years later, even mass collections are removed from production.
There is also a ceramic mosaic - a very small tile, from which you can collect whole panels. It's even harder to pack it, but the wall is very effective.
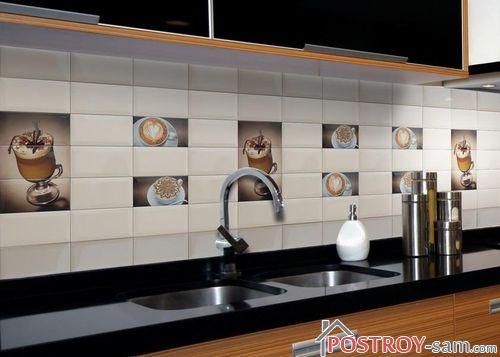
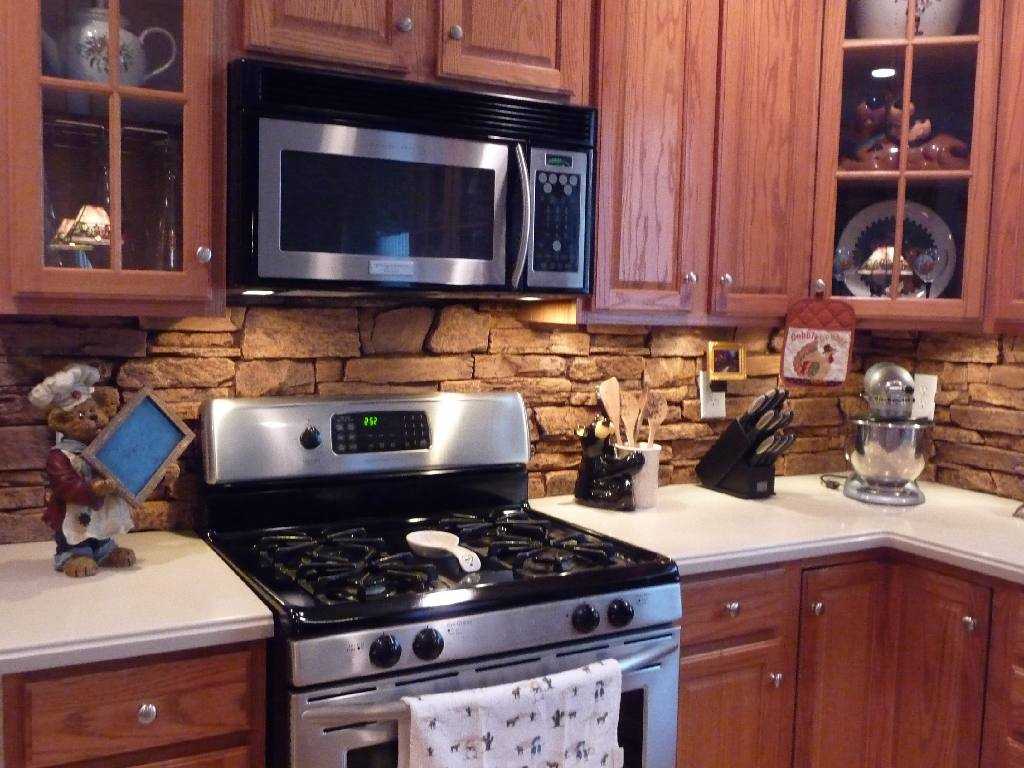
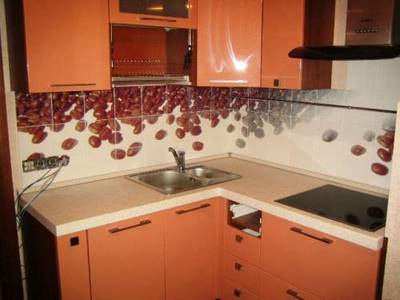
There is another kind of ceramic tile - with photo printing. On the ceramic surface before the firing is applied with a special ink drawing. After it is covered with glaze and fixed at a high temperature in the oven. This technology can be applied even photos, but for kitchen aprons often choose fruits or flowers.
As you can see, there are already a lot of options for a tiled apron in the kitchen. And there are 5 other materials.
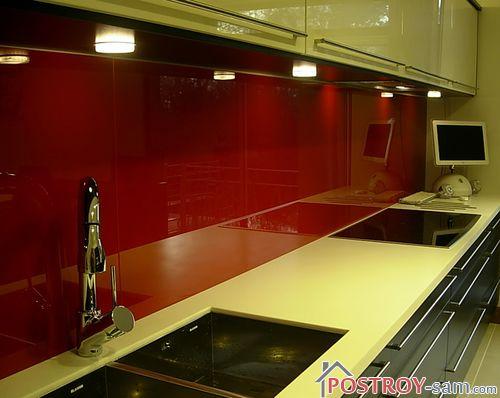
Apron for kitchen from glass
This type of material has been used to finish the working wall in the kitchen relatively recently, but it is rapidly gaining popularity. It is even easier to care for a glass apron than for a tiled apron - almost no seams, the surface is smooth. You can apply almost any pattern - from a smooth color to a voluminous photograph. The technique of printing a photo on glass is called "skinned". It is on aprons in this version that 3D drawings can be applied.
Flower motifs are one of the most popular in the design of the kitchen. They soften the forced strictness of the furniture lines Black and white kitchens - contrasts in everything
How to make yourself photo printing on glass
The only downside of the glass apron is its high cost. This is due to the complex technique of drawing. But you can make it yourself. The technology is not the same as that used in enterprises, but the craftsmen are skilled at this, in order to find a way out of any situation.
For the manufacture of a glass apron in the technique of a skin at home, two glasses of relatively small thickness are taken. If you find or buy a tempered - excellent, but the usual, as practice shows, serves a long time. Ask the glass workshop to process the edges and drill the holes for the fasteners (or do it yourself if you know how). The two glasses must be exactly the same in size, the holes for the fasteners must also coincide.
On one of them is pasted a film with a pattern. It can be a ready-made self-adhesive translucent film, which is usually sold in stores selling wallpaper. You can order printing on a film of any image in a specialized workshop (perhaps you can help in an advertising agency that deals with outdoor advertising).
The glass is cleaned of dust, degreased (a mixture of water and dish remover or a glass cleaner), wiped, then sprayed with water from the spray gun. From the film remove the protective layer and on the one hand glued to wet glass: it is more convenient to work and less likely to make an air bubble. Then they take a dense and elastic material with smooth edges (you can use a rubber spatula) and expel excess water from under the film. The main task is to prevent the appearance of air bubbles. The pasted film is left to dry for a few days, and after doing holes in the fasteners in it.
Both pieces of glass are folded and in this form are attached to the wall. The film is squeezed from both sides and is perfectly protected from any influences. To accurately with time with such an apron nothing happened, but the joint around the perimeter should be smeared with silicone sealant (not acrylic, it turns yellow after a while). You can do without the second layer of glass, but then chances are great that the film will become unstuck, or dirt will get into it, which will be seen.
Apron made of MDF and chipboard
If you need to quickly and inexpensively trim the working wall in the kitchen, you can install an apron from the MDF panels. You need to choose from moisture resistant products with a strong coating: you'll have to wash often. Because MDF is medium or high density. The higher the density, the better: with a smaller thickness, the panels are more durable, but more dense material costs more.
It is installed on furniture screws or, if necessary, on dowel-nails. Preliminary in the necessary places a hole is drilled. The diameter of the drill is the same as that of the hardware rod or slightly smaller. To prevent the hats sticking out, the panels are made with a drill with a larger diameter than the size of the cap making a small groove. In the store, which sells furniture fittings, you can find stubs in the tone of the panel. Here, under the stem of the plug and you can select the diameter of the drill: so that it becomes tight.
Before installation, the adhesive compound is applied to the back surface, then it additionally sits on the fasteners. If the apron is obtained from one wall to another - there is no problem, but if there are corners, they should be somehow trimmed. For this you can use plastic or aluminum corners - depends on the style kitchen furniture (furniture fittings stores).

If we talk about color solutions, that is, single-color variants of different colors, a fairly wide choice of surfaces that imitate different types of wood, is an imitation of stone surfaces. There are also exclusive drawings, such as photo printing, flowers, etc.
The picture on the MDF board is glued. This is a film with photo printing. Since the film must have a high density, these panels are decent.
From plastic
Aprons made of plastic are good because they are inexpensive, they are mounted simply. In this case, the plastic surface is well cleaned. For the production of aprons use plastic ABS (ABS). It is neutral to fats, acids, alkalis, but reacts poorly to contact with alcohol. Therefore, wipe with alcohol and alcohol-containing compounds can not. Physical properties - hard, durable and at the same time plastic - allow you to make housings of household appliances from it. Even some parts in the car make of such plastic. Because aprons in the kitchen - this is only part of its application.
The temperature range at which such a plastic apron can be used is from -40 ° C to + 90 ° C. Its only drawback is that it reacts poorly to ultraviolet radiation. Therefore, to put it in kitchens, in which the working wall is illuminated from the window is undesirable.
The choice of colors is wide, and the relatively low price and ease of installation allow you to change the finish, if very much tired. Any image is applied to the plastic, then it is covered with a double layer of lacquer, which protects the picture and prevents the appearance of scratches. If you try, of course, then you can scratch it, but accidentally hitting it - hardly. In general, a good option. If we talk about the price, then the wall panel of plastic, which is used as a kitchen apron, costs from 1.5 to 6 thousand rubles. The width of the panel is 60-80 cm, length 2-3 m. Some examples of plastic aprons are in the photo gallery.
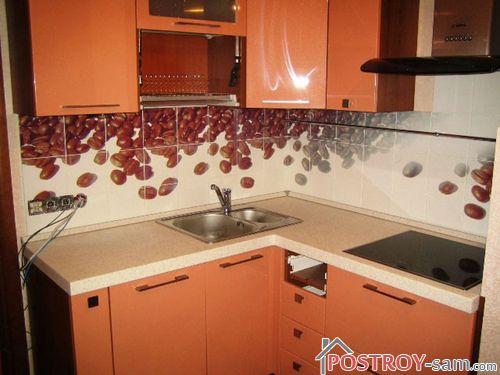
The traditional theme is coffee beans
Mounted wall panels on a relatively flat surface. Point glue is applied like "liquid nails" and plastic is fixed on it. Its density makes it possible to hide minor defects in the surface.
Of stone and metal
The aprons for a kitchen made of stone are the least common. Firstly, they are expensive, secondly, it is not easy to clean the plaque from them: the surface is even very well-processed, has open pores, in which the inevitable in the kitchen fat and soot are clogged.
Apron in the kitchen of stone. It looks fine in some interiors ... .no to clean hard
Exceptions - products based on stone, in particular - porcelain stoneware. Its surface can be very smooth. But there is one more thing: the great weight of such a finish. Accordingly, a complex installation and a powerful fastening system.
Decorate the working wall in the kitchen and metal, but this is a very caustic phenomenon. Such an apron will fit into minimalism and hi-tech, and even then it should be tried so that the room does not look like a shop for cutting meat ...
As you can see, you can finish the working wall different materials. The options are for a different taste and purse. The main thing is to pick up an apron for the kitchen so that the set and the rest of the furniture become a single ensemble. Then it will be cozy in the kitchen.
The kitchen is the working area of the apartment, therefore, first of all, it should be as convenient and functional as possible. Tile is the most suitable material for facing the kitchen. It is durable, resistant to high temperature, easy to clean, does not absorb odors, reliably protects the walls from moisture. Since the tile is a natural material, its walls will be well "breathed". In addition, the properly tiled kitchen looks very nice. With today's abundance of the market, choosing a beautiful tile is not at all difficult. Perhaps, it is more difficult to lay tiles in the kitchen, especially if you decided to do this work with your own hands. But we are also solving this issue. The main thing is to learn as much detail as possible how to put the tile in the kitchen: styling options (they are quite diverse) and examples of design.
In small kitchens, large tiles 20x20 or 30x30 are not a very good solution. The best option would be a 10x10cm tile or a mosaic. Important is also the thickness of the tile, its ornament. The color and texture of the tiles are selected taking into account the material and color kitchen set. The choice of type of tile, design and styling option takes sometimes most of the time when deciding the issue of finishing the kitchen. The main thing in this business is to understand how to lay out the tile in the kitchen to create harmony between all its elements.
- for walls - a tile in the sizes no more than 15х15см;
- for the working area - a tile measuring 10x10 cm.
But know that tiles of a smaller size are placed more difficultly, and even when stacking it is more difficult.
Tiles of small sizes - the most suitable for the working area, but it is harder to put
Before you put the tile in the kitchen, you should calculate as accurately as possible required amount. It is better to consider how many tiles will be needed for each wall separately. In this case, it must be taken into account that the tile will sometimes have to be cut. The cut tile should be considered as a whole, and the results obtained should be rounded upwards.
The meter of the kitchen is counted in centimeters square.
Preparation of the surface for styling
How to put the tile in the kitchen correctly to get a quality and beautiful styling? You need to start by preparing the surface of all the walls. To do this, perform the following work:
- remove wallpaper or old paint and clean the walls;
- treat the surface with a deep penetrating primer to ensure better adhesion of putty;
- to cover with putty all chips and cracks and again primruntovat.

Preparing the surface of the wall under the tile
On the prepared and dried surface it is necessary to draw a marking, for which it is necessary to have:
- a wooden or metal ruler;
- gon;
- plumb bob;
- a simple pencil;
- 1-2 tiles.
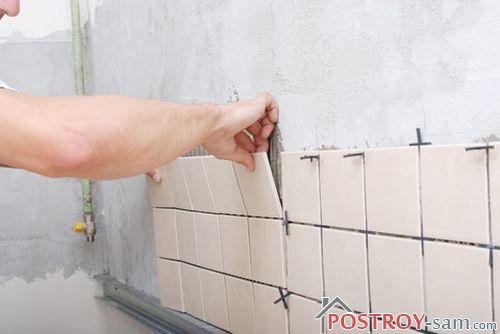
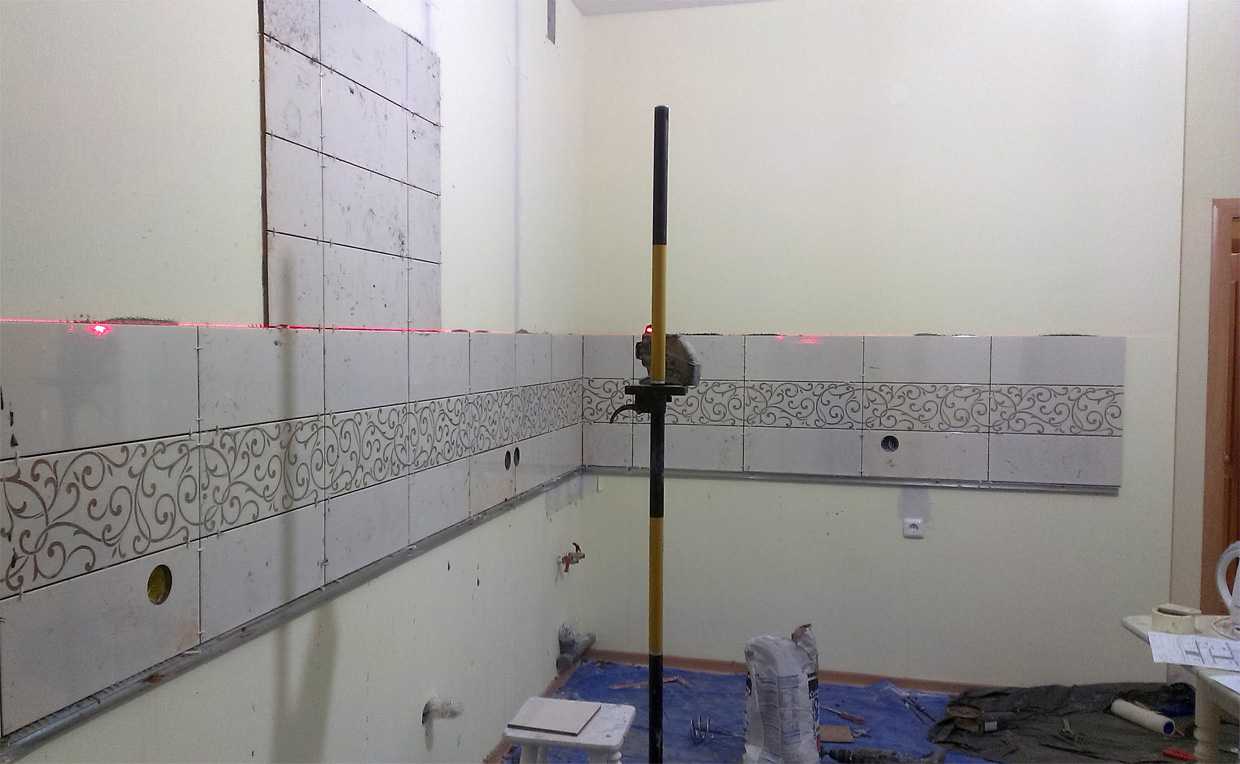
In the corner of the wall near the floor we glue the first tile on the mortar and draw vertical and horizontal lines from it up and to the sides.
How to put a tile in the kitchen
Each tile is a separate plane and the main tasks for its laying:
- to achieve vertical and horizontal accuracy of all tiles relative to each other;
- clearly observe the pattern of interlace seams.
The first layer of the tile is laid out in such a way that the upper edge forms a strictly horizontal line. To do this, you may have to cut the tile with a tile cutter, using a metal ruler as well. The unevenness of the cut edge will then be covered with a plinth. Then the procedure for laying the tile is as follows:
- we put the adhesive on the wall (on the site more than the tiles);
- using a spatula, we apply the solution to the tile;
- strictly adhering to the applied marking lines, we fix the tile on the wall surface;
- each tile of this and the next row is laid out in one plane. To check the level, we apply a metal ruler to the surface of the row;
- tap on each tile with a rubber hammer to achieve its ideal position.
If it is necessary to lay the tile on the working area of the kitchen (at a height of approximately 80 cm from the floor), then it will be necessary to fix horizontally the stop on the wall (metal profile or rail), on which the first row of tiles will rest. This will prevent it from sliding down until the adhesive solidifies. Do not forget to leave a gap of 2.5 millimeters between the tiles: then fill the seams with a special grout. To ensure that the seams are the same, we use special remote frogs. In the course of laying, we regularly check the horizontal level, and vertical - with a plumb.
Options for laying tiles in the kitchen
Today, there are numerous options for laying tiles in the kitchen, we'll talk about several of them. We are talking about ways: classical, "diagonally", "in a runaway", combined.
Laying tiles in classic style simple way, an unusual design is created due to the original pattern on the tile
Classicalthe method is the most common and easiest. For him, use a square or rectangular tile, which is laid horizontally parallel to the walls. To styling looked original, it can make decorative elements of decoration - decors, panels, borders. This variant of laying is the most economical - there is practically no pruning of tiles.

The classic method of laying tiles is the most common, easy and economical

Classic horizontal styling with decorating elements - multi-colored tiles
Diagonallaying tiles allows you to create an unusual pattern that looks much more interesting than straight vertical-horizontal lines.

Laying tiles "diagonal" is more interesting than horizontal and vertical versions
Square tiles are suitable for this method. Its disadvantage is the large consumption of tiles, as the tile adjacent to the walls has to be cut off. This should be taken into account when buying tiles. Despite this, this variant of laying is still very popular, especially when decorating an apron for the kitchen.
Laying "in a run" Used often enough when decorating the kitchen with tiles. In this case, the monochrome rectangular tile looks best, but the use of square tiles is not excluded. Drawing pattern "in the run" is formed by the method of brickwork in horizontal rows.
Drawing pattern "in the runaway" is formed by the method of brickwork
He will give originality to the kitchen, emphasize the traditional design.
Laying the tiles "in a descent" will emphasize the traditional design
Combined the option provides for the laying of tiles of the same size, but laid in different blocks: one part diagonally, the other part - horizontally.
Combined way of laying. One option.

Laying tiles in the kitchen in a combined way. Another variant
Combined way of laying tiles in the kitchen. The third option.
To make such a drawing you need time, patience and responsibility. But this kind of laying will look professional from the design point of view. With its help, you can combine different formats of the tile or select individual parts of the apron (for example, the drawing zone).
Combined way of laying with the allocation of an area for drawing a beautiful pattern
Well, the top of combinatorial fantasy can be a combination of different directions of laying with borders and decorative panels.
All options for laying tiles have their own special technology, but this is another, separate topic.
The decoration of the kitchen with tiles can be done in any style. Combining different shades of tile, combining different directions of laying, using a mosaic with interspersed mirrors, etc., you can create a unique luxury in the kitchen, emphasizing the beauty of decor and furniture.