Gas silicate is an affordable and practical material for the construction of houses of any type of destination. He is chosen for his unpretentious care, fast and inexpensive installation, as well as for high levels of sound insulation, energy efficiency and resistance to fire, by which he is an order of magnitude higher than a more expensive brick.
Gas silicate blocks allow you to build a strong, durable and reliable house in a short period of time. Feature of the material - porous surface, allowing the walls of the house to breathe, naturally when choosing the right finish.
Do not think that gas silicate houses are limiting the choice of finishing materials.
Just like houses made of other materials, structures from porous blocks of gas silicate can be finished:
- brick or stone;
- paint (on plaster or on blocks);
- plastering;
- siding;
- lining;
- tiles;
- glass-magnesium sheets;
- flat slate.
Consider each of the options for facing the house with an algorithm for installing materials.
Brick for finishing gas silicate houses
The decision that the house will be finished with a brick should be taken at the planning stage and laying the foundation, calculating the weight of the finish. In this case, the foundation will need to be laid more in view of the brick finish, under which it will be necessary to leave the outer perimeter.
 The finishing of the house with a brick on the outside is in principle no different from the usual brickwork and is made with a thickness of one brick with verticality in accordance with pre-installed beacons. For sheathing of porous blocks of gas silicate, it is better to use a silicate or hollow quality brick, which does not require additional plastering. You can perform laying with a gap between the finish and the base or close.
If the second option was chosen, the main condition is a relatively non-rigid connection of the finish with the wall. This is important, considering that we have to deal with different materials with respect to the coefficient of expansion, which can lead to harmful consequences if the temperature drops when the connection is too hard, the house wall is destroyed. There are two types of junction of brickwork with a gas silicate wall.
The first option - during the installation of blocks between them mount thick rods, the ends of which extend beyond the wall by 10 centimeters. In the process of facing the brick, the ends of the reinforcement are laid inside the wall, thus strengthening it.
The second option - after laying the first row of bricks in the blocks, metal pins with a 10-centimeter washer are clogged, then in the lining an indentation equal to half the thickness of the pin is prepared, with subsequent rows overlapping the pins, resulting in a practical design.
Plastering of house from gas silicate
Plaster for finishing the house from the outside of any type of material - this is the most affordable option for finishing. In the case of gas silicate structures, this is a fairly popular option, which can be used both independently and in combination with subsequent painting.
Given that the gas silicate blocks are a porous material, it is also worthwhile to select plasters for its finishing with high vapor permeability.
When choosing materials for plastering the walls of a breathing house, one should adhere to the following rule: each subsequent layer should have vapor permeability parameters not less than the previous one. That is why it is highly discouraged to use cement-sand mortars in the process - they will not only adversely affect the vapor permeability of the material, but will also cause a deterioration of the microclimate inside the house.
The exterior walls of the gas silicate structure are plastered on the outside according to the following algorithm:
- the base is primed using special compositions intended for porous surfaces;
- the surface is reinforced with a special facade mesh based on fiberglass, using for self-tapping;
- plaster the surface with mixtures with high vapor permeability;
- treated with hydrophobic compounds after a year or two to increase the life of the finish.
Qualitatively carried out works will allow to receive as a result durable furnish which can become a reliable protection for a gas silicate house.
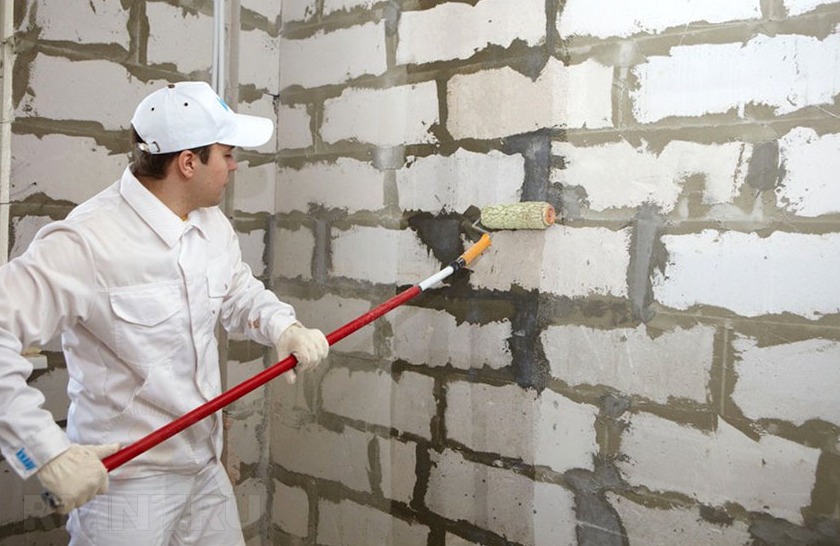
If the decorative plaster of the facade seems to be an unfinished solution, then the walls can be painted after the plastering works. For painting, you will also need to use vapor permeable paints that are applied to the surface with the help of rollers or brushes.
Please note that painting the walls from the outside can be done without preliminary plastering of the walls - with the application of paint directly onto the surface of the gas silicate blocks. This is the most economical option for those who plan to fit into the narrow framework of the budget.
Before painting the walls of the building will need to be treated with special ground mixes for porous substrates, pre-level and sand with special sandpaper.
Recently, most often used water-based paint, affordable and easy to use. Apply the paint in several layers, first horizontally, then vertically along a fresh, not dried layer.
Siding for finishing the gas-silicate structure
 Specialists strongly recommend the use of siding for facing porous walls. This is an affordable and practical material that will be excellent protective for the substrate, retain an attractive appearance and basic physical properties throughout the entire period of use.
Installation of siding on gas silicate blocks is the following scheme:
- on the base of the wall, a wooden crate is installed, which will be necessary to create a gap between the finishing layer and the base;
- in the field of apertures the crate is installed along their perimeter;
- between the crate and the base, if desired, you can install a heater, for example, a mineral wool, additionally protected by a waterproof membrane;
- at the base of the house pull the fishing line horizontally - it will be possible to navigate through it, performing installation of siding panels;
- siding is fastened to the crate by self-tapping screws.
Most often for finishing use vinyl siding because of the wide choice of products presented in different colors and affordable prices. More rarely - metal, for the installation of which it would be appropriate to use a crate of metal rails. The facade, sidewalk, is distinguished by its durability, practicality, safety and aesthetics.
Please note that it is important to mount the slats with a small gap in order to avoid damaging the finish during the expansion of materials due to temperature changes.
As for the lining, it is mounted on the same principle as siding. In addition to plastic and metal panels for the lining of a gas silicate house, wooden lining can be used - a block house. The material is also attached to a prefabricated frame with thermal insulation if necessary.
Clinker tiles for finishing the house from gas silicate
 An alternative to bricklaying in the case of the facade of a house made of gas silicate can be clinker tiles, the installation of which will require less effort, time and money. In addition, it is worth noting that clinker tiles can look like panels that can be stacked one order faster than the products individually.
The surface of the house made of aerated concrete before tiling should be prepared - arrange a layer of waterproofing, plastered at least a few days before the start of work.
The tile is mounted on the substrate using a special glue that can be prepared at home, according to the instructions on the package. Compositions are applied only to the base, using a conventional notched trowel, which will prevent the formation of surplus mixture on the wall surface. Between the tiles it is important to leave seams with a width of not more than 12 mm. Perform masonry work should be at a temperature of no higher than 5 and not less than 30 degrees Celsius.
Begin the process of fixing clinker tiles from the openings, and not from the corners, as many may seem. To design the latter suitable special elements that are part of a set of tiled products for decoration. For cutting tiles, you can use a special tool - a tile cutter, both manual and electric type, also suitable for a Bulgarian with a diamond string.
The final stage of tile installation is the grouting of seams using special compositions that are applied diagonally with the removal of surpluses. The finished tile finish is spectacular and practical, resembling a high-quality silicate brick.
Sheets of glass magnesium - finishing of new generation
 A completely new version of the material for the cladding of houses, including gas silicate, is the sheets of glass magnesium. In terms of functionality, the material has some similarities with gypsum fiber sheets, but unlike them it is more practical and durable, suitable for both interior and exterior finishes. The material is based on magnesium-chloride shavings. Lightweight, reinforced on both sides sheets show increased resistance to moisture, do not burn, have a spectacular appearance with a perfectly smooth surface.
The finishing with sheets of glass is especially important when it is important to cover the houses located in a climate with high humidity. The sheets can be additionally painted and plastered - the surface shows excellent adhesion with finishing materials. In addition, it is worth noting the environmental friendliness of the material, which does not include harmful substances.
With regard to installation, the process has much in common with fixing plasterboard sheets. Strengthen the material with screws, use a jigsaw or sharp knife for cutting. Between the sheets must leave gaps, equal to half the thickness of the product, which at the final stage of finishing shpaklyuyut with subsequent trowelling.
Flat slate for covering the house from slabs of gas silicate
If with wave-like slate though in absentia, but everyone is familiar, then flat slate for many can become something new. In fact, this material is the closest relative of the well-known undulating slate, ideally suited for finishing the house with an economical option.
The advantages of the material include the following:
- resistance to frost;
- simple installation;
- resistance to moisture;
- practicality and durability;
- resistance to fire;
- high levels of sound insulation;
- resistance to aggressive substances.
The installation of flat slate on houses made of gas silicate is carried out according to the algorithm. The material is mounted on a frame made of wood or metal profiles installed at a distance of at least 60 cm from each other.
Between the base and the crate, you can, if desired, lay the thermal insulation material with waterproofing. For cutting material, you can use a conventional saw, but it is better to use a diamond grinder with a Bulgarian. Finished products are mounted on the frame with the help of a klyamer and screws.
An interesting variant is a cutting from a flat slate of small tiles with dimensions that will perfectly match with the architectural features of the house. After the products are screwed to the frame, they can be painted with special facade acrylic paints.
The culmination of the construction work is usually ... Recently, the panel for outdoor home decoration ...
Do you agree with the article or did not you like it? Rate:
It represents a solution of aesthetic and design problems, promotes the formation of a comfortable climate in the room. Therefore, when choosing a material, it is repulsed from its operational properties and vapor permeability requirements. On the one hand, when wall finishing is important, high air circulation is important, and on the other hand, the interior finish of aerated concrete should be as much as possible isolated from the steam. After all, the vapor barrier increases the service life of the finishing materials. So before the construction works it is important to correctly prioritize when choosing decorative bases.
Experienced builders often prefer a vapor-permeable material for interior decorating in homes. Of the whole variety of construction assortment it can be difficult to find the right material. The most commonly used plaster, which consists of building gypsum, sand and hydrated lime. This building material is easy to use, before applying it, you do not even need to process the walls of the room. The putty is vapor-permeable due to its natural ventilation features.
If there is no vapor permeability
If there is no vapor permeability, there is no possibility of transferring air from the walls inside the room. Because of this, cracks and joints form on the surface of the walls, the air ceases to circulate, and dampness is felt in the buildings, and mold is observed in the corners.
Decoration of a house made of vapor-proof materials
 Preparation for the vapor barrier of walls.
 To decorate the walls of vapor-proof materials, vinyl wallpaper, polyethylene film, which perfectly reduces the porosity of the surface, will perfectly suit. However, stopping their choice on this type of finish, there is a risk of condensation, destroying the construction of buildings. When working with vapor-proof materials, preliminary work is carried out on the processing of walls before gluing. For this purpose, a primer in several layers and plaster of sand and cement is suitable. With the help of it, the permeability of the walls will be significantly reduced, but this method is not enough for a long time, after a time it is necessary to plaster the walls again. After doing the preparatory work proceed to the decorating stage.
Preservation of aerated concrete characteristics
To avoid problems with air circulation, you need to carefully approach the issue of selecting materials for work with the finishing of walls of aerated concrete. After the choice of the building material has been made, it is necessary to correctly connect the ingredients for the solution and observe the technological processes.
Requirements for building materials
When choosing materials for construction, it must be remembered that the quality of the selected product influences the service life of internal sanding. Therefore, when making a purchase, you should not save on the choice of building materials, this will save the service of the surface of the premises for many years. Acquire goods better in large outlets where you can demand a certificate for products. Choosing building materials, you need to pay attention to their packaging, which should be in proper condition. All materials used must be environmentally friendly and contain no additives that could harm human health.
Why is it worth carefully choosing the materials for decoration?
Choosing aerated concrete, take into account its high ability to absorb water vapor from the air. To do this, before applying it, apply a layer of plaster and cover the interior surfaces with wallpaper. Thanks to this method, uniform vapor tightness and vapor permeability of the material are ensured, which contributes to the creation of an optimal microclimate in the house. Also the finishing material should be not only strong and qualitative, but also beautiful externally, after all repair is often done not for one year.
Types of walls from aerated concrete
Interior decoration is carried out by such materials:
- plastic panels;
- plaster;
- wallpaper;
- drywall;
- ceramic tile;
- panels made of wood;
- paint.
 When the surface is cleaned of debris, cover the walls with a primer.
 When starting work with plaster, it is necessary to prepare a working surface. On the walls apply several layers of primer, to prevent the appearance of fungi and mold. It is necessary to monitor the smoothness of the applied solution, this will ensure the accuracy of subsequent steps. Next, if desired, use wallpaper or drywall. It is fixed to special profiles using a perforator and screws. To attach the profile smoothly, use the building level. Advantage of drywall in its heat and sound insulation. A significant advantage of drywall is the lack of pre-treatment of walls, which do not need to putty and plaster. But at the same time the surface will turn out to be perfectly smooth and smooth, and, therefore, it will be possible immediately to proceed with the subsequent decoration. The only drawback in working with plasterboard is the loss of the internal area of the house, for fixing the profiles and the thickness of the material used.
Another way of interior decoration of the walls is to finish with plastic and wooden panels. This is a very simple method, subject even to a novice builder, does not require preliminary leveling of the walls and is mounted easily and for a short time. And most importantly, the end result has an attractive look.
One of the popular options for the design of vertical surfaces is the wallpapering. To save money, wallpaper can be glued by yourself, but before you start working, you need to take care of an even and clean basis. For this, the walls are plastered and then ground. For gluing wallpaper use a special adhesive with high adhesive properties, which is resistant to moisture, mold or fungus. After selecting the adhesive base, you need to properly dilute it, relying on the instructions, and then let stand for about half an hour. For better adhesion of wallpaper to the wall, it is primed with a solution of glue, previously diluted with a little water. Apply glue to the wallpaper with a roller or a wide brush from the back of the canvas, then let stand a bit and start sticking on the wall. For this, gluing the wallpaper, they are gradually smoothed with a rag or hands. After the walls are glued, take care of their drying. To do this, exclude the appearance of drafts, the presence of which leads to uneven drying, and therefore, creep, rupture or peeling wallpaper.
Many years ago it was fashionable to paint panels in different colors. Basically, water-based paint is used, which has a low price and is simple in its application. Before painting, prepare the walls using grinding or nazhdachku. The surface is leveled to a perfectly flat state. Next, priming and applying the first layer of water-based paint, which is mixed with the required color. The mixture must be thoroughly mixed to a uniform consistency. The painting starts from the far corner of the room. To make the color saturated, apply several layers, which need to alternate horizontally and vertically, then the surface will be beautiful and neat.
Ceramic tiles are also often used, which is vapor-proof and has found its application in the decoration of the walls of bathrooms, kitchens and corridors. Working with the tile, use the building level, and the surface before it is applied and a layer of primer is applied.
Stages of preparation of walls for decoration
 Aerated concrete is best plastered with plaster.
 Begin preparing the walls with interior finishing, and then with the outside. On the working surface, the adhesive is peeled off from the previous wallpaper, the formed potholes are combed, and the possible grooves are filled with mortar, thus a smooth wall is obtained. Further, a primer coat is applied over the entire wall, the use of which is permitted in residential premises. At the next stage, beacons from a long profile are fixed vertically. Again, with the help of the level, the level, verticality and horizontality of the beacons installed in parallel are checked. After that, a fur coat up to one centimeter thick is laid. The thickness should not be very large, but it must hide the surface irregularities. The next layer is plaster, in the process of its drying, an equalization is carried out with a spatula. At the end of the work, you can remove the beacon, and the rest of the place to seal the solution.
What mixtures are used for gas blocks?
A good solution used to treat the gas block is an important stage in decorating houses. When selecting which you should consider the following parameters:
- The ability of the mixture to firmly adhere to the surface to be painted.
- To ensure the consistency of the solution is good, mix 15 kg of plaster with 4 liters of water.
- It is better to use the prepared mixture immediately before use.
- Select mixtures and use them for their intended purpose, i.e. if the solution is for internal use, do not use it externally.
- Before the beginning of the work, the volumes of material expended are calculated, it is better if 15 kg of the mixture leave for 4 squares of the wall covering.
Decoration of the house is no less important stage in the construction, so you need to seriously approach the choice of materials used.
More and more popular today are comfortable, strong and reliable houses made of aerated concrete, gas silicate blocks. The material is ideal for building modern buildings.
If you decide to build a house of gas silicate blocks, you need to be ready for some features peculiar only to this building material.
The properties of gas blocks include high vapor permeability and the ability in large quantities to absorb water. The internal structure of the gas blocks is porous.
Modern construction technology makes it possible to build houses from aerated concrete, or gas silicate blocks, quickly and in the shortest possible time.

In order to avoid reducing the thermal insulation properties of gas units, it is necessary to protect them from excessive moisture from the bottom.
The familiar plastering of blocks is absolutely not suitable, because the plaster significantly reduces the high vapor permeability properties of the gas blocks.
Other types of paints are undesirable, since they have film-forming properties.

With a great desire and some financial opportunities, it is quite possible to decorate the facade of a house of aerated concrete yourself. True, not earlier than a few months after the construction of the walls.
They must completely dry and finally settle, otherwise the owner of the house is waiting for an unpleasant surprise. Most likely, the facing will be covered with microcracks.

If the construction of the house takes place in the winter, excessive moisture, trapped in the porous structure of the gas blocks, can eventually damage the external lining of the walls. This should pay attention, so plan the construction better in winter.
Methods of finishing the wall from aerated concrete outside
The most practical, generally recognized materials for exterior wall finishing from aerated concrete blocks are. Wall cladding can be done using a lining, decorative panels or siding.
Suspended facade
In the future, properly selected and installed ventilated facade of the house will reliably protect the house from invisible to the eye internal microcracks.

You can also use a conventional face brick with a ventilated gap of 30-50 cm (between aerated concrete and brick) for facing gas-walled walls. It looks good thin-layer plaster with special mixtures for aerated concrete.
Putty or textured, vapor-permeable paint is recommended for grouting joints between blocks.

Laying the foundation of the future house from the gas blocks, you should take care of the correct width of the foundation. Brick and block must rest on the foundation at the same time. The recommended overhang of the facing masonry from the foundation to the half-brick is not more than 30 cm.
It is necessary to leave a gap of 30-50 cm. This is necessary to prevent the possible condensate from falling out between the seams of the gas units.
To protect the gap during the laying of the face layer from clogging, a rearranged sheet of foamed plastic can be wound up, this is a very simple and effective method. The width of the gap just depends on the thickness of the sheet.

It is necessary to leave special ventilations for ventilation under the cornice at the level of the basement floor. For this purpose, do not fill the vertical seam with a solution between the bricks.
Without gaps, you can manage in houses that are not intended for living all year round. Brick lining is fixed to the blocks by ties (not less than 4 connections per 1 sq. M. Of the wall).
Also, it can be fixed with the help of mortgages, which are specially left during the erection of the brickwork. Often used bandage tape from stainless steel (19.1x 1.1 mm).
For the bookmark, you can also use the perfo-band for electrical work. Dimensions 20x1.5 mm. The strip is nailed to the gas blocks with spiral nails (120 mm) or chopped rods 5-6 mm in diameter. This will significantly increase the strength of the fastening.
Nails or rods are driven at an angle of 45 degrees to each other in pairs. Some experts recommend the use of flexible basalt-plastic bonds. In the load-bearing and facing wall, a flexible basalt joint must enter a minimum of 90 cm.
Finishing of the facade from aerated concrete, gas silicate blocks with plaster compositions
It is best to decorate it with a special dry plaster for aerated concrete, which can be purchased at any construction store. Very popular dry, astringent, lime-cement mix.
The walls are made of gas silicate blocks using exclusively vapor-permeable plasters. Under the window apertures, where most often there is a local fracture of the facade of the house, that is, in places of stress, it is desirable to reinforce the plaster layer with iron mesh.
Do not allow the plaster to freeze, dry out during the finishing of walls from gas silicate blocks. It is necessary to observe the temperature and humidity conditions. These are the basic requirements, without which it is impossible to properly trim the walls.
Only after meeting all the requirements and recommendations listed above, it is possible to ensure that the facade of the house made of aerated concrete is plastered correctly.
Many opponents of aerated concrete called the main drawback of this material its hygroscopicity. Indeed, aerated concrete can absorb moisture. To extend the life of the house from aerated concrete, the interior and exterior finishes are necessary. In addition, it makes the structure more attractive.
Exterior finish
There are different finishes:
- siding or paneling;
- facing brick or artificial stone.
The choice of the method of external finishing is due to the financial possibilities, expediency and operating conditions of the house. Finishing the house from aerated concrete from the outside allows you to protect the house from getting wet, weighting, oxidation and loss of attractiveness.
Plastering
The most accessible way of finishing is plastering. You can use almost any plastering mixture - aerated concrete in this respect is not whimsical. Sometimes gypsum plasters are used with special additives that prevent the absorption of moisture by aerated concrete. These are thin-layer plasters that allow the walls to "breathe".
Sequence of work:
- cleaning of the surface from dust, if necessary - removal of irregularities, filling of joints;
- coating with a special primer for aerated concrete;
- plastering;
- fixing plaster mesh;
- coloring - you can add decorative additives to the plaster instead of staining;
- coating hydrophobizer - a means to protect from rain.
Board of the foreman:
Plastered walls can be combined with other types of finishes - for example, the plinth of the plastered house can be faced with a finishing stone.
Video: aerated concrete walls
Facing with bricks
One of the most expensive ways - finishing the facade of a house made of aerated concrete with facing brick. Brick is used as a finishing material only for buildings not higher than two floors. In other cases, it is better to use clinker tiles. This option, as well as the use of ceramic granite tiles are more economical, moreover, such finishing reduces the load on the foundation.

The decision on the facing of the house with a brick must be taken before laying the foundation, as it must be of sufficient width and strength to withstand not only the walls of the gas blocks, but also the finish
Finishing is done in one brick. Between gas units and brickwork there should be a small gap, which can be filled with heat insulation plates in the frame. When performing brickwork through 4 rows, it is necessary to lay bricks across the row so that they rest on a wall made of aerated concrete.
Siding finish
The device of ventilated facades for aerated concrete houses is very popular, as it is affordable and raises the level of comfort of living in such a house. The house "breathes", it is warm and dry.

On the walls of aerated concrete is fastened the crate, inside of which are laid heat insulation plates, and on top are mounted siding, decorative panels or, for example, blockhouse - this option is especially good for finishing the bath
Interior finish
The interior decoration of walls made of aerated concrete is possible in several versions:
- coloring;
- facing with tiles;
- plastering with subsequent wallpapering;
- the use of frame structures with gypsum plasterboard or decorative panels.
You can paint gas blocks with special paints, for this you must carefully prepare the walls. The total cost of such work is too high, moreover, for the finishing of aerated concrete requires a large consumption of material, because even special primers do not greatly reduce the absorption of paint.
Photo-examples of interior finishing of houses made of aerated concrete
Tile tiles are usually laid in bathrooms using special primer for aerated concrete and tile glue.
Plastering inside is carried out in the same way as outside, strengthening the walls and especially the corners of the reinforcing mesh. This method of finishing is suitable only for houses with external insulation or houses built in regions with warm climate.
Usually, all the same in the houses made of aerated concrete make the insulation, for which the ideal frame structures with subsequent plating of decorative materials or plasterboard. Aerated concrete walls are waterproofed at the same time, special films are used to reduce the vapor permeability, a heat insulation layer (polystyrene foam, eco-wool, mineral wool, etc.) is laid in the crate, and then sutured with plasterboard. The resulting surface can be wallpapered, painted, tiled. This version of interior decoration - the most appropriate and practical.
The impact of atmospheric precipitation and dust on the walls of gas silicate blocks leads to their wetting and loss of appearance, the blocks darken. Therefore, it is recommended to finish on aerated concrete.
Today, aerated concrete as a building material, is in great demand, so the issue of its finishing is extremely relevant.
The feature of aerated concrete "breathe", passing water vapor and gases through the wall, affects the choice of material for finishing the facades.
Unsuitable material can degrade the vapor permeability of the material.
Like any structure of blocks, the houses of aerated concrete rarely have an ideal surface. In addition, they are characterized by shrinkage. Therefore, despite the good thermal insulation properties of this building material, they are additionally insulated.

The decoration of the facades with brick is the best option. However, it is quite expensive.
It is most optimal to choose a variant of internal and external decoration in pairs, so that it was easy to lay the insulation on one side. If the house outside is simply painted, then it is better to use a wall lining for the interior roughing of the house, which will help to hide all the cracks and irregularities, and it is easy to lay a layer of insulator under the lath on which it is laid. If the exterior decoration materials are installed on the lath, then inside the house, as a rough finish, it is possible to fill in the slots and plaster the walls.
Building materials for finishing the house of aerated concrete from the outside should be hygienic, durable and durable. For materials used inside the house, hygiene is more important, and external should be resistant to wind, water and sun rays.
For exterior finishing of the house from aerocrete blocks are used:
- facing brick;
- textured vapor permeable paints;
- ventilated facades with decorative panels, siding or lining for performing facing works;
- special vapor permeable plaster mixtures, which retain the ability of aerated concrete to "breathe" and protect it from moisture.
Lining Options

If it was decided to plaster the house, then you should choose vapor permeable plasters - aerated concrete should breathe.
The most accessible and simple option for exterior finishing of the house from aerated concrete blocks is painting. It is carried out strictly on plaster, because the paint materials can not give the finish of the house from aerated concrete strength and aesthetic appearance. On durability and price, the first place is occupied by oil paint, although it is unpleasant in work. You can use modern emulsion paints, which are convenient to apply with spray guns.
Recently, veneer siding has been increasingly used to coat houses from aerated concrete blocks. Although metal siding with a coating of specialized materials is not inferior to either the complexity of the installation or its strength. Laying siding is simple, the difficulty is only in the construction of the laths from metal profiles.
One of the actual materials for exterior decoration of a house made of aerated concrete is a thermopanel. They are simple in operation, durable and durable, do not require additional insulating materials. Thermal panels are made of synthetic materials, so they are inexpensive and have a variety of designs: a variety of shades, imitation wood and stone, etc.
Face brick - not only building material, but also an element of decor. It is used not only for the construction of new houses, but also for restoration work. By its characteristics, it is well suited to the Russian climate.

This kind of facing is done for decades - the brick is durable and frost-hardy.
The brick used for the cladding should have a certain color and surface, resist weathering, be strong. The facing of the aerated concrete blocks has its advantages: frost resistance (from 25 to 100 cycles), low thermal conductivity, quickly dries, high strength, light weight - 2-3 kg, is made of environmentally friendly raw materials, provides a good microclimate. However, this material has its drawbacks: a fairly high cost, the probability of the appearance of divorce and white spots.
Facing with a brick is carried out only in houses made of aerated concrete not higher than 2 floors. Its laying is carried out on the construction of the walls of the basement, foundation or basement. This type of work should be provided for in the building design. The fixing of brickwork to the wall is carried out by means of flexible connections.

Before applying plaster walls must be primed.
In addition to the brick in the modern market, the assortment includes clinker tiles. It well resists atmospheric precipitation, temperature changes, mechanical stress, protects the walls from water and is not susceptible to aggressive chemicals. The clinker is well suited for the lining of a house made of aerated concrete due to its color scheme, texture and technical characteristics. It does not exert additional load on the foundation, its use is cheaper than brick.
The clinker not only looks beautiful, but also has a great longevity. The undoubted advantage of the clinker as an external finish of the facade made from aerated concrete is the ease of installation. For styling does not require special skills, the installation is carried out on mastic. Externally, the decoration of the facade of the house from the blocks of aerated concrete does not differ from the walls laid out with bricks.
Stages of finishing works
All external finishing work must be completed in the warm season, so that the aerated concrete blocks dry. They can only be carried out after the completion of internal work, including the pouring of floors. This is due to the movement of the internal steam outside through the walls and with their drying. The sequence of work will be as follows:

Finishing the house with clinker tiles will not only give it a finished look, but it will not take much time, as the tile is easy to assemble.
- surface preparation, defects of seams and joints are sealed, which improves the insulation of the entire house. To do this, the technology is widely used: "warm seam" - sealing all kinds of cavities and seams with mounting foam, then a thin layer of insulation is applied to it, and the top is filled with putty;
- perforator;
- a hammer;
- screwdriver or screwdriver;
- building level not less than 80 cm long;
- scissors for metal;
- hacksaw for metal;
- joiner's corner;
- roulette;
- building rope;
- pencil for marking.
The assembly process consists of the following steps. An important aspect of the process of finishing gas-concrete blocks with siding is the lath, to which all the elements of the siding are attached. Rims other than the role of the frame can be a support for additional insulation, leveling the walls. Most often use a dry wooden bar cross-section of 50 to 30 mm and a moisture content of 13-15%. With the help of nails, the beams are fixed in an upright position along all the finishing parts of the walls, the wide side of the beam to the wall and the distance between the bars of 40-50 cm, and also set over the edging parts of the house, the socle and the corners.
After installing the battens and laying the insulation begin the process of finishing with siding. First, a siding corner is attached to the corners of the house. After the perimeter of the base of the house at a distance no higher than 5 cm from the ground level, the start panel is attached. Then in the upper groove you need to insert the first main siding panel. Do not strongly pull the panel up, just pull it lightly up to a characteristic click, indicating a reliable connection to the start panel.
The rest of the siding panels are attached the same way, one after the other, from the bottom up. They must be adjusted in such a way that their entry into the corners was not dense, but with a gap on each side of 5-10 mm. This is done to prevent deformation of the material when it narrows or expands under the influence of low and high temperatures. With the same purpose, the panels are installed to the crate, not completely nailing or screwing the screw up to a full rigid grip of 1-1.5 mm, and also twisting it at an angle of 90 ° to the exact center of the attachment point. All this allows the siding structure to slightly "walk".
The installation of the facade of the house must begin with the fixing of the starting panel around the perimeter of the house, but close to the last panel of the installed basement siding structure. Then everything is done in the same way as when finishing the socle.
Finishing the facade is a more laborious and complicated process, since with self-adjusting and fastening the panels in the upper part of the facade, especially if the house is 2-storey, it is not easy. The presence of scaffolding will help to facilitate the process of finishing the upper layers, since it is impossible to lift and reach the end parts of the 6-meter panel into the grooves of the corners, working on the stairs.