In order to reliably and quickly connect the wires, to replace the simplest electronic parts of boards and microcircuits with a lot of conclusions, you need to learn how to work with a soldering iron. Not only the basics, but also the nuances that make up this technology are useful. The article provides information that will help you not make mistakes and correctly reproduce techniques of varying complexity.
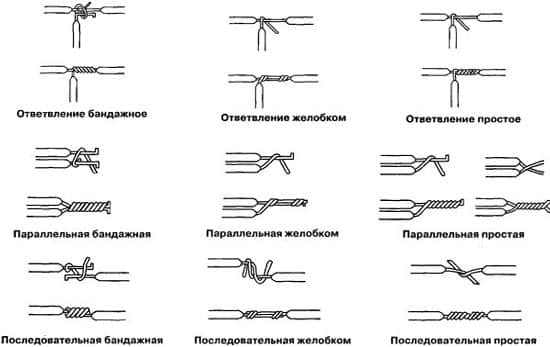
Connection by welding wire twisting
Selection of equipment and materials
Essential value when buying a set of equipment have the characteristics of work, their volume. If soldering of the standard wiring, thick wires is expected, a fairly strong heating of the large elements will be required (see above). Dismantling the chip from the board will be performed flawlessly with certain skills, using special equipment.
To learn, you need to start with a simple set of tools:
- Soldering iron up to 40 W with a copper sting. It is not difficult for them to use. Without a protective shell, the sting will burn out, so you have to correct its shape with a file. But solder is well retained on a clean copper surface.
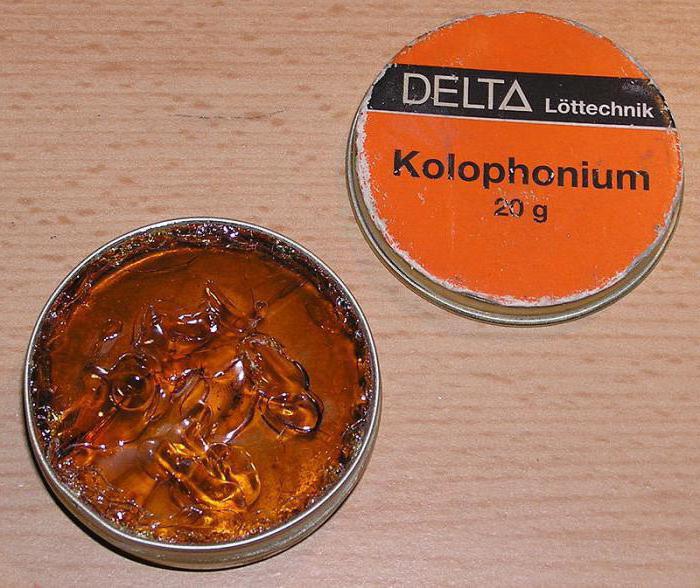
- Many problems can be solved with rosin. But, if it is supposed to join twists of aluminum, fasteners of boards made of stainless steel, you need to remove more resistant oxides from the surfaces. You need to buy a universal flux, which is useful in practice.
- Typically, solder "low-temperature type" brands PIC 30 (40, 61).
- To work with the soldering iron was convenient, you need a special stand, designed for high temperature. You can buy it, or make it yourself from a thick wire, other improvised materials.
- Vices are useful for fixing boards, other parts in the right position during the soldering process.
- It is also necessary to prepare metal shavings, a piece of foam rubber sponge. Such devices are used to quickly remove excess solder from the tip of the soldering iron.
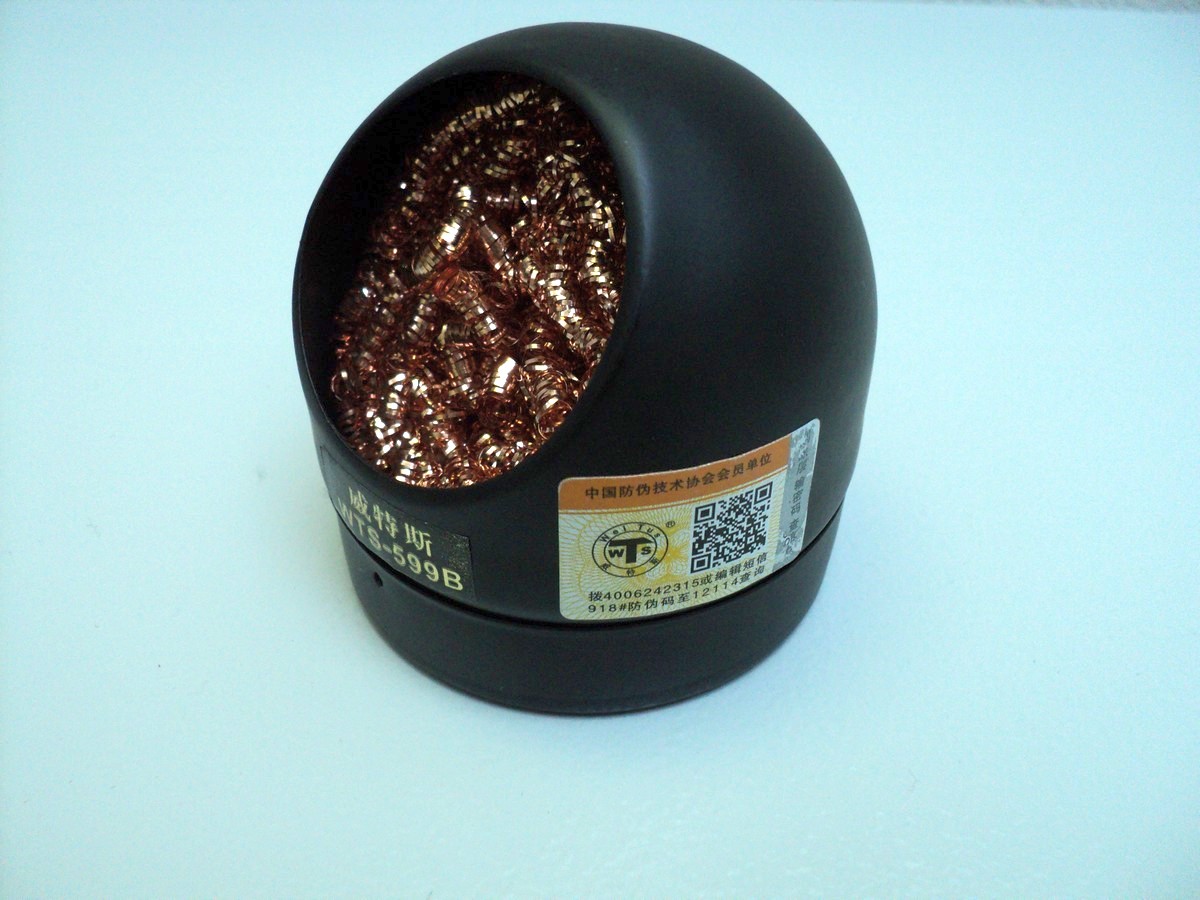
Metal shavings for removing solder
Different methods of soldering
To make it easier to learn how to use an electric soldering iron, it is worth considering how each technology is performed separately. For this you can use typical processes as examples.
In any case, you need to prepare the soldering iron for work. The stain is cleaned of dirt. It removes the old solder. If necessary, attach a special shape using the file. It may be necessary, for example, to dismantle a compact component of the SMD type from the boards, chips with a small number of legs. Such a modification is created for the simultaneous heating of the two terminals. In the standard version, the end of the stinger is ground at an angle to form a pad sufficient to place the solder in the desired amount.

Preparing the workstation for soldering
At the first start the stove can smoke until a protective grease is burnt. After creating the desired shape, it is covered with rosin and solder by tinning.
Rosin should be used gently. The evaporation should be removed from the room, for which it is necessary to ensure good ventilation. Lead solder is also unsafe, so this measure will come in handy when working with it.
To solder a few wires, you need to remove from them layers of protection, insulation. Use nippers, tweezers. It is advisable to use firing with an open flame, strong heating. Some electrical wiring shells contain fluoride and other dangerous chemical compounds, capable of harming the human body. In case of severe damage to the veins, the damaged part of the wire must be cut off and the scratching must be repeated.
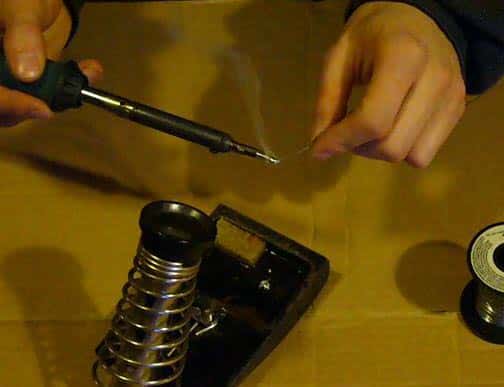
- the cleaned parts of the wires are placed on a wooden support;
- with a soldering tip touch the rosin, take the solder;
- its working surface is treated with wires;
- solder should form a uniform shell on them. If necessary, the procedure is repeated.
If this technology does not ensure the creation of a high-quality layer, or the solder is not fixed at all, it is necessary to remove the oxides. Specialists suggest using the usual pill for pain, aspirin. When it is heated, acetylsalicylic acid is released, which is quite enough to obtain the desired result. Some types of insulation during melting also destroy oxides.
Varnish should not be removed with sandpaper, abrasive compounds. Such strong mechanical influences can damage the wires. If you use an open flame, you can exceed a certain temperature threshold. In this case, the strength of the metal will deteriorate. In order not to risk, you need to use flux, a special tool designed to remove varnishes and prepare the surface of wires for soldering.

Flux soldering for surface preparation for soldering
With the help of this relatively simple technological operation, you can master the necessary skills. In particular, it will be easier to deal with the optimization of temperature.
If it is excessive, on the tip of the soldering iron appear dark dirt, solder on it does not hold. At low temperatures, soldering does not have a uniform structure, sufficient strength. Outwardly, this is determined by the matt color of its surface.
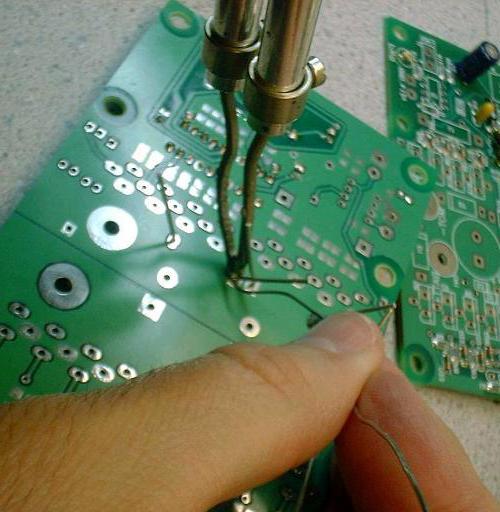
After accumulating sufficient experience, one can proceed to more complex soldering processes. Now, more details on how to remove chips from the boards. There are many conclusions in these elements. If you do not plan to check with a possible installation back, then it will be easier to use a wire cutter.
But for delicate handling of the product, a soldering is useful. It is necessary to prepare in advance a special tool, a thin steel tube. With an electric soldering iron, the necessary area is heated, and this device is put on the bottom of the board on the leg of the chip and rotated, disconnecting the melted solder. If the dimensions of the leads are suitable, use the appropriate needle of the medical syringe.
Remove excess solder from the boards using a hand-held vacuum pump. That the spout of this product withstood thermal and mechanical influences, but not joined to the working area, it is created from fluoroplastic.
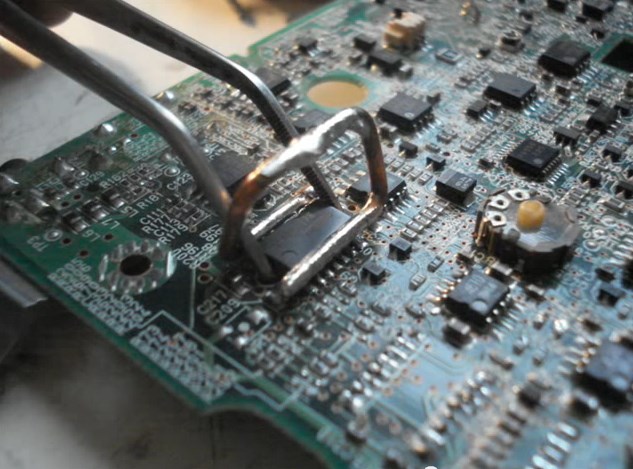
Dismantling the chip using a special nozzle
How to properly solder soldering iron different in the parameters of the wires and detach the electronic elements from the boards, it is easy to find out. But only practice will allow you to learn not only the basics, but also the intricacies of proper soldering. Here are the recommendations that will simplify the development of individual technologies:
- Soldering wires with the use of twists is easier, since it is not necessary to hold the connected parts in a certain position.
- For the most complex types of soldering, you need to buy a special device ("third hand"). This design is equipped with clamps, which fix the parts, boards. A large magnifying glass will make it possible to see carefully the small details.
- To remove the LED from the board, you can wrap a thick copper wire around the tip of the soldering iron (about 5 mm in diameter). Its ends are bent to the width corresponding to the location of the legs of the device.
- Soldering will be neat, if you clean the surface of the boards, stained with rosin, remove excess solder. For this, a copper braid, compressed into a tape, is useful. It is applied to the contaminated sections of the boards and heated with a soldering iron.
Skills training
If there is no previous experience, then the preliminary development of elementary skills is useful. The following algorithm of actions will help to master the technology of soldering:
- Take a solid wire. Cut it into identical pieces 5-6 cm in length.
- Remove the insulation from the ends of each wire. This procedure is carried out with the help of nippers, using the flat side of the tool surface.
- If there is a varnish layer on the surface, a special tool is used to remove it.
- The foam sponge is wetted with water.
- In order not to spoil the surface of the table, all working operations are performed over a sheet of plywood.
- A soldering iron is included in the 220 V network, wait until the packing lubricant has burnt.
- To clean the old solder, a sponge will be used. But such rubbing does not need to be done for a long time so as not to cool the stinger excessively.
- The free ends of the wires must be tightened, after which create a "cube" from such blanks, using only soldered joints (without twisting).
- When the product cools, it is compressed in a fist. With the correct implementation of the technology, all connections will be preserved in integrity.
If it does not work, you should check the sequence of actions taking into account the following recommendations:
- All parts of the parts, which will be subsequently connected, must be thoroughly cleaned from lacquer coatings, impurities.
- When combining them during the soldering process, it is necessary to provide a reliable fixation. It is for this purpose that the "third hand" adaptation, about which it was written above, is useful. Even small vibrations, movements, can worsen the quality of the connection.
- The amount of solder should be optimal. Do not use "dropping" it from the sting.
- The time of heat exposure should be limited not only for the preservation of the functional state of electronic components on printed circuit boards. An experienced person makes one-time rations in 2-3 seconds.
- If a flux is used, it must be taken into account that it is able to quickly evaporate. This tool is applied immediately before soldering, so the first workout is easier to perform with the use of rosin.
- After a thorough cleaning of the sting, it will itself attract solder. This effect is used to dismantle electronic components. When doing this exercise, this is not necessary, so you need to make sure that the soldering iron has enough solder on the heated surface.
- Cool sting can be a strong draft. On the other hand, airing the room is necessary for the timely removal of harmful fumes. Ensure adequate ventilation.
- For beginners it is difficult to determine by the indirect attributes the degree of heating of the soldering iron. In order not to create unnecessary difficulties, it is recommended to use a tool equipped with temperature control, or to purchase a specialized unit that supports a certain power consumption.
Lessons in soldering. Video
How to solder metal, beginners can learn from this video.
Different kinds of twists, installation and dismantling of electronic devices of different types, elimination of board defects - answers to these and many other questions will not be very difficult to find. But in any case, for a qualitative performance of the operations, you will need sufficient experience, which will only help to acquire practice.
Temperature effects on various metal surfaces for the purpose of their connection - the most effective technique. We offer to consider how to properly solder chips, boards and plastic pipes, how to work with rosin, and what safety measures are used during operation.
Connections of metallic materials with the help of local temperature increase and surfacing of metals at a lower temperature are soldering. It is believed that this process is more similar to the surface gluing of molten materials. Soldering is simple enough, although certain skills and knowledge are required.
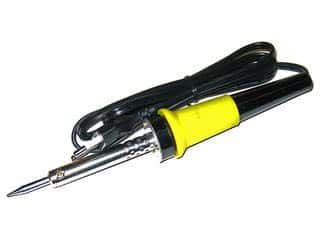
Photo - Household soldering iron
A soldering iron is a soldering device that radiates heat. These devices can be in the range from 15 watts to 30, they can solder parts of SMD-boards and electrical circuits. Devices that are higher than this power can only be used for small rations to unscrew the XLR connector or to reconnect the improper connection of thick wires.

Photos - 30 Watt soldering iron
For electric equipment that soldered office equipment, an acoustic soldering iron is useful, it has a low heat capacity, small dimensions and excellent performance, it is used for fine soldering (for example, assembly of circuits). There are also large industrial soldering irons, which are used to attach calibration cables, chassis or stained glass work.
Photos - Soldering pencil
The soldering iron must be selected with a three-way grounding plug. Such a device will help to prevent the dissipation of voltage along the current path in the device. Heat is produced by closing the current in the tip, which is made of a metal conductive wire. For a beginner, a device with a range of 15 watts to 30 watts is suitable, but you need to know that 15 watts may not be enough to connect even simple audio wires. To work in cars, the most practical is a device with a power of 40 watts, it can cover large areas and provide fast connections. Also for the car often used special nozzles to facilitate work.
Video: how to solder
Soldering Station
To ensure autonomy, the soldering station is used: the device where the machine is connected to an AC source, this device is able to emit up to 80 watts. Of course, to work with the station you need some experience, but experts say that it is much easier to solder with it. Advantages of soldering equipment:
- You can precisely control the temperature to almost a degree;
- Such an instrument is capable of soldering even complex compounds from aluminum, steel, stainless steel, PPR, etc .;
- Allows to unscrew the cable into two RCA;
- Durability;
- Such a technique can easily solder polypropylene pipes, plastic on a motorcycle and other vehicles, because You can control the temperature to almost one tenth of a degree.
But the system also has limitations: high cost, complexity in work (in any case, you will need some experience) and a strong electric energy cost. In the event that you plan to solder parts for the phone, then be sure to consider buying a soldering station.

Photo - Soldering station in operation
Solder
Before soldering any device, it is very important to choose the right solder. To work with electrical appliances, only a few types of solder are available. To solder the contacts of the motherboard or the column you will need rosin. In turn, as an acid is the main substance, which is used to evaporate thin connections, copper wires, small contacts. If rosin is used in electronics, then acids will destroy the contacts on the board and destroy the main parts of the circuit.
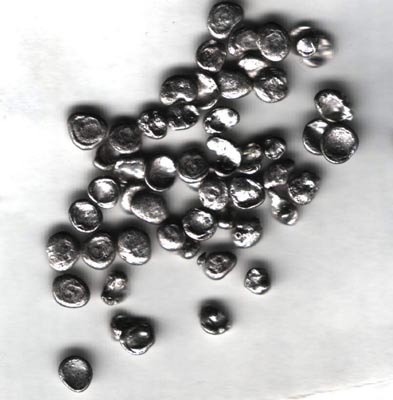
Photo - Lead for solder
For most electrical boards, solder with a diameter of one mm to half a mm is used. Thicker parts can be used to quickly solder large pieces; to work out a small circuit, its contacts and outputs they can not because of the large size. An alloy in which 60% of tin is the rest of lead and impurities is used for better electronics performance. Bulky connections, such as attaching the bracket to the chassis, repairing the bumper or the speaker, are done using a high-power soldering iron.
During soldering, the solder heats up and emits different connections. These gases are extremely harmful to humans. You must work in a well ventilated area. Also beware of hot solder, use protective equipment: masks, respirators, gloves.
Lessons, how to solder
Of course, it is almost impossible to learn how to solder the first time, but you can get a thorough, fundamental knowledge. We offer you to read the step-by-step instructions for using a soldering iron:
Always clean the new tool tip. Tinning is the process of coating a thin layer of soldering solder (working part) soldering iron. This helps in the heat exchange between the treatment material and the solder.
Photos - Tinning stings
- Warm up
Thoroughly heat the soldering iron. Check the uniformity of heating of the working solder, its temperature and quality. If you ignore this rule, the soldering iron will be covered with corrosion.
- Preparation of the workplace
Before you weld anything, you need to prepare a working area. Dampen the sponge in the water and place it next to the soldering iron, place a small piece of cardboard or thick paper in case you drop the solder. You should be comfortable and enough seats.
- Grease
Solder well with a sting. Check the coating, it is necessary that the entire surface is greased. In the case of surplus solder, it can be removed at any time with cardboard.
- Cleaning the nozzle
Cover the top with solder, check the surface integrity, wipe the tip of the soldering iron with a cloth or washcloth to remove residual flux. Before soldering soldering iron with acid, it is correct to prepare a sponge with a special composition. You need to work quickly until the solder is frozen.
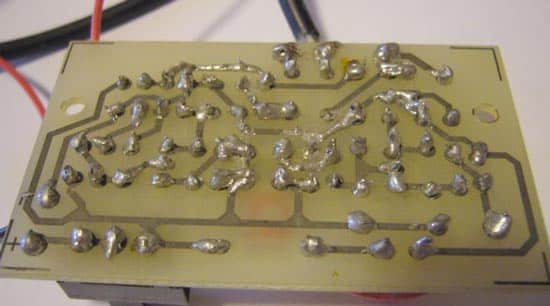
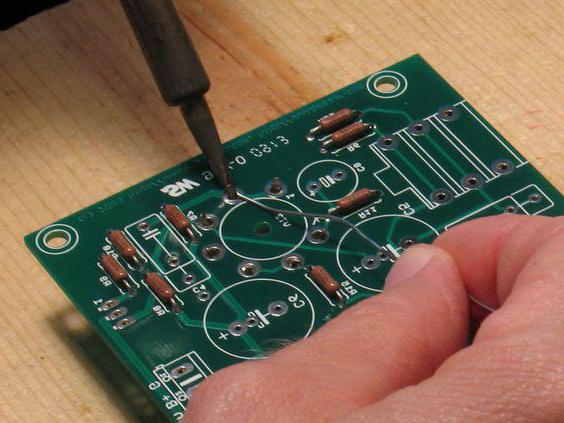
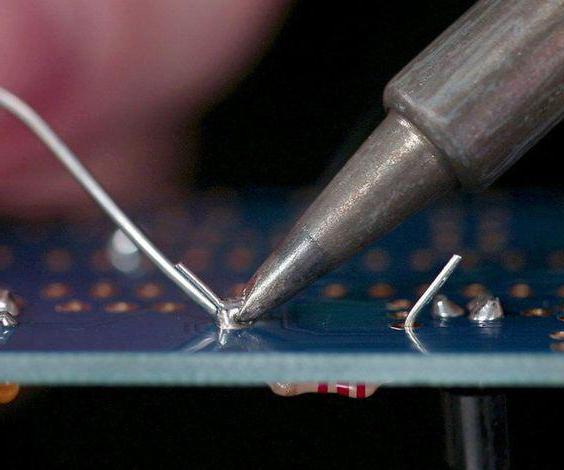
How to solder the board
Soldering the printed circuit board is probably the most common type of work for a soldering iron. Before you learn how to solder a diode tape or headphones with a soldering iron, do not buy expensive kits, enough and the usual budget scheme.
- Surface preparation
It is very important to clean the surface as much as possible to create a strong connection and low resistance. To degrease the board, you can use a simple napkin with a soapy solution, only then thoroughly wipe the metals. In the event that the scheme of solid deposits, you need to buy a special composition, which can be found in the electrical shop.
The site needs to be cleaned to the shine of a copper surface, to clean any contacts, you can use ordinary acetone. Another good solvent is methyl hydrate, it has a calmer smell and is safer.
- Location:
After cleaning, you need to correctly place on the circuit contacts, a soldering iron and wires. The first need to solder small flat parts (resistor, varistor), and then work with large (capacitor, transistor, transformer, microphone, potentiometer). This will help ensure the safety of sensitive components (MOS, Socketed ICS) in working order, the temperature effect will not affect their conductivity in any way.

Photos - How to Solder Boards
Wires must be bent at an acute angle of 45 degrees. Such a system is used if resistors and charging are soldered. Parts with short wires, speakers, speaker for auto, can be pre-wired with electrical tape.
- Heat
At the tip of the soldering iron is applied a little solder. With this action, you improve the conductivity of the metal. To heat the connection, place the tip of the iron so that it rests against the components of the board. Hold in this condition the construction of two to three seconds for heating and connection.
If bubbles begin to appear on the treated area, you must stop the heating immediately and remove the soldering iron, otherwise the board will overheat.
- Apply the solder
Once the lead is hot, you can use solder. Apply solder to the tip of the soldering iron and to lead on the surface to be treated. You will see a site of liquefaction, and also, bubbles around the connection will begin to stand out. It is necessary to continue to solder until a small elevation appears. Do not overdo it!
Photos - Soldering connections
When we have finished soldering, turn off the soldering iron, we remove the surplus of the mixture correctly. Do not move the connection for several minutes, so that it stays stable and does not have to be re-soldered. During this period of time, you have the opportunity to quickly unsolder the bridge, if something is wrong, then it will be more difficult.
After this, clean the treatment site, remove all solder droplets and check to see if other parts of the circuit are not affected. This method can solder the button to the modem, fix the plug or even the radiator.
Many people wonder how to solder copper wires for splicing, because in this way you can easily extend the guitar cord, connect the usb-cable to the antenna, equip the seamless heating.
- It is necessary to properly clean the wires from insulation
To insulate the spliced wires, a heat shrink tube is actively used. It is necessary to use this universal tool with a diameter of about one and a half to two times the size of the cable to be connected. Cut the heat shrinkage along the length so that it extends beyond each weld by 2-7 mm. Now leave about 2 centimeters of insulation coating at each end.

Photos - Wire soldering
- Connect the wires
It is necessary to provide the wires with a strong mechanical connection. The wires are twisted in the mounting joint. Connect the stripped cables together so that their centers intersect each other, and then twist one of the wires along the length of the other cable. Do the same with the second cord.
Photos - How to solder the wires
- Heat the soldering iron
It is necessary to direct heat to the bottom of the connection, this will help to heat the cable as efficiently as possible. If you heat only the upper part of the wire, as the temperature increases, heat will be lost. Accordingly, the thicker the cross-section of the tip, the more heat conducts the solder.
- Apply the solder
As in the previous instructions, solder should be applied to the hot surface of the wires. Do not heat the metal until bubbles appear, because The plug may not withstand this temperature.
- Insulation
Place the heat shrink tube so that it evenly covers the connection and heats it. Under the influence of heat, the wire is finally isolated on the joint and will provide excellent flexibility and adhesion strength.
- Keep the tip of the soldering iron clean. A clean stinger provides an increase in thermal conductivity and a stronger connection. Use a damp washcloth to clean the tip.
- Double check the seams. If you collect stained glass from the joints, it is advisable to even use a magnifying glass.
- Correctly first solder small parts, joints, thin wires, tk. sting in the beginning will be the most accurate and delicate.
- Sensitive parts are installed last.
Every radio amateur or master who repairs himself, sooner or later will have to pick up a soldering iron and try. The quality of the work performed and even the performance of the product will depend directly on a variety of factors that must be known about before starting work.
Correct work with a soldering iron
Despite the seeming simplicity of working with a soldering iron, it is very desirable to have initial skills of qualitative work and be able to correctly use solder with rosin.
The soldering is carried out with the help of various solders. The so-called solder in the coil with rosin is perhaps the most popular. When performing work related to soldering, solder is used. The amount of tin and lead contained in it is 60 and 40%, respectively. This alloy melts at 180 g.
What you need to work with a soldering iron:
- the soldering iron itself;
- solder;
- rosin.
The heated solder creates a sufficient internal connection with metals such as copper, brass, silver, etc., if the following conditions are met:
- Surfaces of parts must be stripped of oxides.
- The part in the place of soldering is warmer than the melting point of the solder itself.
- During operation, the place of soldering is required to be protected from exposure to oxygen, various fluxes are used for this. They create a protective film directly over the place of soldering.
Tricks and the secrets of working with a soldering iron
After the solder began to melt, they can already be soldered. To do this, cover the tip of the soldering iron with a thin layer of solder, and then wipe it thoroughly against a damp sponge. So remove the remaining solder from work with rosin. It will not be superfluous to take the habit of wiping the sting of a wet sponge every time after soldering.
Before you start to solder the radio parts, it must be prepared. It is necessary to bend its terminals in such a way that the piece freely enters the holes intended for it.
Beginners without work experience often touch the place of soldering with the tip of the soldering iron tip. And you need to keep the soldering iron so that the contact area between it and the place of soldering is as much as possible, otherwise the place where you need to make a soldering is not heated enough to fasten the parts.
How to clean a soldering iron tip
When soldering, a deposit often appears on the soldering iron. It can be removed with plain water. If you hold the soldering iron over a damp cloth, the scale will remain on it, and the sting will again become clean. Periodically you need to do this while working with a soldering iron. If the fabric does not help, you can use a hard sponge.
Soldering tips classes
- Stings removable with a coating of nickel.
- Copper stings.
Soldering tips of the first class are usually used in complex soldering irons, in which it is possible to regulate the temperature.
The stings of the second are the most common.
Types of soldering tips nickel plated
- Sting in the form of a needle - they are soldered by very small radio components, such as SMD. When repairing phones, this sting is irreplaceable. It is used on boards with high density of mounted parts.
- Stinger-spatula - is used for the implementation of soldering and in cases of mounting large radio components. They work with multi-output microcircuits.
- Sting in the form of a drop - it is convenient for them to transfer solder with rosin to the soldering site, which leads to an improvement in the quality of work.
- Sting with a curved shape - most often they solder the radio components, which are in a copper shell, so that no extra solder remains on the board. It can also be used for conventional soldering. The soldering iron is heated to a temperature of 290-300 ° C.
When working with a soldering iron, it must always be kept in perfect cleanliness. New soldering tips are usually treated with a hammer so that small jags form on its surface. Subsequently they are neatly trimmed with a file to give the most correct form to the jam.
Then the stinger should be stained using a solder with rosin. That is, cover with a thin layer of solder, dipping it into rosin.
How to cool the soldering station
Tweezers made of metal, which hold the radio parts, also works as a heat sink during soldering. You can use for this purpose a special clip "crocodile".
Soldering Soldering Tips
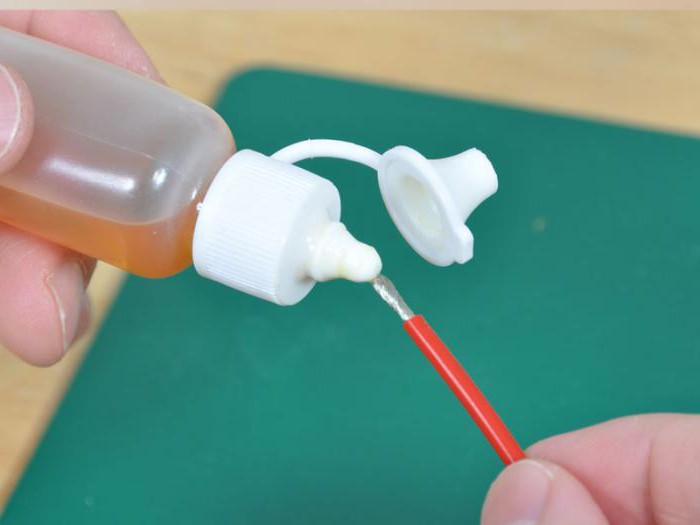
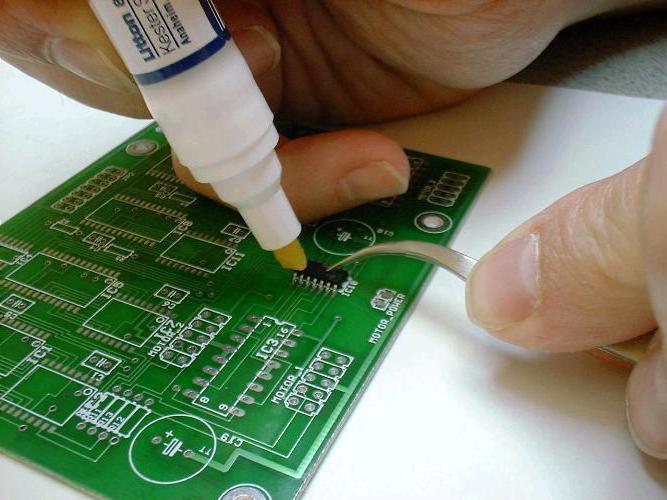
To obtain a good result when soldering, it is absolutely necessary to use solder with rosin and flux correctly. It is a low-melting alloy of a special metal, which solder the terminals of parts and wires.
- The best solder is tin in its pure form. But such a metal is too expensive to use when soldering. Therefore, when working with radio components, so-called lead-tin solders are used.
- Lead with tin. On the strength of soldering, these solders are not worse than pure tin. They melt at a temperature of 170-190 degrees. It is customary to designate such solders with the abbreviation "POS" - tin-lead solder. The figure that stands after these letters in the designation means the fraction of tin expressed in percent. It is better to use solder "POS-6O".
- Fluxes are substances that have antioxidant properties. They are used to prevent oxidation of the place of soldering. If you do not use the flux, the solder simply does not stick to the surface of the metal.
Types of fluxes
When working with radio components, fluxes are used in which acid is not contained. For example, rosin. In the shops, we also sell bowed rosin for the lubrication of musical instruments. It can also be used for soldering. But metal dishes are brazed using solder without rosin. To repair it will require This dissolved in hydrochloric acid zinc. Radio components can not be soldered with such solder, since in time it will destroy the soldering.
If soldering is required in hard-to-reach places, then it is necessary to have a liquid flux. You can make it yourself. Rosin is ground into powder, poured into acetone or ethyl alcohol. Stirring the solution, you need to pour more rosin to get a thick paste-like mass. At the place of soldering, such a liquid rosin should be applied with a brush or a stick. At the same time there is a nuance - to work with printed circuit boards the flux should be more liquid. For hard-to-reach places, solder wire with rosin can also be used, which is much more convenient.
When working with various fluxes, it is necessary to take into account that those that have acetone in their composition are very toxic. Therefore, working with them, it is necessary to avoid getting vapor into the respiratory tract. Solder better near the window, if the summer, and in winter often ventilate the room in which work is being done. At the end of the work, you should wash your hands with soap and warm water.
soldering with rosin
An important condition for successful soldering is the maintenance of the cleanliness of the surfaces that are required to be soldered. It is necessary to clean the solder points to a shine. Then the details should be put on a piece of rosin and warmed. The molten rosin will help the solder to spread evenly over the conductor or the part that you need to solder. You can gently rotate the part, leading at the same time with a soldering tip, so that the solder spreads evenly over the surface.
If you need to tin the conductor, which is soldered into the board, then after cleaning the soldering site with a grinding paper or knife, you need to bring a piece of rosin, and then smoothly distribute the solder as evenly as possible by conducting a soldering iron.
The quality of soldering is influenced by the way the wires or the contacts of the parts are properly connected during soldering. They should be pressed tightly between each other and after that bring the soldering iron to the prepared conductors, touching it. After the heated solder spreads over the surface, filling even small spaces between them, the soldering iron should be removed.
The continuous soldering time should not exceed five seconds. After this period of time, the solder will harden and the parts will be firmly bonded. However, if the soldering does not fail, the parts can not be moved within 10-15 seconds after the end of the soldering. Otherwise, the connection will be unstable.
If the work is done with transistors, then their conclusions must be protected so as not to overheat. It is better to keep them either with pliers or tweezers, thus performing heat removal.
When performing soldering of radio components, you should never twist the ends of the parts. If you want to re-solder parts or replace conductors, you need to think about this beforehand, before mounting. The ends of the details are best soldered at a short distance from each other, and not in one place.
 How to properly solder?
Before you start to consider the question: "How to solder?" We need to designate one but ...
Soldering is different. It should be understood that there is a big difference in the method of soldering a hefty 2 Watt resistor to a conventional PCB and, for example, a BGA chip on a multilayered cell phone card.
If in the first case you can do with a simple electric soldering iron with a power of 40 watts, hard rosin and solder, then in the second case you will need the use of such devices as a thermo-air station, no-washing flux, solder paste, stencils and, possibly, a station for lower heating of the boards.
As you can see, the difference is substantial.
In each specific case it is necessary to choose the method of soldering, which is the most suitable for a particular type of installation. So for the soldering of microcircuits in the planar case it is better to use the thermo-air soldering, and for installation of usual output resistors, large electrolytic capacitors it is necessary to use contact soldering with an electric soldering iron.
Consider the simplest rules of conventional contact soldering.
To begin with, it is quite enough for a novice amateur radio to master the usual contact soldering with a simple electric soldering iron with a copper sting.
First you need to cook minimal set for soldering and a soldering tool. How to prepare an electric soldering iron for work has already been described in the article about preparation and care of a soldering iron.
Many people think that it is better to use a soldering iron with a non-combustible tip for soldering. Unlike copper, a non-burning stinger does not require periodic sharpening and tinning, since there are no depressions on its surface - shells.

Soldering iron
(for clarity, the copper sting is pretreated with a file).
The photo shows that the edge of the copper stinger is uneven, and the formed grooves are filled with frozen solder.
Non-combustible sting in widely distributed soldering irons, as a rule, has a conical shape. Such a sting is not wetted by molten solder, that is, with its help, you can not take solder on the stinger. When working with such a soldering iron, solder to the place of soldering is delivered with the help of thin wire brazing.
It is clear that it is difficult and inconvenient to use solder in pieces or rods when soldering with a soldering iron with a non-burning sting. Therefore, those who want to learn how to solder, it is better to start your practice with a conventional electric soldering iron with a copper sting. Disadvantages of its use are easily compensated by such conveniences as the ease of use of solders in any performance (wire, core, lump, etc.), the possibility of changing the shape of the copper sting.
An electric soldering iron with a copper tip is convenient in that it can be used to easily dose the amount of solder that needs to be conveyed to the soldering station.
Also, when soldering various radio components, it is worth paying attention to the area of the surfaces to be welded. The larger the area of the conductor, for example, the copper track on the printed circuit board, the more powerful the soldering iron should be. When soldering, heat transfer occurs and apart from the soldering station, there is also an indirect heating of the radio components or printed circuit board.
If a significant heat dissipation occurs from the place of soldering, then it is impossible to warm the soldering site well with a soldering iron and the solder very quickly cools down, turning into a loose substance. In this case, you need to either heat the soldered surfaces longer (which is not always possible or does not lead to the desired result), or use a more powerful soldering iron.
For the soldering of small-sized radioelements and printed circuit boards with tight mounting it is better to use a soldering iron with a power of no more than 25 watts. Usually in radio amateur practice, soldering irons with a power of 25 - 40 watts are used with AC 220 volts. When operating an electric soldering iron is regularly check the insulation of the power cord, as in the process of work are frequent cases of damage to it and accidental reflow by heated parts of the soldering iron.
When sealing or soldering the radio components from the printed circuit board, it is advisable to monitor the soldering time and in no case overheat the PCB and copper tracks on its surface above 280 ° C.
If the board overheats, it may deform in the place of heating, stratification or swelling will occur, the printed tracks will peel off in the place of heating.
Temperature above 240-280 0 C is critical for most radio elements. Overheating of radio components during soldering may cause damage to them.
When soldering parts it is very important to fix them firmly. If this is not done, then any vibration or offset will disrupt the quality of the soldering, since solder takes several seconds to harden.
In order to qualitatively produce the soldering of parts "on weight" and avoid displacement or vibration during the cooling of the soldered connection, you can use a device that in the life of radio amateurs is called " third hand”.

The "third hand"
Such a simple device will not only easily and without much effort to solder parts, but also save from burns, which can be obtained if you hold the parts during soldering by hand.
The "third hand" in the work
Safety measures for soldering.
In the process of soldering, it is fairly easy to get a small but a burn. Most often, fingers and hands are exposed to burns. The cause of burns, as a rule, is haste and poor organization of the workplace.
It should be remembered that during soldering it is not worth the effort to the soldering iron. There is no point in pressing them on the printed circuit board in the hope of quickly melting the soldered contact. It is necessary to wait, when the temperature in the place of soldering will reach the required. Otherwise, the soldering tip of the soldering iron may fall off the board and accidental touching of the fingers or palms with the molten metal. Believe me, burn wounds heals very long!
Also it is worth keeping your eyes away from the place of soldering. It is not uncommon for cases when overheating the printed track on the board exfoliates with a characteristic swelling that leads to the spraying of the smallest droplets of molten solder. If there are safety goggles, then it is worth applying them. As soon as you have sufficient experience of soldering, you can refuse from protective glasses.
It is desirable to make the soldering in a well-ventilated room. Pairs of lead and rosin are harmful to health. If there is no way to ventilate the room, then it's worth taking breaks between work.
Soldering wires with a soldering iron is not anything complicated, so even an inexperienced electrician can cope with this method of connecting copper strands. Next, we'll tell you how to properly wire the wires in the junction box - the place where the wiring is routed through the rooms. The technology will be provided step-by-step, with pictures and video examples, so that you can more clearly understand how to solder two wires together. We immediately draw your attention to the fact that we will tell how to solder the veins of copper. This is due to the fact that aluminum conductors at home are already not used. The connection of different non-ferrous metals (aluminum and copper conductors) is recommended by GOST standards, therefore the only safe option for a private house and apartment is the soldering of copper conductors of the cable.
Step 1 - Preparing the tool
First you need to prepare a soldering iron for soldering wires yourself. All that is required is to thoroughly clean the stinger of solder residues or other possible contaminants.
For this you can use a regular file. In addition, you must prepare the solder and flux, without which you can not solder the wires with a soldering iron. With regard to solder, in order to solder the veins, you can use either an alloy of tin and lead, or a special thread, as shown in the photo below. 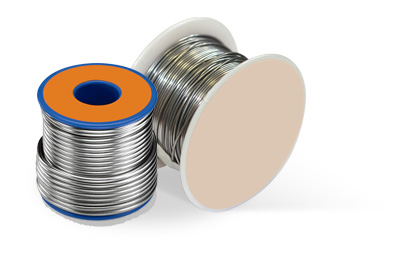
Flux is necessary to ensure that during soldering the solder evenly covers the soldered materials. In addition, the flux relieves copper cores of the oxide film, which significantly worsens the reliability of the connection. As a flux, you can use either rosin or a special soldering acid. And the one and the other option is popular with the masters. 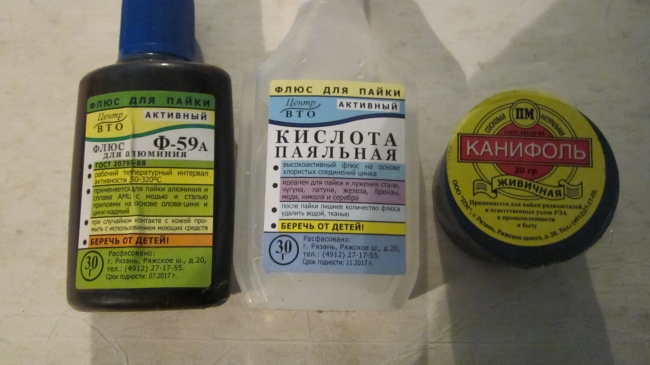
Another important stage of preparation is the creation of a suitable workplace. You should have a socket and a stand for the soldering iron, so that the soldering technique of the wires by yourself would be safe.
By the way, you can, that will not take much time and effort. Homemade device will last you for a long time, as you can see for yourself!
Step 2 - Carry out tinning
So, if you need to connect two power wires to each other, then first of all you have to remove the polyethylene insulation and tear bare strands, especially if they are very thin. The stranded conductor is first twisted before soldering, after which it is processed by flux, on top of which a thin layer of heated solder is applied. Be sure to prepare the soldering iron tip before dipping - dip it into the flux (in the same rosin as shown in the photo), and then into the tin, so that the tip is covered with a small layer of solder.
For soldering, it's quite simple to do it - first you have to put the bare core on rosin, then warm it with a soldering iron so that the wires are submerged in flux. After that, it must be obtained and evenly processed from all sides with solder. In order to apply a well-heated alloy of tin and lead to the surface well, twist the wire during tinning. If you need to connect the wires in the junction box, you can use acid instead of rosin for convenience. It is simple enough to apply a brush on the surface, which you need to solder. 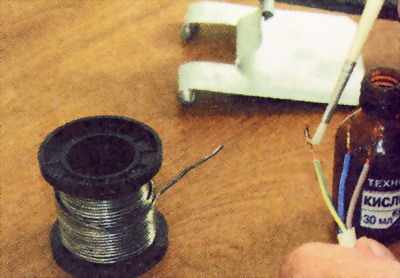
If the veins are of large section (thick), tinning is carried out in a similar manner. The only difference is that it is not necessary to pre-twist the wires, as in a multiwire conductor.
After you do the tinning, you can proceed to the soldering process. Immediately, we draw your attention to the fact that it is necessary to perform work only with electricity cut off. It's strictly forbidden to wire live!
Step 3 - Solder the wires
Well, the last thing left is to solder the two prepared wires in the switchbox. All you need is to twist or overlap the wires to each other and heat up the connection place with a soldering iron. The solder will melt and after it has solidified - it will reliably connect the electrical conductors. We considered the advice separately. 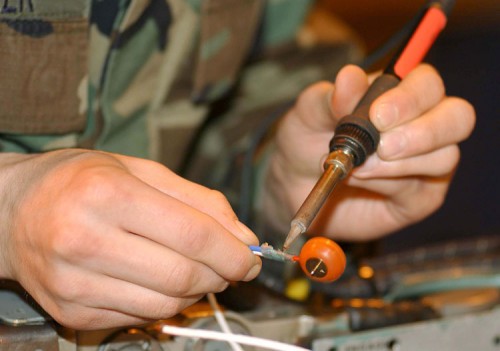
The important point is that during soldering do not move the wires, otherwise the connection will not be reliable enough.
It should also be noted that pre-tinning can and should not be done, but simply twist the wiring in the drawer box, treat them with a flux and properly disperse. However, we do not recommend this to you, because in this case the connection will be an order of magnitude worse.
The final touch is the isolation of the cooled area. About that, we told you. It is best to isolate each strand separately with insulating tape, and on top of it, use a heat shrink tube. In the video below you can view in detail the entire order of soldering:
Learning to solder the wires with a soldering iron
It is important to know!
Above we told how to solder the wires in the junction box, but this procedure does not work, if you need to solder the contacts with the diode band or even on the board (chip). So, give a brief overview of the possible soldering technologies:
- . If you need to connect the LED ribbon, which means - to solder the contacts from the power supply with the leads on the tape (copper circles), first zaludite veins plus and minus, then treat the acid leads on the tape and drip the melted solder onto them. All that remains is to press the wires to the connection point and warm with a soldering iron. When the solder is cold, insulate the exposed area using an adhesive gun or heat shrinkage.
- Work with boards. If you decide to solder the wires on a chip, then the soldering technology will be more responsible. To solder a capacitor, a transistor, a resistor or the same LED, you need a soldering iron with a power of 5 to 20 watts. A more powerful device can overheat the board and then your efforts will be in vain. In addition, the sting should be very thin, because The excess of tin will act as bridges, which in turn will "shorten".
- Soldering headphones. If you suddenly decide to repair the headphones with a 3.5 plug that often break in the connector area, then first look at the video on the Internet, which tells how to learn how to solder enameled thin wires with a silk thread inside. In short, you will have to clean the enamel to copper, perform tinning and then just solder the plug to the wiring.