And so on. For the time being, it's convenient for us to run through them, but ... the rainy season begins, and what? .. It is necessary to quickly find somewhere in the attic old rubber boots, and even grandmother's galoshes to wear. It's messy!
Let's look at ways of creating good garden paths that will last for more than a decade, and they will look much more beautiful than old cozy but such plain paths.
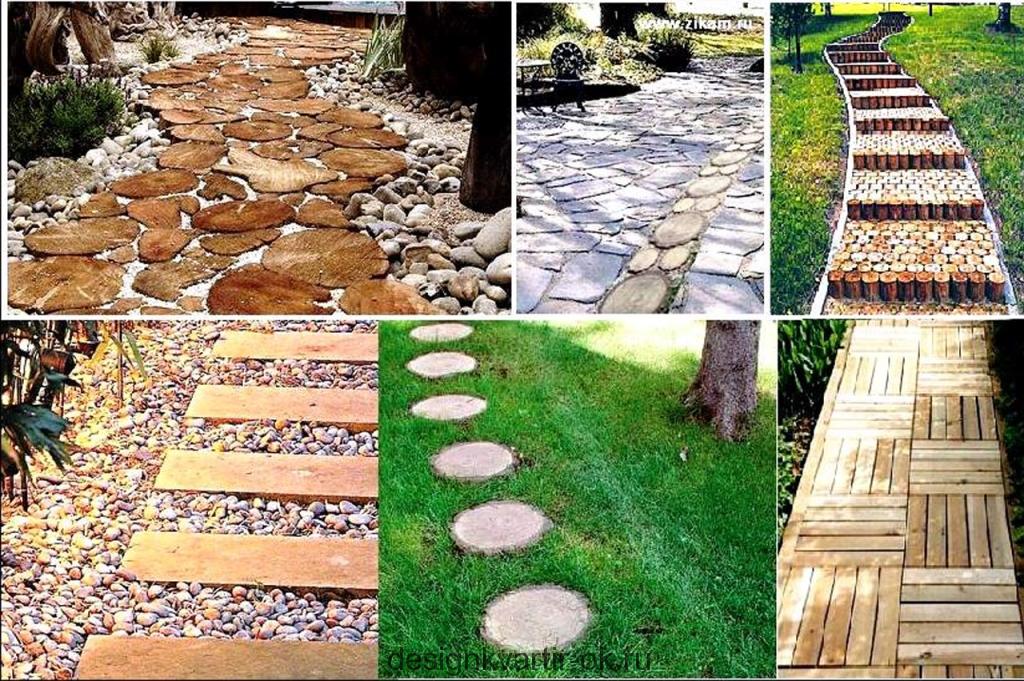
For the construction of garden paths there is a mass of ready solutions. What kind of species and now you will not find on sale! Just eyes run. But for dacha owners with not very high incomes, the price of such material is very "biting")) Therefore, let's look at simple and economical ways to make paths in the dacha with our own hands from improvised material.
Than to pave?
At once there is a question: than to pave? Very successful design approach - to build garden paths from the same material, from which a country house or country house is built. Especially, for certain you have preserved the remains of the building material:, or. For example, if the basement of the house is faced with a white stone, then the paths "running away" from the house to the garden, lay out with a stone, and then the stone can be replaced with paving stones, or something else. If your country house, then in the design of the garden path with your own hands it is good to apply a combination of wooden beams with stone, ceramic granite slabs or gravel. And with a brick house will combine a strong path of bricks, only a brick for garden paths you need to use the paving clinker, because the usual building in a couple of years will fall apart. In general, look around and show wit))Concrete path with own hands
Many summer residents, not philosophising craftily, build monolithic concrete paths. Sturdy, but so sad ... However, and concrete paths can be refined: it's nice to decorate them at the time of construction with colored mosaics, pieces of ceramic tiles or. And to build such tracks with their own hands in the country is very simple.
- Noting the width and length of the track, its bed is buried at 8-10 cm.
- Then sprinkle it with sand to a height of 5-6 cm, sand is well compacted and spilled with water.
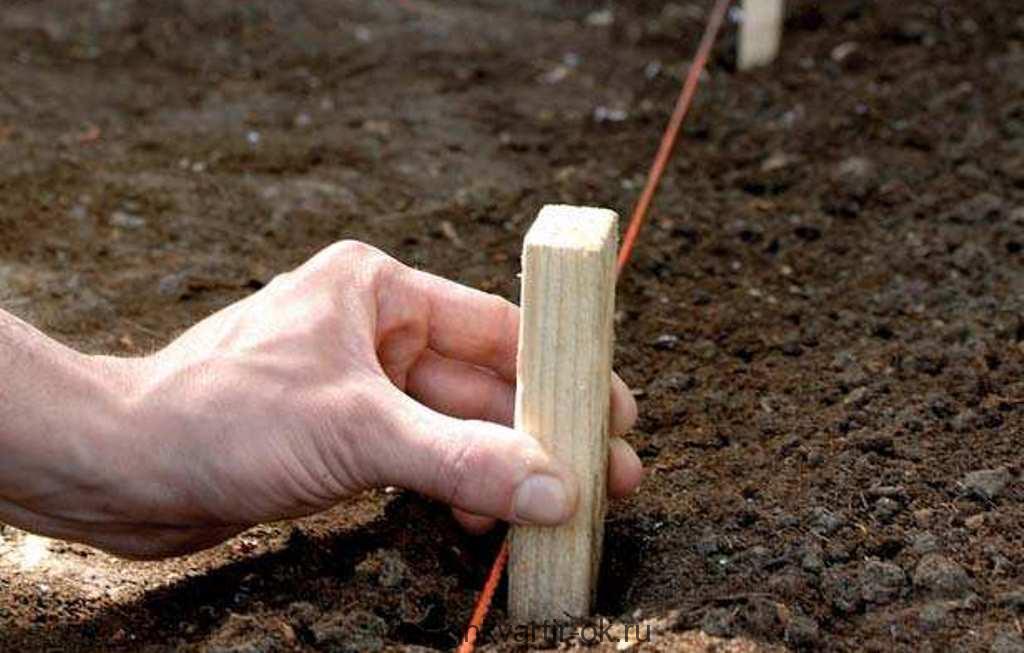
- After the entire length of the bed of the track, frames are mounted, knocked out of wood or plywood, leaving a distance of 5-7 cm between them. The width of the frame should correspond to the width of the track. The most optimal and easy-to-use size of the wooden frame for concreting: 60 x 60 cm.
- Then the frame is poured, and when it dries slightly, beautifully spread decorative elements on top (you can even use ordinary shell rock).
- After the track dries completely (2-3 days), the land between the slabs is planted with unpretentious plants for the lawn. That's all)) - the concrete path is ready with your own hands.
Garden paths from planks by own hands
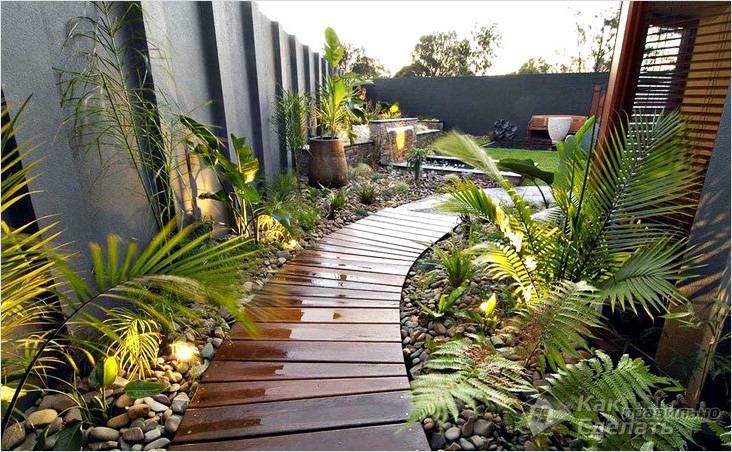
The best material for creating a wooden path will be not rotting wood.
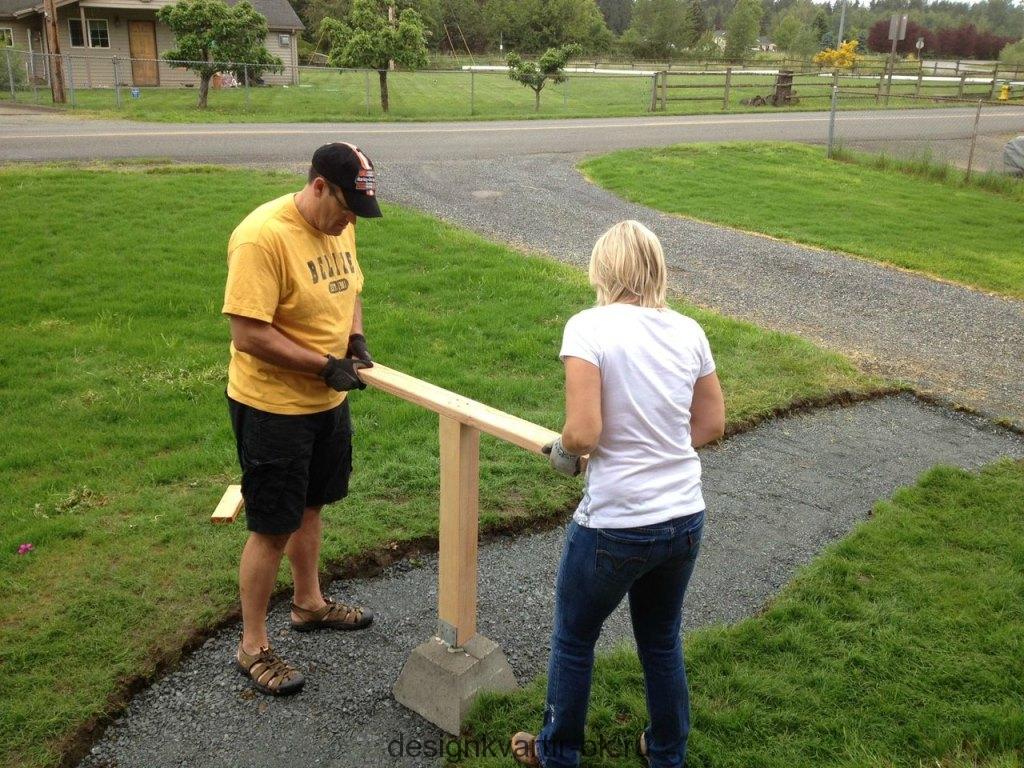
- Pathways made of wood usually lift above the ground, strengthening them on strong massive beams, treated with a special composition from rotting.
- And the bars, in turn, are set on a layer of gravel (5-6 cm).
- Gravel preliminarily carefully level on the whole lodge of the garden path.
- Flooring is not done at any price, but with an interval of 1-2 cm between boards to provide a kind of "airing")) Thus, the boardwalk will last much longer.
Garden paths from wooden chukok with their own hands
It is also possible to build a garden path from wooden chutes or cross-sections of thick trees, pretreated to protect them from rotting.
For this:
- According to the planned lodge, the paths are digging a trench 5-6 cm deep more deep than the height of the chicken or wooden "rounds".
- The bed is covered with gravel (2-3 cm), then sand (2-3 cm), carefully compacted, watered abundantly and as tightly as possible in a bed of chocks.
- After that, gravels are covered in gaps with sand and again abundantly watered.
1. In a bed of a track densely establish chocks:
2. Level the chicks with the help of a sledgehammer:
Form for the garden path. Photo from the site telemagazin24.ru
Their cost varies from 900 to 1200 rubles. We will need you at least 4 identical shapes.
1. First, determine the location and width of the garden paths using pegs and a rope. Here I want to note: similar forms, like puzzles, are easily adjacent to each other, and the size is, as a rule, 60x60 cm, which is quite enough for a narrow garden path. If you want to build a track wider - 1.2 m, then fold two forms not along, but across the bed.
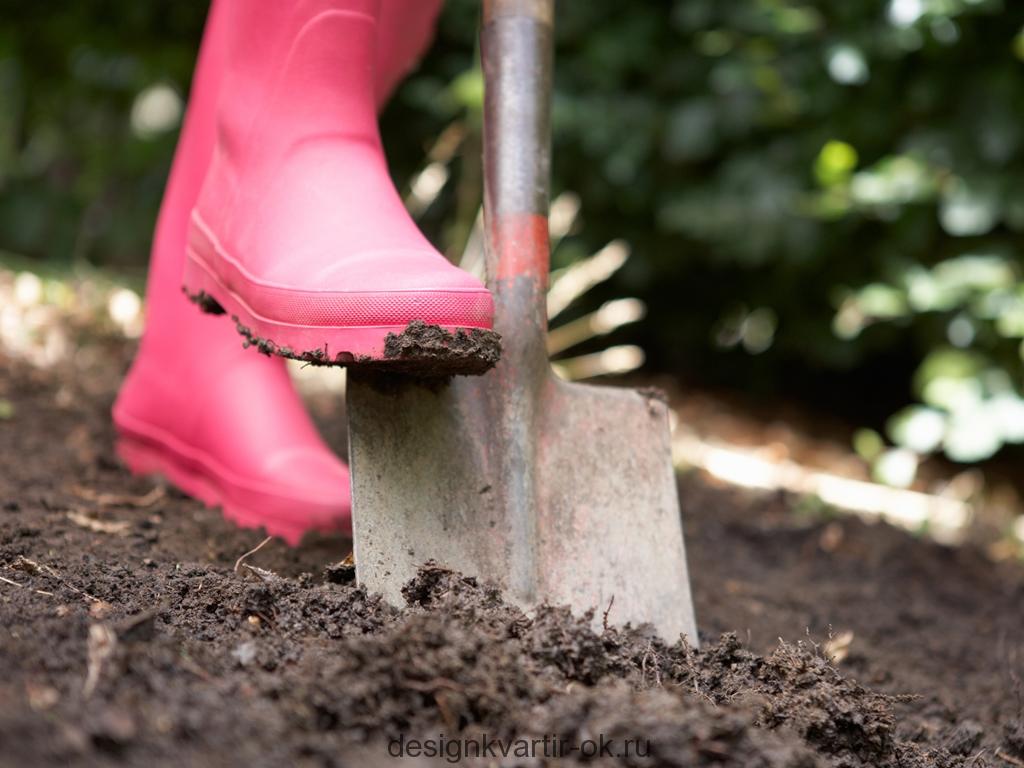
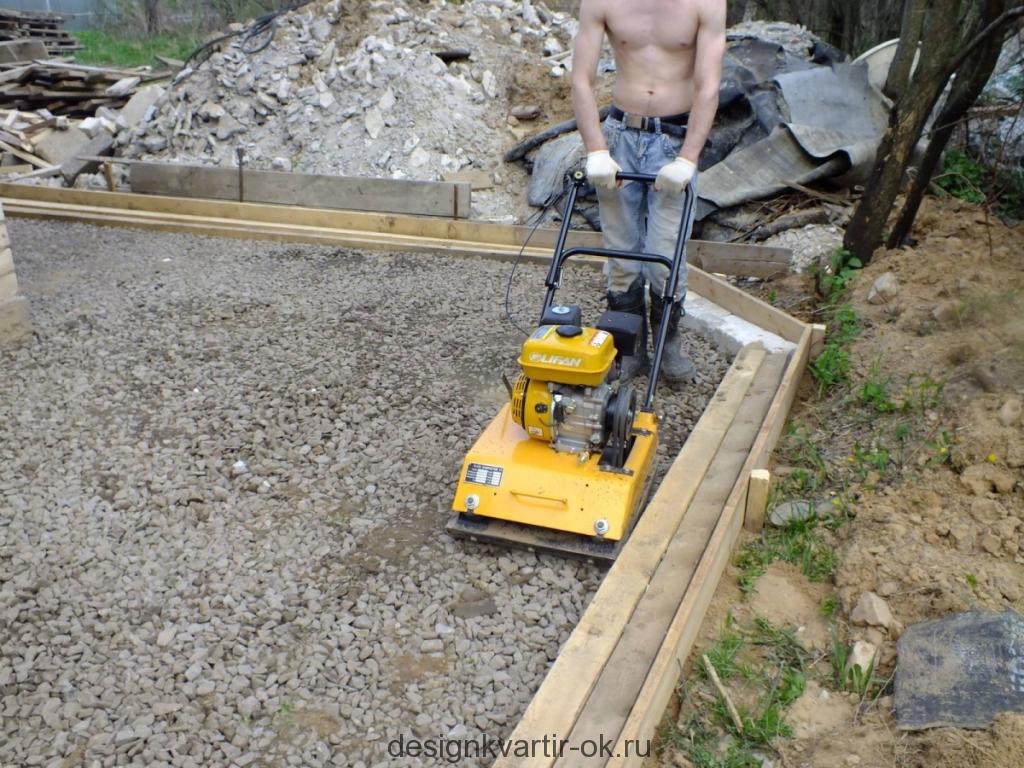
2. Now arm yourself with a shovel and prophesy along a planned trench with a depth of 8-10 cm. Tightly tamp the earth. For this it is better to use an electric vibrator; You can also ground the earth manually, but this will require a lot of effort. In a well-packed trench, fill a layer of rubble or pebbles (3-4 cm), and top with river sand (5-6 cm). Before laying the mold, sand abundantly pour water from the hose with a sprayer. Then lubricate the molds with engine oil (for want of use, you can use the usual vegetable) and install them on wet sand.
The solution will "grab" in 30-40 minutes, and the forms can be carefully removed, shifted them further along the path of the future path and repeat the procedure. Shape molds with semi-dry cement is quite easy (if you, of course, do not forget to lubricate them))

5. While the solution is not completely dry, you can decorate the path with pieces of colored tiles, ceramic granite, beautiful pebbles or other material. You just need to press the decorations into the cement a little, and they will stay very firmly after the solution dries completely.
Now the most difficult phase of work remains)) - to protect your newly created masterpiece from the encroachment of domestic animals or the pampering of children, because the cement slurry will dry completely after 2-3 days, and even if it is sunny. Therefore, think over the "defensive measures", plaques with the inscription put or temporary fences.
The article is placed in the sections:,
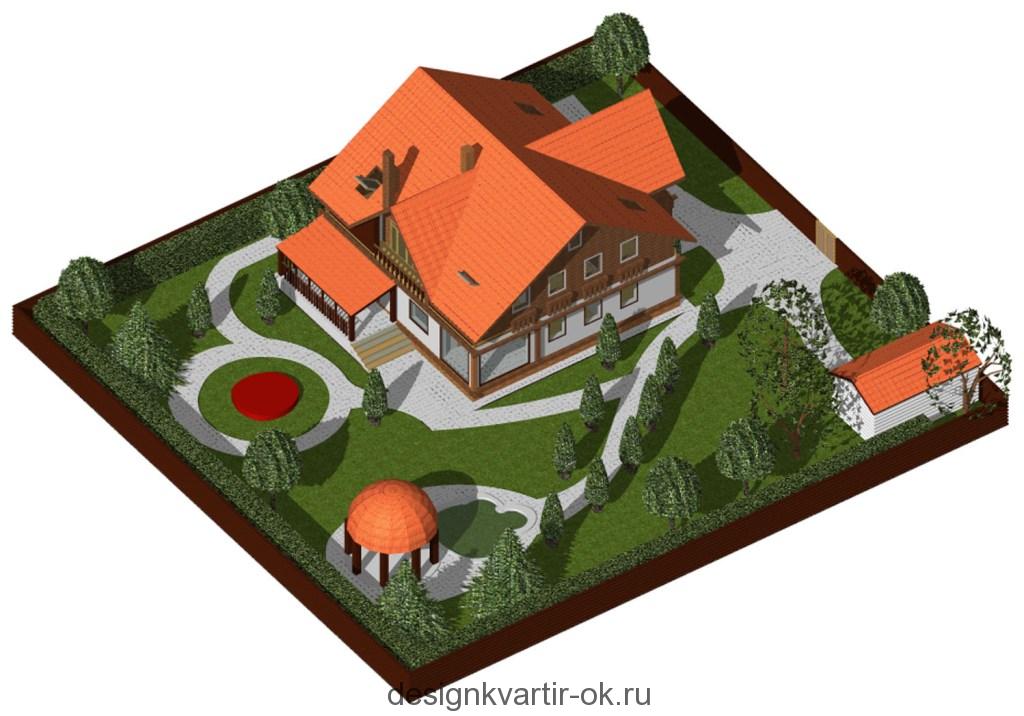
The paths at the dacha should meet such functional requirements as: interconnection of certain types of buildings, providing comfortable walking, and breaking down the site into certain zones. Answer to all these functions can only qualitatively and competently arranged tracks, made in accordance with all requirements.
Paths in the country with their own hands
Practically each of us has a summer residence, and as it would be desirable, that on our site all was beautiful, including paths. And the tracks we have, as a rule, everywhere: the inner paths in the garden, between the beds, the central path to the house, etc. Tracks can be made from various materials: wood, stone, brick, paving slabs, etc.
How to make tracks yourself
To make any tracks on your site, you need to make an accurate calculation and scaling, draw a layout, calculate ergonomics. Next you need to select the material from which the tracks will be made. Which to choose? Here everything is at your discretion and purse. Consider some types of materials for these purposes: paving slabs - looks great, provides drainage, disadvantages are high prices and difficulty in stacking; gravel - it can be used to make wonderful rainy paths throughout the site, creates a wonderful appearance, perfectly removes water, but, alas, is too short-lived; wood - creates a good aesthetic appearance, has a long service life, a lack of a laborious process of execution.
Of course, this is not the whole list of materials for making tracks.
 Let's consider some variants of manufacturing of paths by own hands. The paths can be either straight or winding, intricately winding around the garden. To qualitatively execute the whole process, you must first draw a plan and make appropriate markups. For the marking of a straight path, a stretched cord will perfectly come off. Marking for a winding path can be done with the help of ordinary rakes, just driving in the edges of the long nails and dragging along the previously thought-out line of the future track. As for the width, it all depends on the design and your preferences, but it's better if the track is not already 50cm. On the marking line, remove the layer of soil in the depths of at least 30 cm. When digging a trench, try to lay the necessary slope for a better drain of water. The walls and bottom of the trench should be well padded and filled with drainage, in the role of which you can use a large rubble. Then the drainage layer should be wedged with a layer of earth and sand. You can proceed to the decorative coating. If you plan to fill the tracks with concrete, you need to put the reinforcement on top of the drainage. If you add different colors to the concrete, you can get an original decorative coating.

A nice decoration of the cottage is marble and granite, which is better to use small pieces, rather than solid plates.
To lay a decorative tile it is necessary on a dry cement-sand mix, along the edges a curb is executed. After the installation, the tile should be taped with a rubber mallet.
Paths in the garden with their own hands
Without paths on the backyard can not do. It is they who connect the house and various parts between them, ensure the comfort of walking, regardless of the weather. In addition to all this, the garden paths break the site into certain zones.
Before building the paths in the garden, you need to plan them. For proper planning it is necessary to determine the so-called focal points - the places to which the trails go. One of the tracks must be laid from the gate to the porch. The number and shape of the other tracks depend on your imagination and site design. The tracks must be carried out so that you have the opportunity not only to pass from point A to point B, but also to walk along them, showing the charms of your site. Do not make the tracks too tangled and twisty.
Do not forget about the driveway - it should be capital. Here it is best to use asphalt or gravel.
From what you can do the paths in the garden. The choice of materials, basically, depends on your imagination and prosperity. The most simple, inexpensive and quite popular are sand, gravel and brick crumbs. The main disadvantage of sand is its quick wash-out and the need for constant renovation. Next comes the brick. The paths from it have a beautiful appearance, but the process of laying is very laborious and requires certain skills, besides, the brick is not too durable.
Another common type of production of garden paths is concreting. In order to perform such a path, you first need to lay out the formwork in which concrete will be poured.
Also widely used paving slabs. It looks great, durable. The main disadvantage is a rather high cost.
Walking paths with own hands
Dachshunds, made by themselves, allow not only to improve the appearance of the site, but also greatly facilitate everyday life.
Create, manifest imagination and enjoy the fruits of your labor. Good luck to you!
udec.ru
What sorts of classifications are not available-both for material for manufacturing, and for location and size. We will take a division into species based on the method of the device.
Garden trails
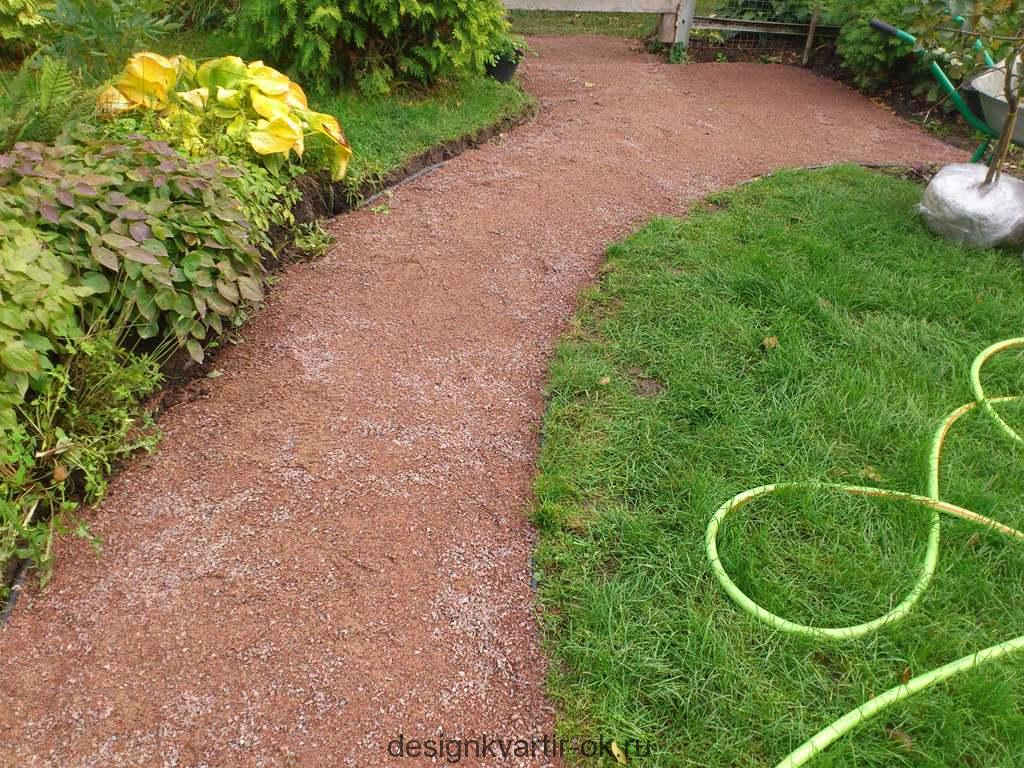
This is a natural view, as the paths appear on their own, without special planning. Usually, they are trodden by people's feet or tamped with wheels of garden machinery and serve to connect the most important points of the site - a house, a bath, a garden, a garden, a gate. The usual dirt track has minuses (mud after rain, puddles, overgrowing with grass), so it is only possible as a temporary option. The path, by the way, can also be ennobled: just lay out the edges of the cobblestone or sidewalk tiles.
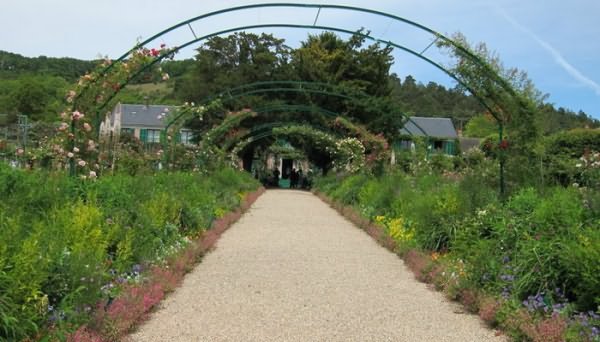
Garden trails - the best option for sites located in dry areas
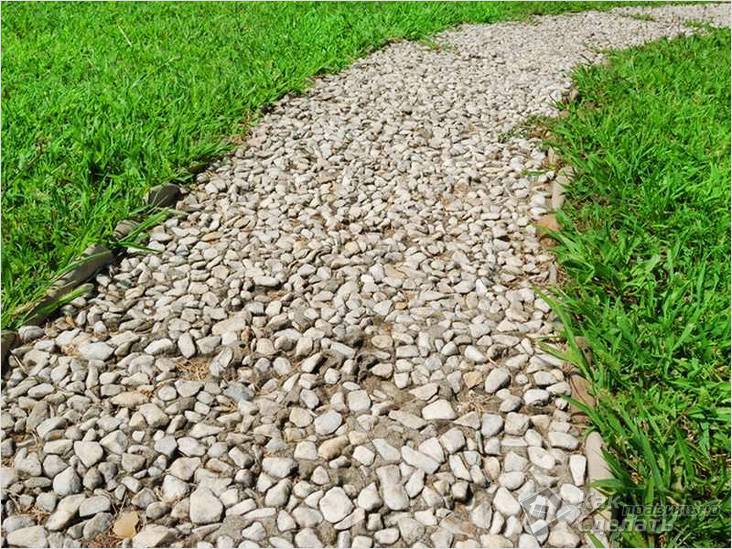
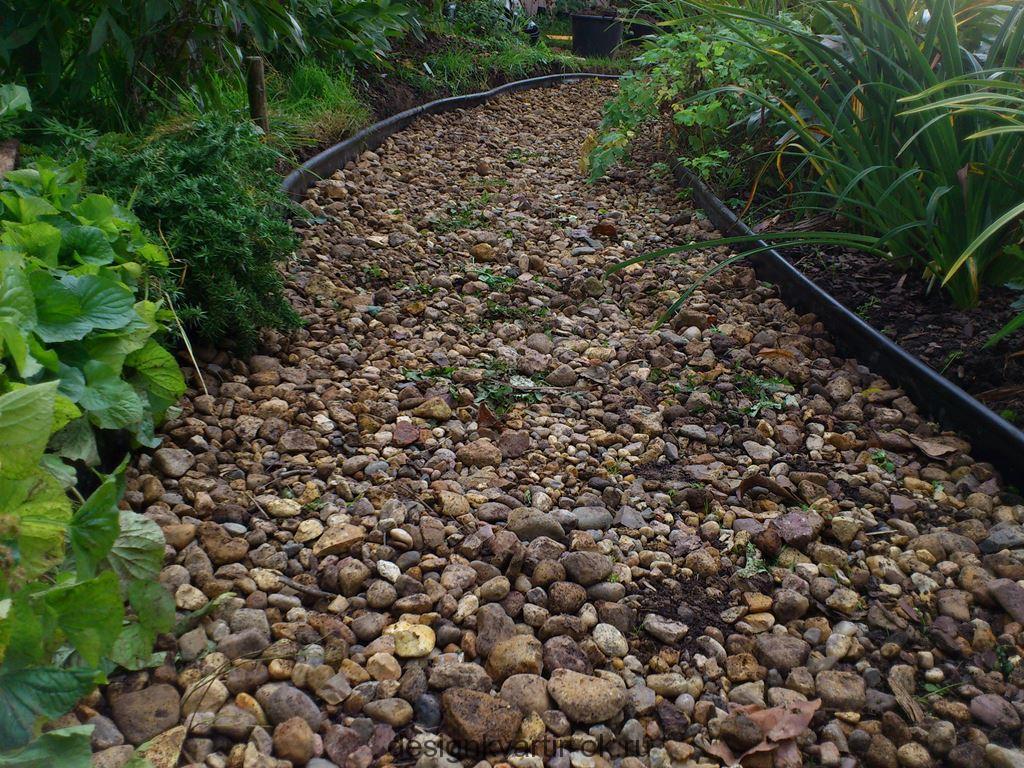
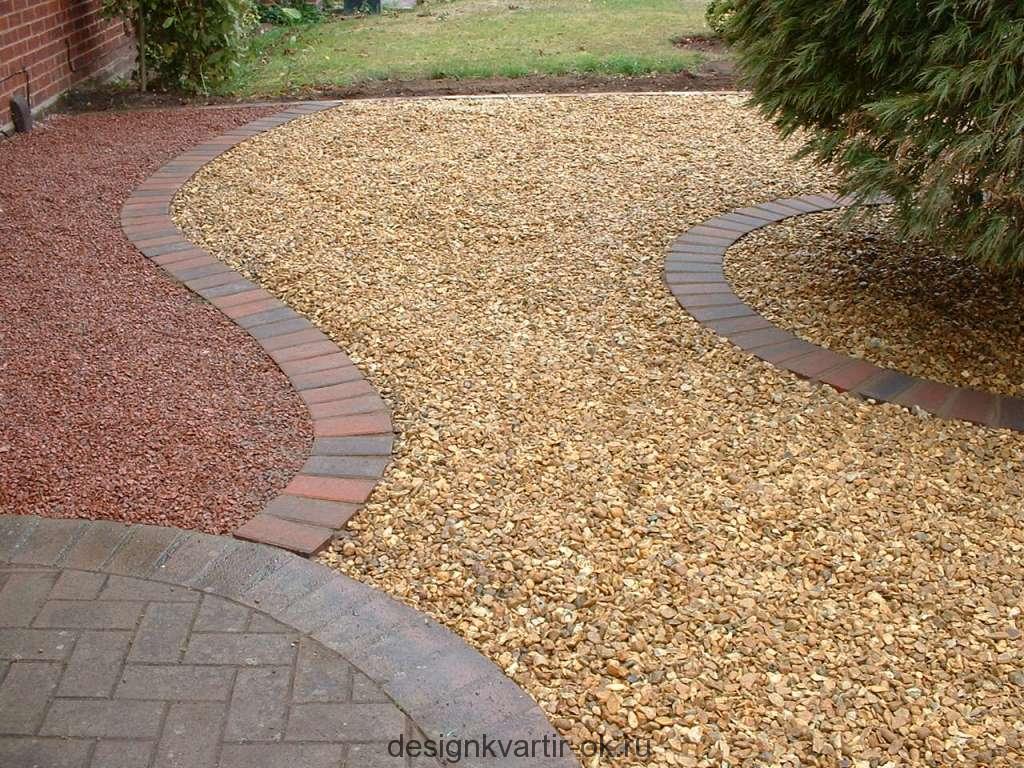
Tracks with backfilling
They are easy to arrange: you should dig a ditch, approximately 100 mm deep, lay geotextiles (density not less than 150 g / m²) on the bottom and edges, and strengthen the sides with a curb-ribbon. It will remain on the finished base to fill pebbles, crushed stone, marble chips or screenings. If this option seems simple, you can additionally lay on the surface of stone or concrete slabs - in an orderly or chaotic manner. For ease of movement, the slab should be drowned in the backfill, so that they are flush with the surface.
Picking up gravel or rubble of different colors, you can decorate paths or divide them into zones
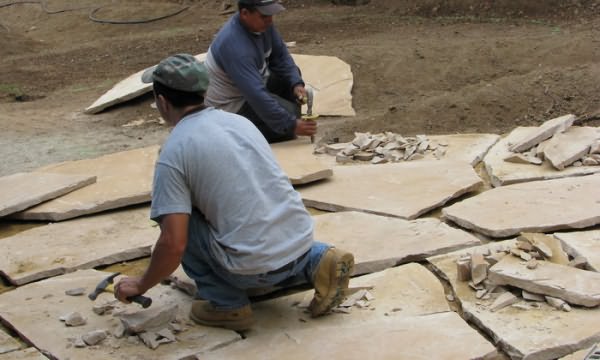
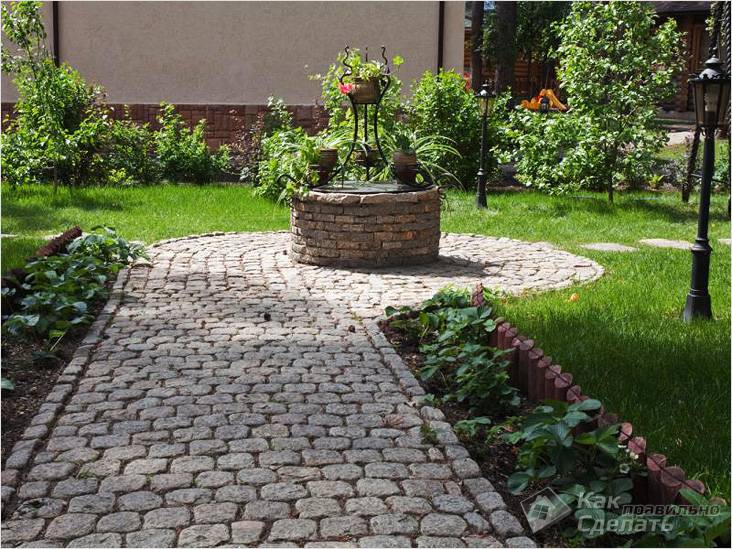
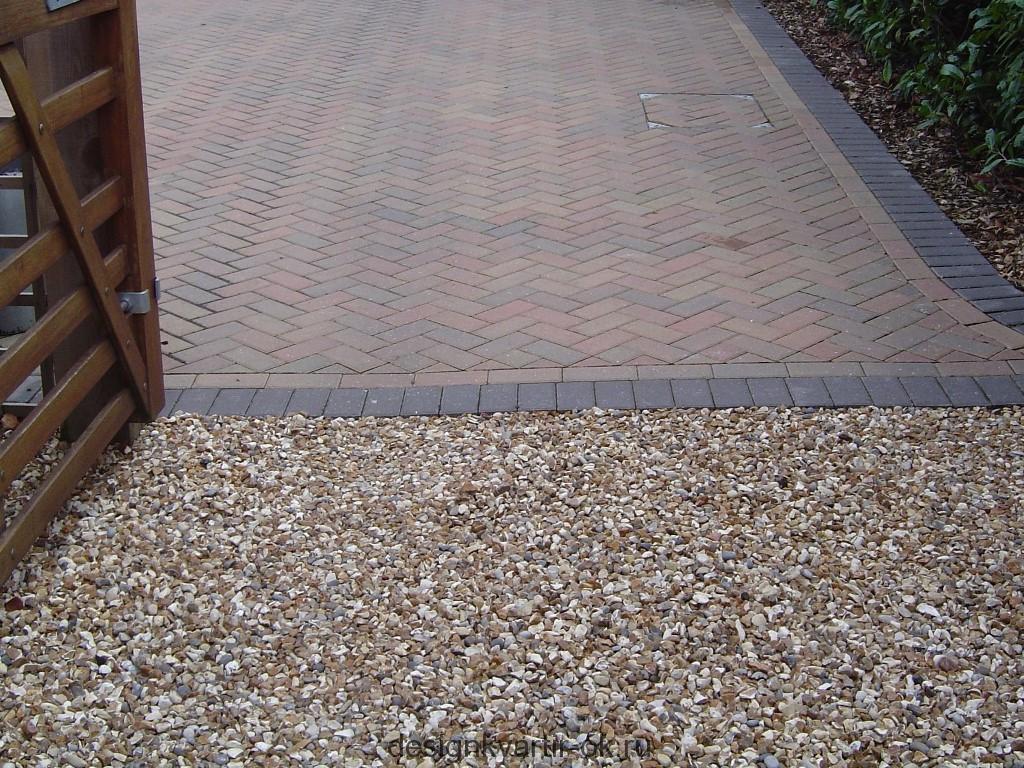
Solid flood lanes
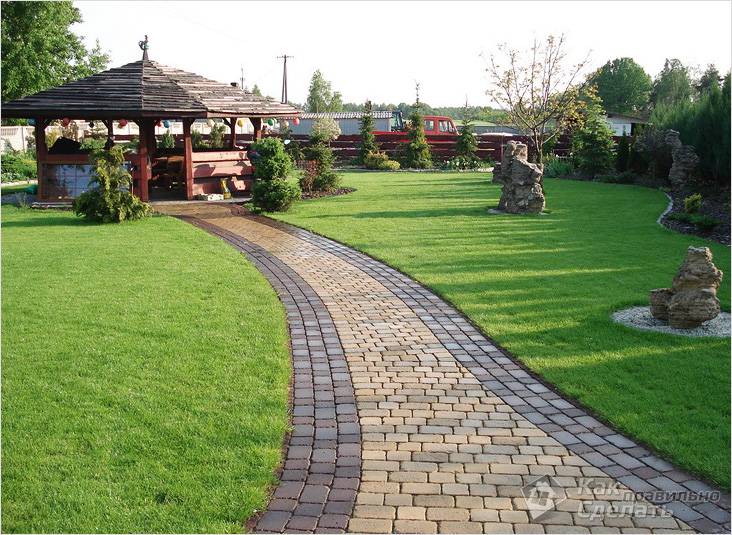
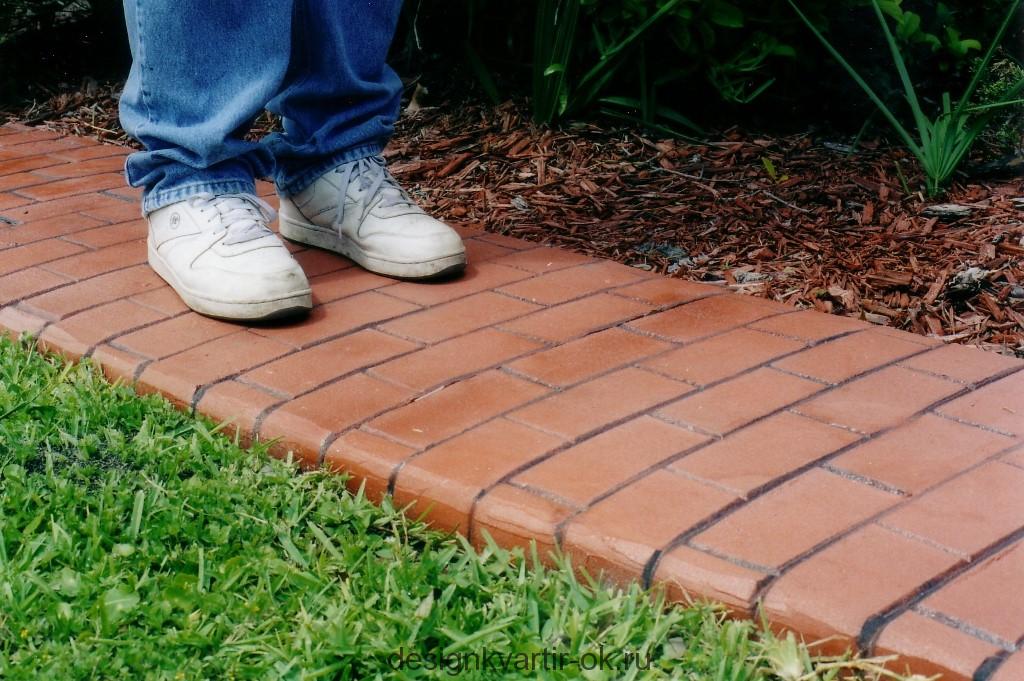
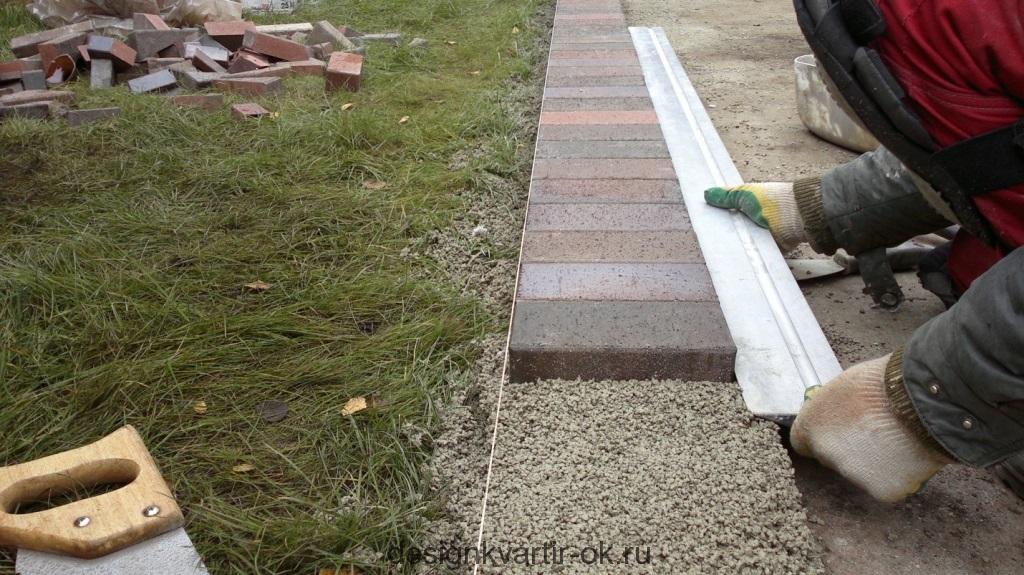
A durable coating is ideal for heavy loads. The paving of the garden paths takes place on a concrete foundation with further laying of decorative elements: tiles, paving stone, natural stone. Using material of different colors gives the decor a natural look. It is better, if the finished object will rise above the ground by 50-70 mm - this will save it from water erosion and soil sediment.
Tracks made of slabs or stone, laid on a concrete foundation, are distinguished by reliability and durability
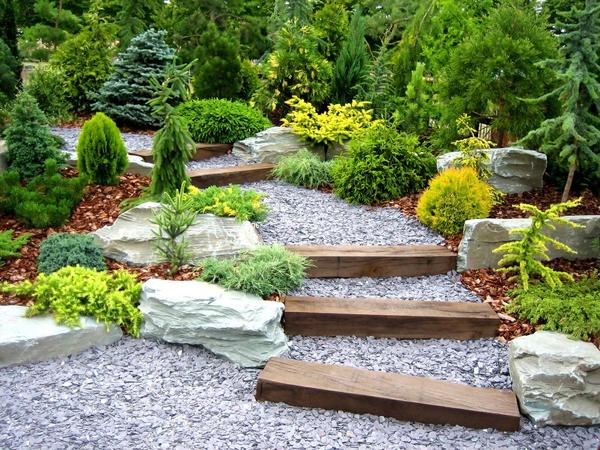
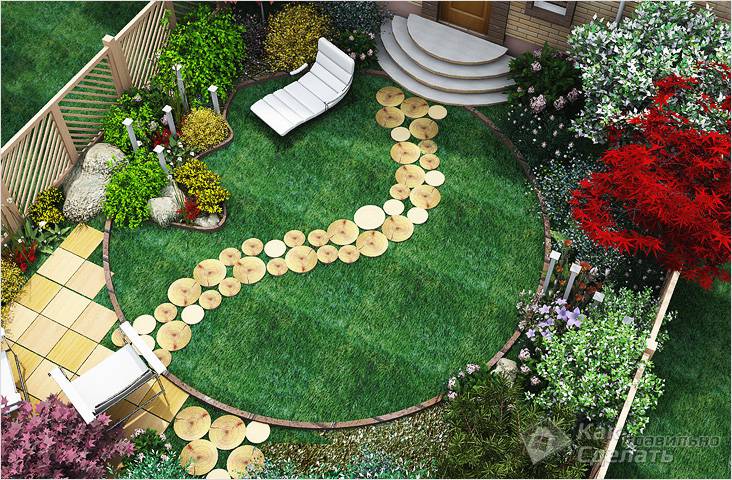
Budget and favorite dachnikov option - garden paths made of wood. The most popular are two types:
- using wooden bars;
- from wood splits.
If the climate is more dry than wet, you can use wooden blocks or thick boards that are easy to buy in any building supermarket. It's better to stay on solid rock. The same segments are cut (length 100 cm, width 30 cm and thickness 15-20 cm) and laid on the prepared base - gravel or sand.
Each bar should be treated with fuel oil or a special composition that protects against moisture and rot. For the same purpose, liquid asphalt is applied to the underground part of the bar, and sometimes a standard sand cushion is arranged. Such combined coatings should be better laid in the autumn, as in the winter time there is a subsidence of the soil, due to which a natural ramming is performed.
For tracks from wooden bars it is better to use small gravel or crushed stone
Using spears of different size and color, you can create unique tracks
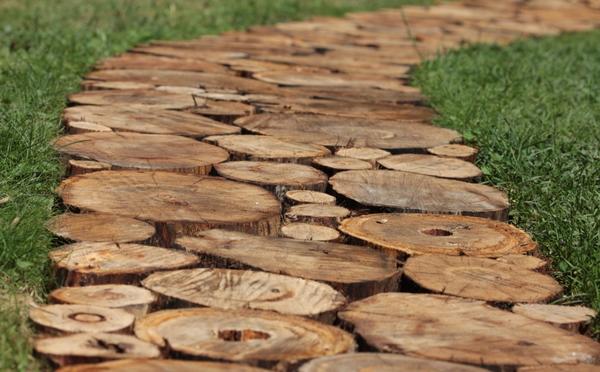
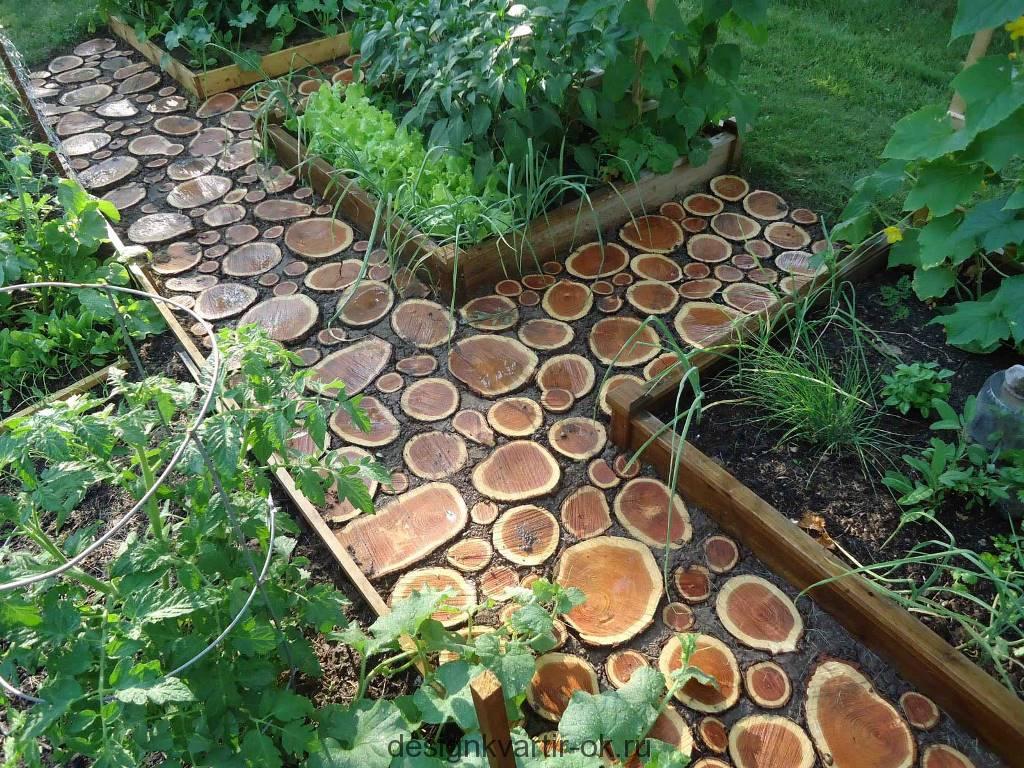
Old fallen trees in the country house - a real godsend for craftsmen. Cutting the trunks into parts, from the received elements - cuts - you can make wooden garden paths that look equally good, crossing the lawn or winding among the flower beds. In the course will go not only trunks, but also thick branches, with spills from which it is convenient to fill the voids between the large elements.
Screening strengthens individual elements, and geotextile protects the path from germination of grass
In order for wooden products to last a long time, they need to be processed from all sides by hot linseed oil, it is better to repeat the procedure twice. Between the saw and the ground put a piece of geotextile or polyethylene.
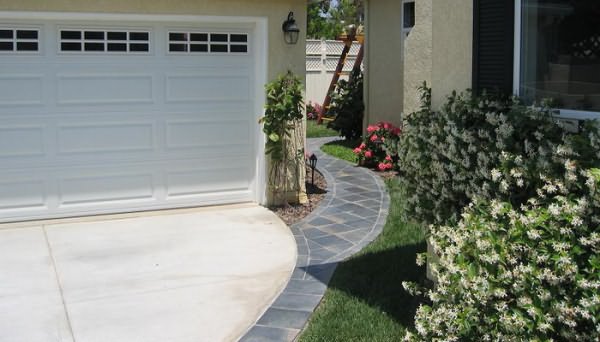
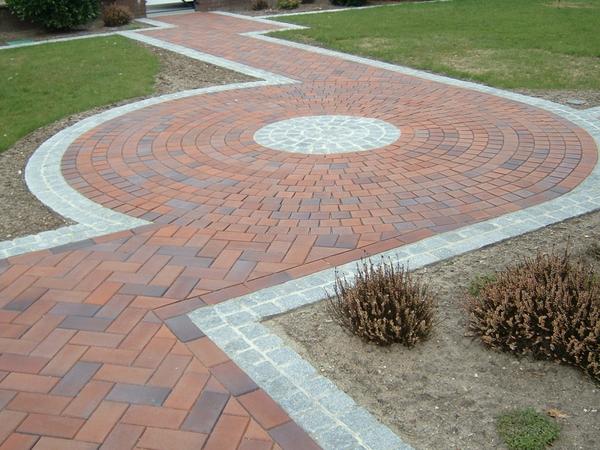
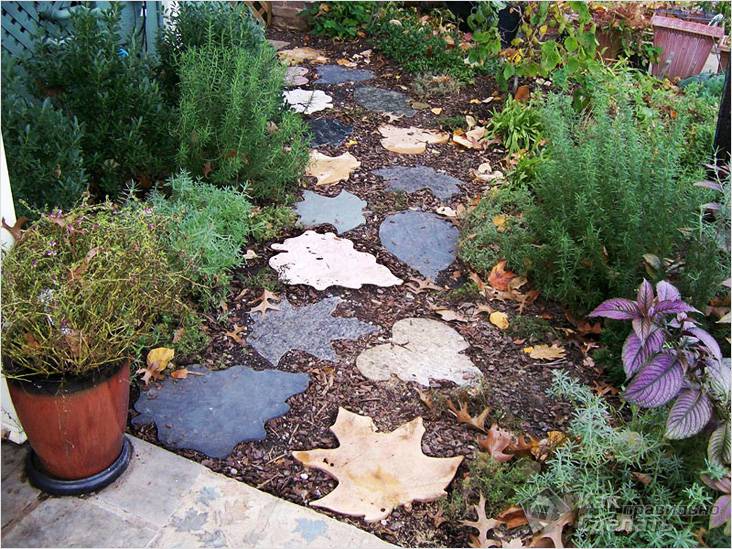
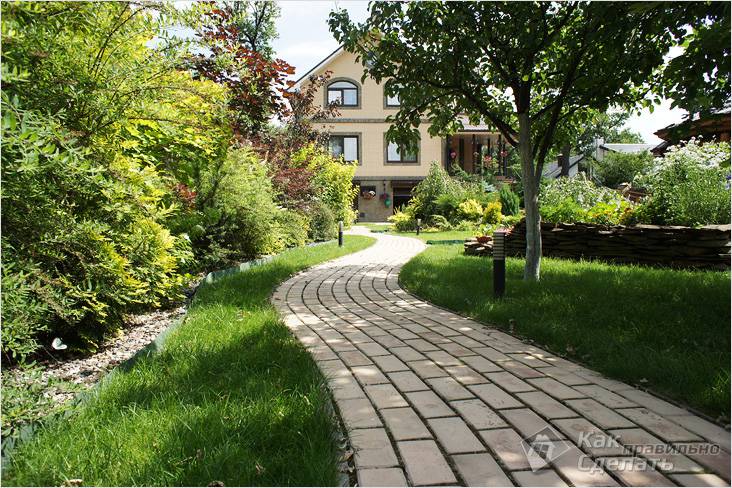
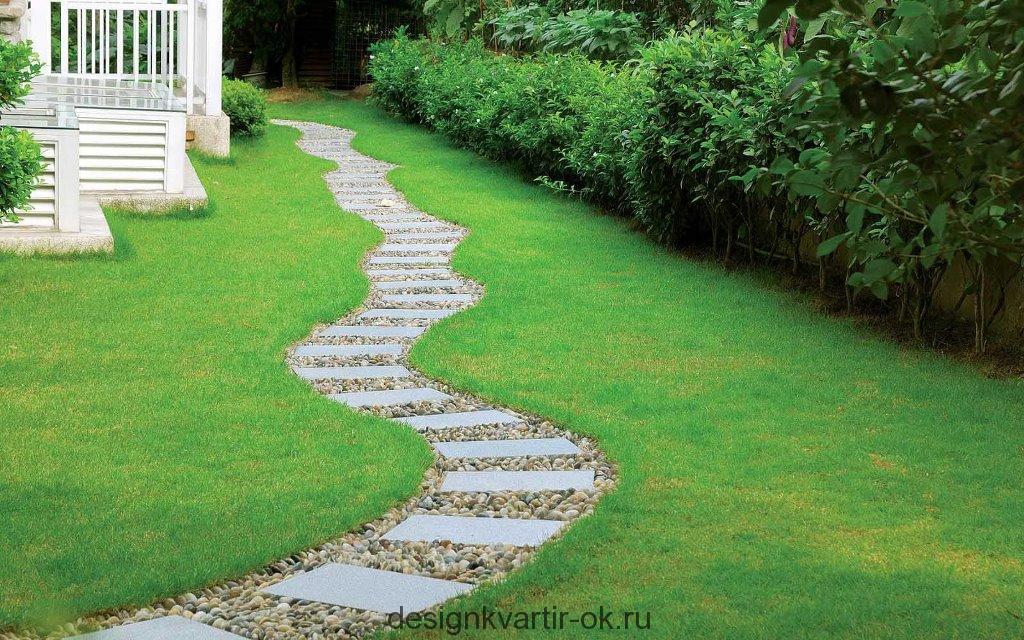
With the help of pictures and descriptions you can imagine how to make paths in the garden of paving slabs - a noble and lasting material.
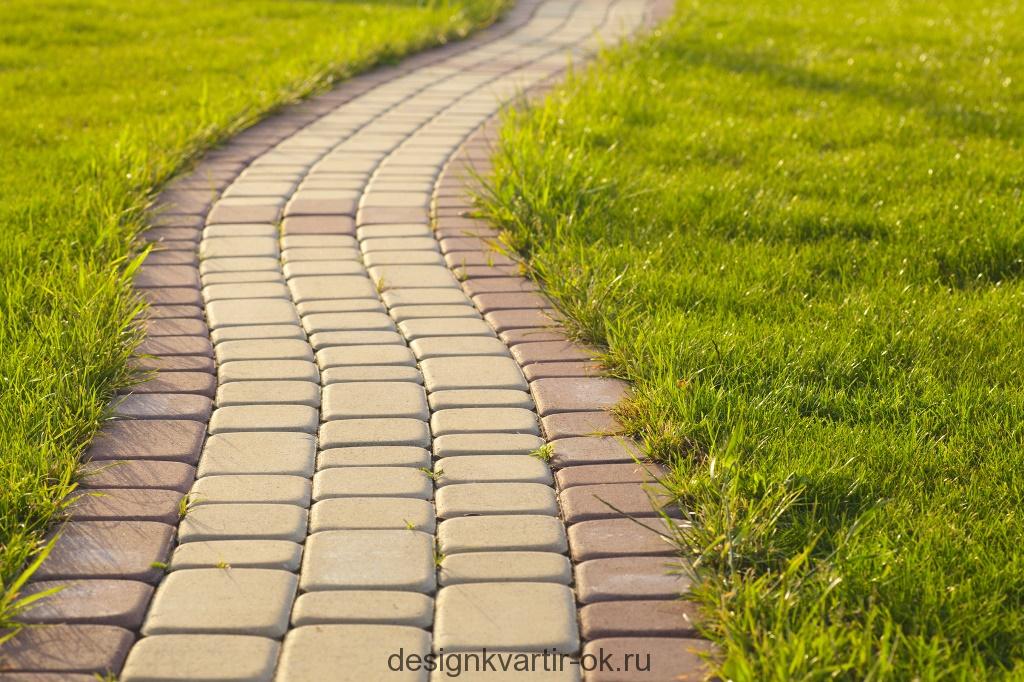
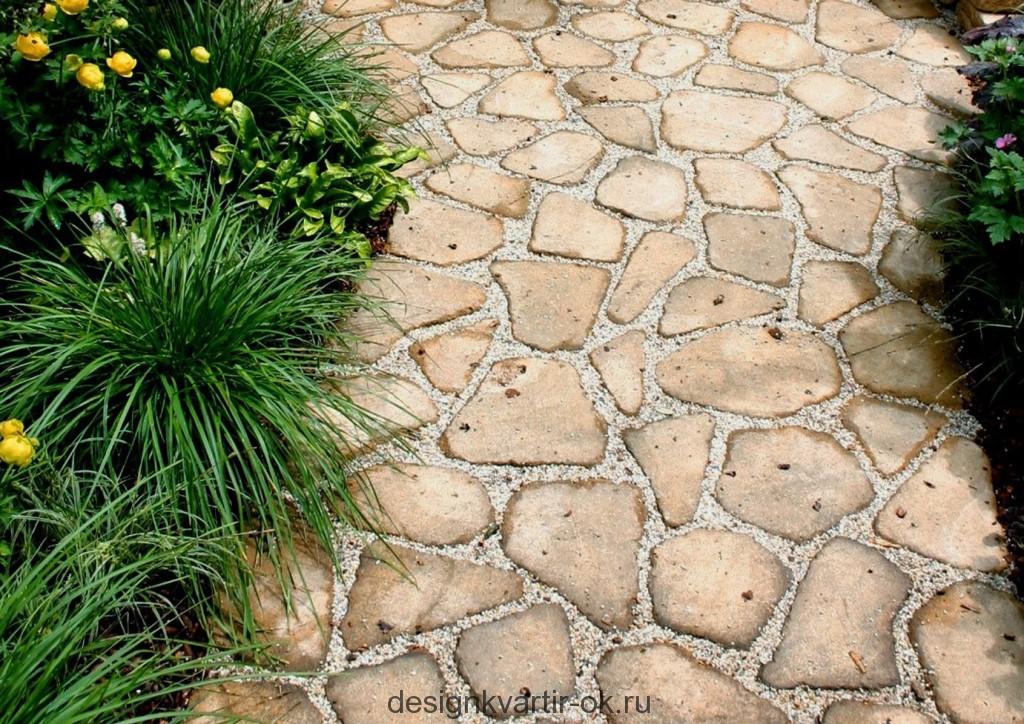
Paths from paving slabs of irregular shape look more natural than straight lines
diz-cafe.com
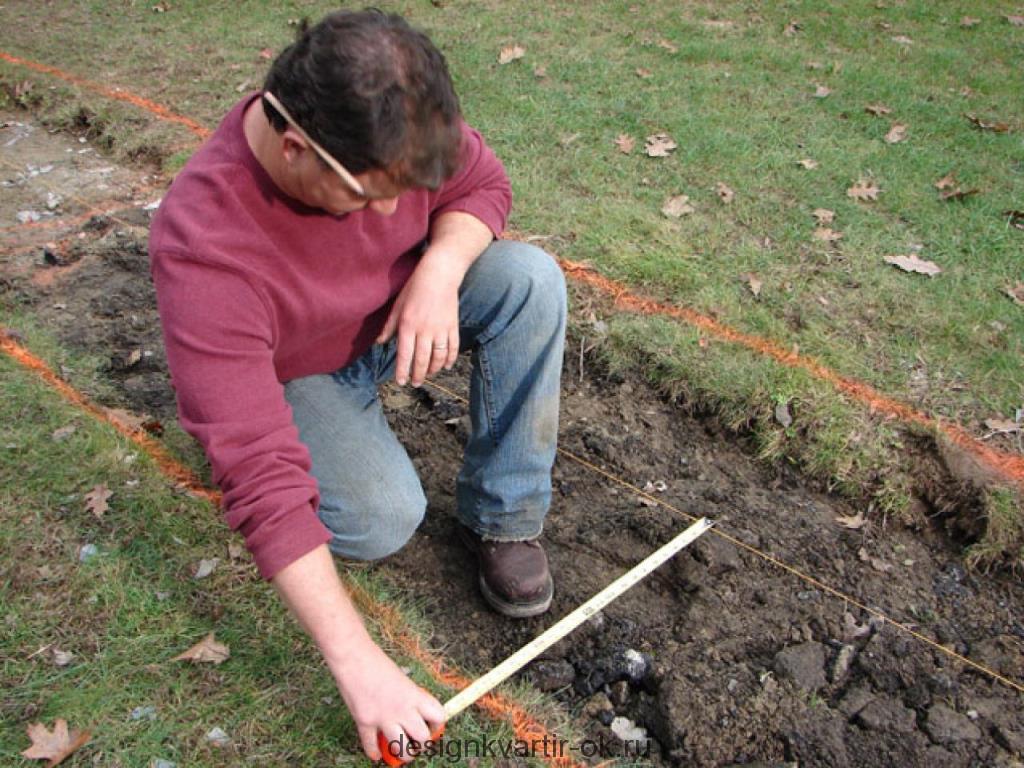
To begin with, using roulette you need to mark the boundaries of the track, all its bends and turns, at the corners drive in pegs, between them we pull the rope. Note that bends require more frequent driving of pegs. It must also be remembered to control the width of the track throughout its entire length. Shovel remove the top layer of the soil to a depth of about 15-20 cm. Align the created bed with a level is especially important if you plan to pave a large area site, for example, under the patio. Laying tiles requires the creation of a foundation for paving. It can be a sand cushion, a concrete base or rubble. Let's consider two variants of paving: on crushed stone and on a sand pillow
Back to contents
Sand pillow paving
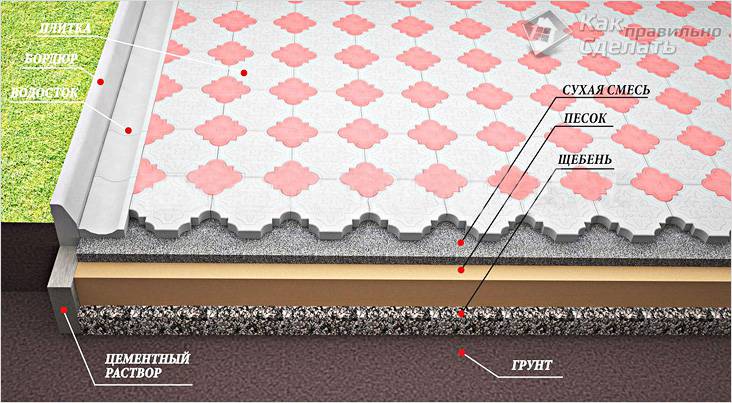
The scheme of laying the path from the pavers to the sand base.
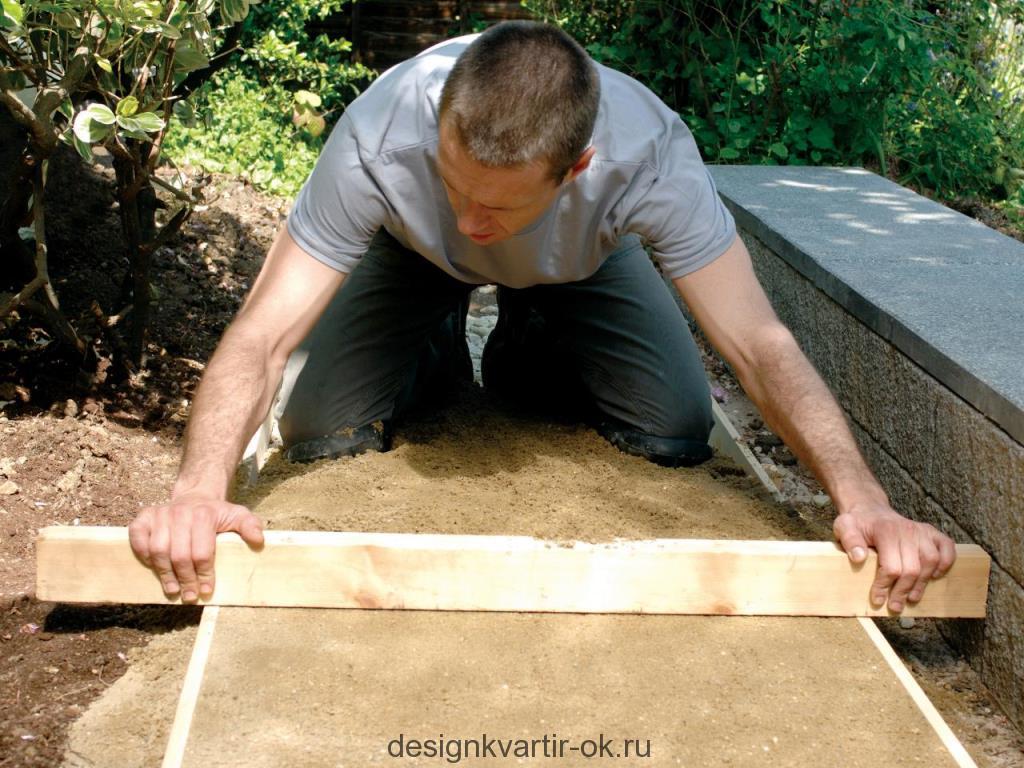
In the prepared bed we cover a layer of sand 5-15 cm thick, level the sand with rakes, then gently spill out of the watering can or from the slag with a sprayer, palm with hands. On the edges it is necessary to install a curbstone, otherwise the tile will "creep". The border is planted on a liquid mortar M 100, the sides of the curb are spilled with the same solution and filled with sand.
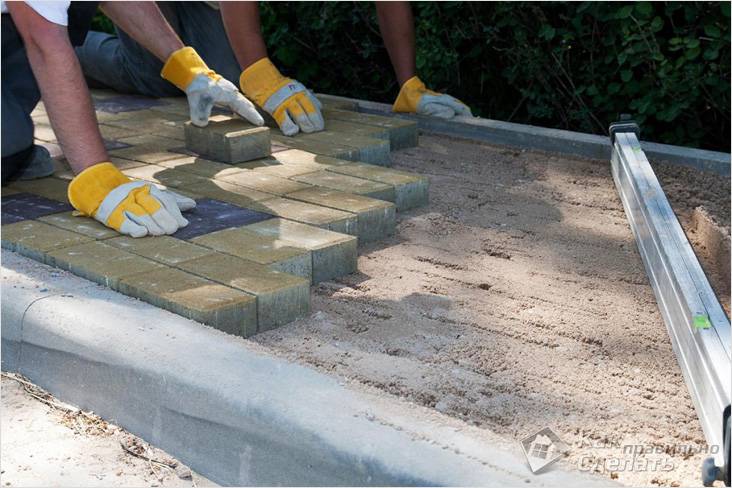
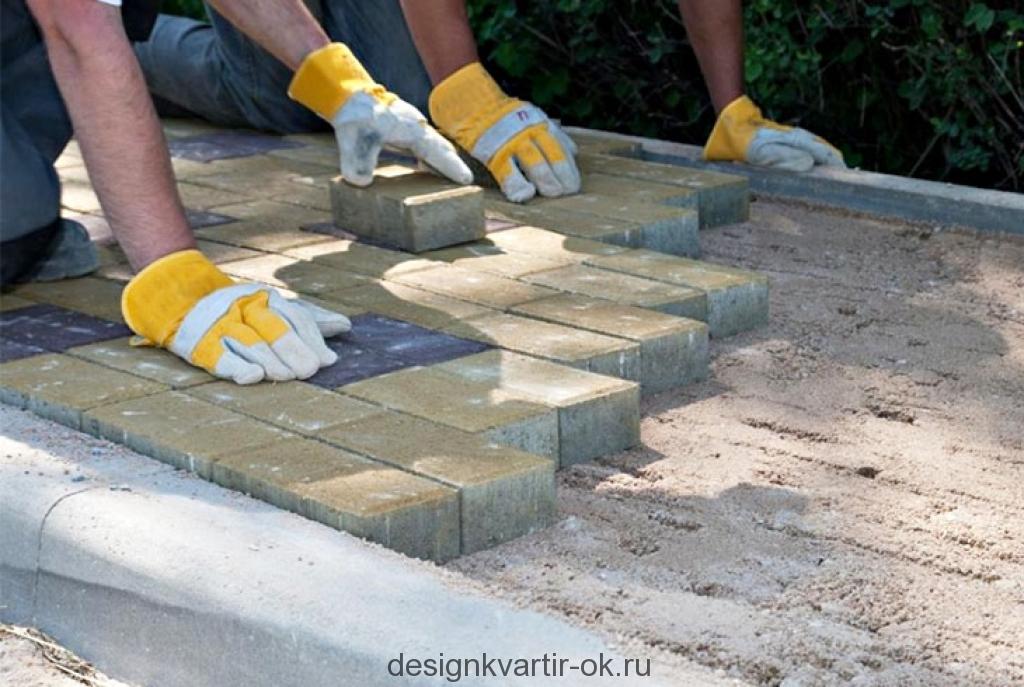
The tiling starts from the edges to the center. The tiles are tightly paired to each other with a kyanki, leaving a gap between the tiles of 5-7 mm. We check the flatness of the upper surface with a wooden bar. Interbed gap fill with sand, for this purpose we use a brush, the slopes are controlled by a level.
Back to contents
Paving on crushed stone
Scheme of the base for laying paving slabs on crushed stone.
Paving of tiles on crushed stone is also easy enough to make by hand. In the prepared bed we lay a layer of crushed stone or gravel 10-20 cm, we seal it with a manual rammer, install it on the grout's liquid solution, fill the sides with sand. From above lay a 5-10 cm layer of sand or a cement-sand mixture (in the ratio 1: 3). Addition of cement will give additional strength and fix the tile after the first rain. We level the surface, spill water from a watering-can or a hose with a sprayer and a manual rammer. From the top we lay the tile, the tiles are adjusted in the process of paving by tapping the surface of the tile with a rubber mallet. When the paving is finished, fill the joints with a dry mixture, remove the excess and spill a little water.
Directly the installation of paving slabs with their own hands is simple.
Most of the time is spent on preparing the foundation for paving. And this is not accidental: the strength and durability of your garden path directly depends on the quality of the foundation. It is necessary that it is perfectly even and dense. It should also be mentioned that, in order to fit into the dimensions, it is necessary to cut the tile with the help of a Bulgarian.
Back to contents
Paths from spills, made by own hands
Scheme laying the path from the saw.
Very original look tracks made of wood spits. Such paths will perfectly fit in the landscape design of the forest area, and will be appropriate in the orchard. They are easy enough to make by yourself. First of all, such paths need good drainage. To do this, geotextiles are laid on the bottom of the excavated trench (about 30 cm deep), a layer of sand is piled on top. The sand should lie flat and dense, so cover it gradually with thin layers, about 5 cm each, and spill each layer with water.
To increase the service life, wood chips are impregnated with antiseptic before installation, 10% solution can be used for this purpose. After impregnation, the logs are dried. The spils are laid on a sand cushion. The combination of different diameter of the spits (large and small) will allow them to be tightened more closely to each other. Spaces between the spills are covered with sand. You can fill the gaps with earth and plant moss or small ground cover green plants.
If you decide to make your own paths in the garden with wooden spils, then it is better to choose larch: it practically does not rot. The service life of oak is 8-10 years, aspen and pine will last about 5-7 years. And be sure to take a few spills in reserve so that you can later easily replace the damaged element.
Properly designed design and properly selected materials will allow garden paths to look natural and attractive, but at the same time retain their functionality. And the paving of tracks, qualitatively executed by own hands, will not only be the best guarantee of durability of their service, but also a subject of well-deserved pride of the owner.
1LandscapeDesign.ru
The paths in your garden!
Every owner of the garden site sooner or later faces the need to create paths in his garden. One wants the garden paths to be beautiful, durable, light in performance and relatively inexpensive. Others prefer to build "for ages" with a great investment of resources and resources. Let's try to understand a wide variety of garden paths.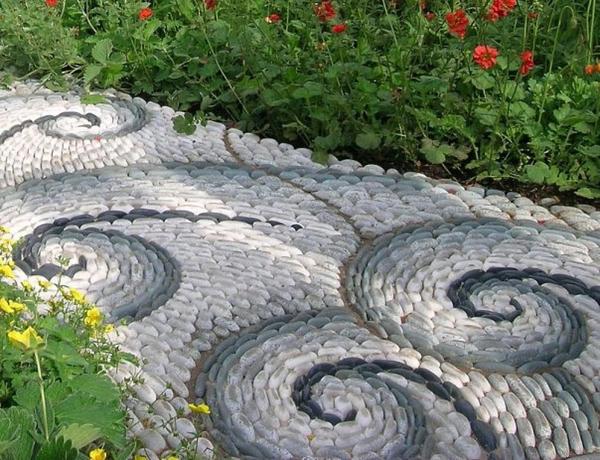
Types of garden paths
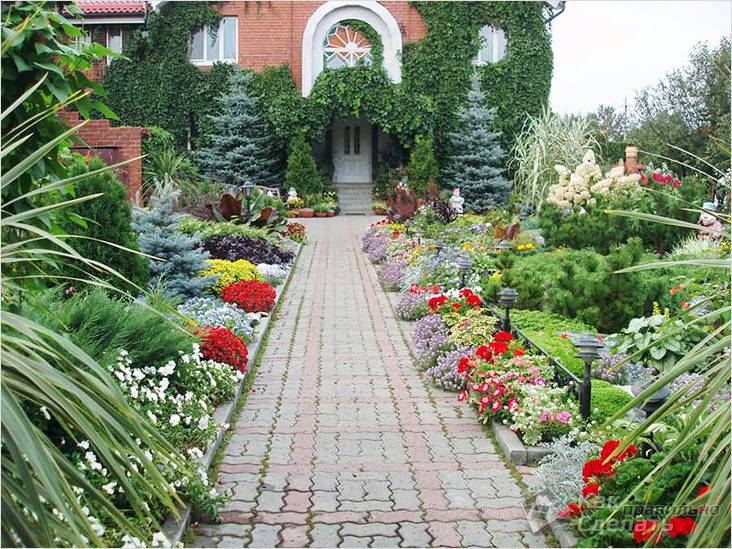
All tracks can be divided according to the type of material from which they are made. Choose the material for the production of the track, you must proceed from the style of your garden and financial possibilities.- Concrete or concrete tiles. Tracks with such coverage, perhaps, have the highest popularity in the country cottages of our country. Such tracks are frost-resistant, durable, very durable and relatively inexpensive. Concrete tiles can be used for both footpaths and road passes. The plates themselves can be made of stone or concrete and have a different configuration: hexagon, wave, brick, corner, etc.

- A natural stone. According to many, this is the best option from an aesthetic and practical point of view. However, such tracks will not cost you dearly. For the production of tracks made of natural stone used marble, granite, labradorite, basalt, limestone and others. Today you can buy a cover for tracks made of natural stone of absolutely different colors. Especially important between these stones is a small grass or moss. Do not forget to consult a specialist about how much material is slippery.
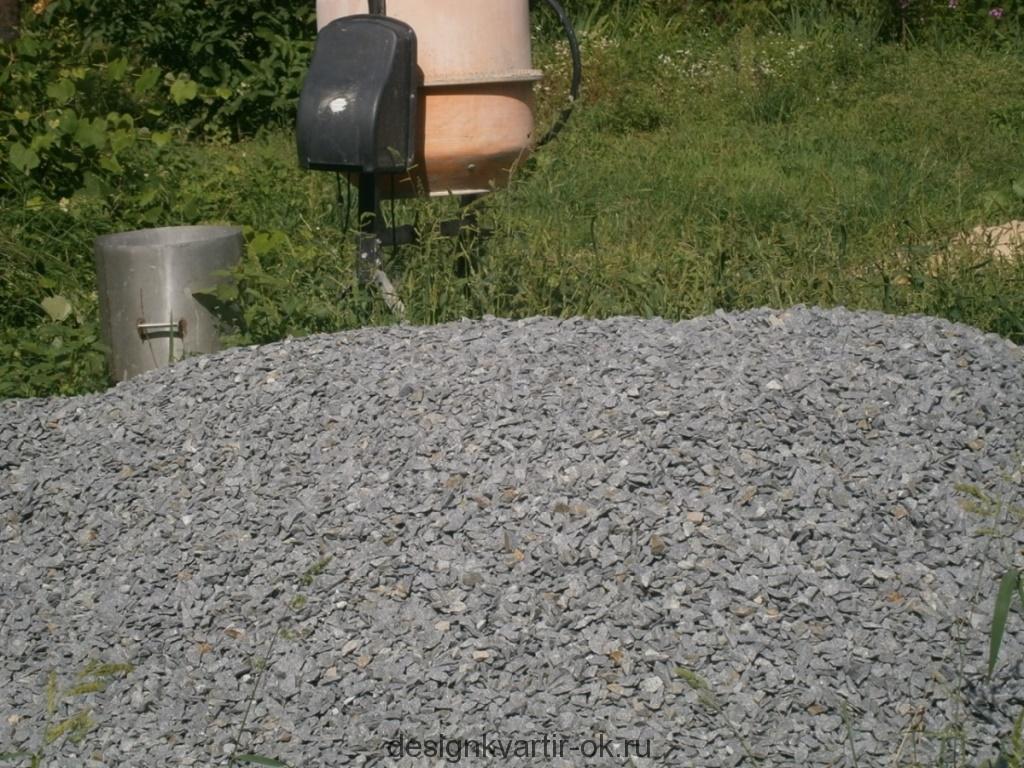
- Pebbles, gravel and crushed stone. This, perhaps, is the most labor-consuming and rather cheap option. All that is necessary to create such a track is to clearly outline the boundaries, purchase material and fill it with an even layer. This option is suitable for places where the track is difficult to cram something else due to its configuration.
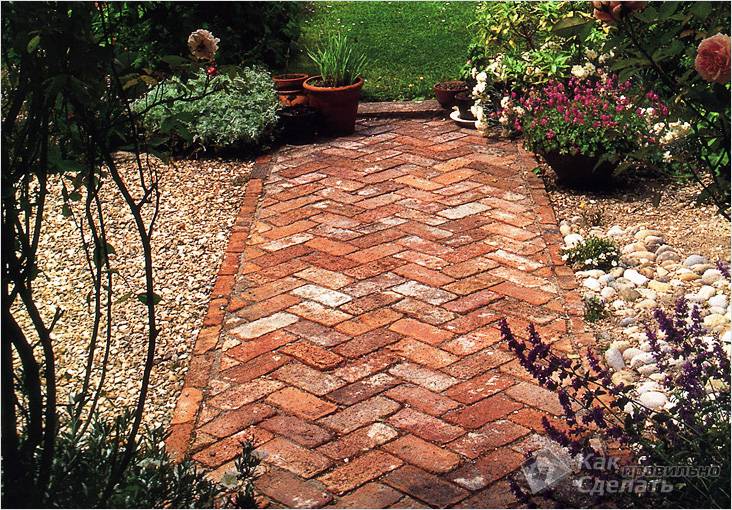
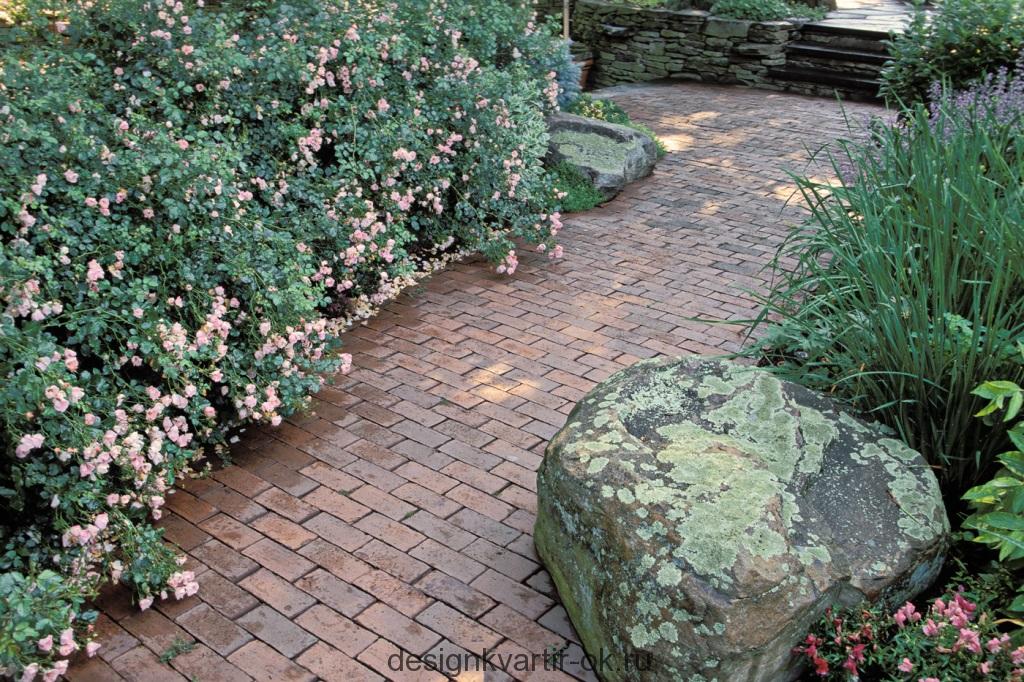
- Brick. The trust in yourself as a coating for garden paths brick-clinker deserved for the simplicity of laying, the relative cheapness and warm color scheme.
- Tree. On sale today you can find a huge number of wooden coatings for the tracks. They are treated with a special composition from slipping and rotting. But those who prefer long-lived options, still should choose other coatings.
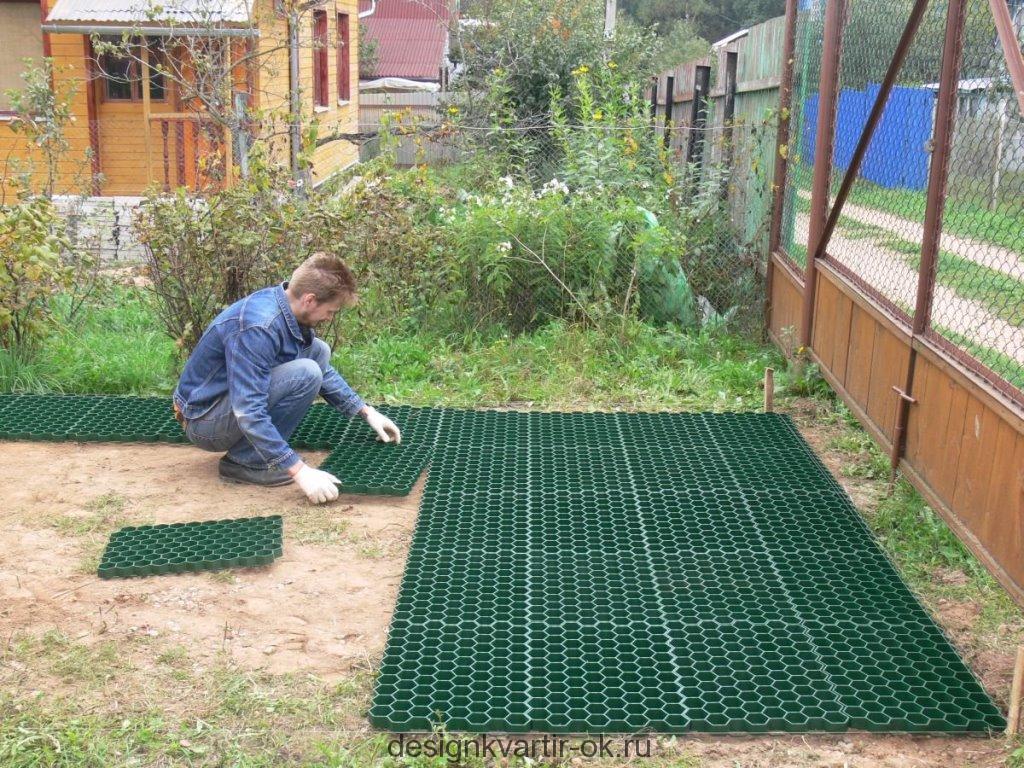
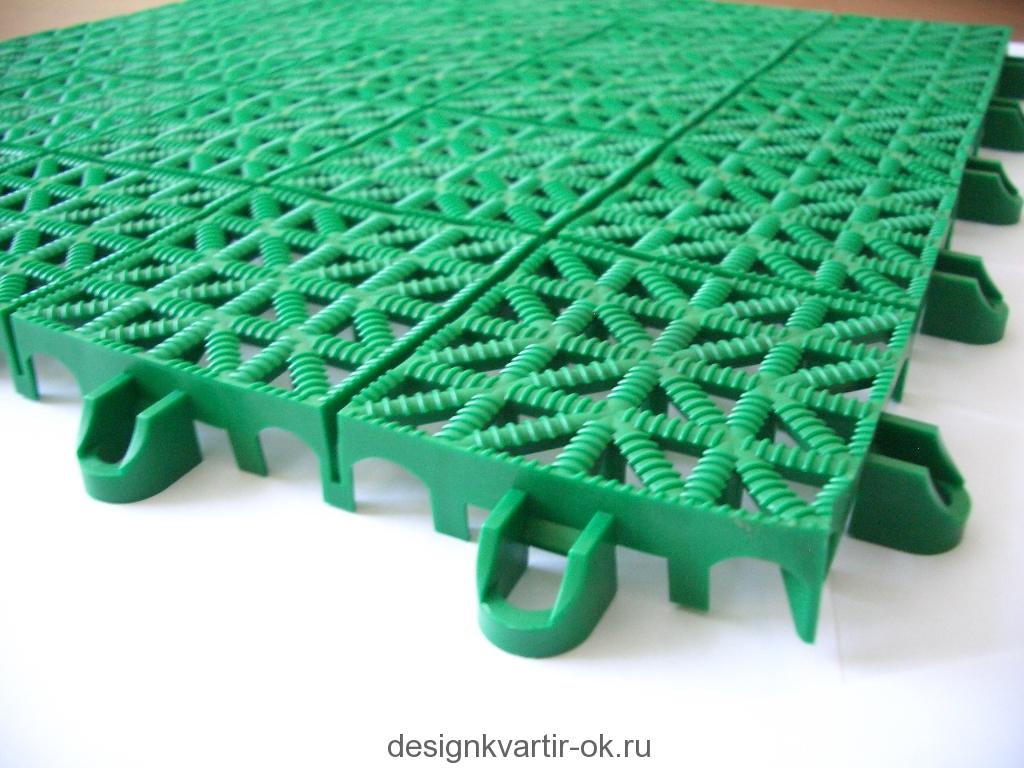
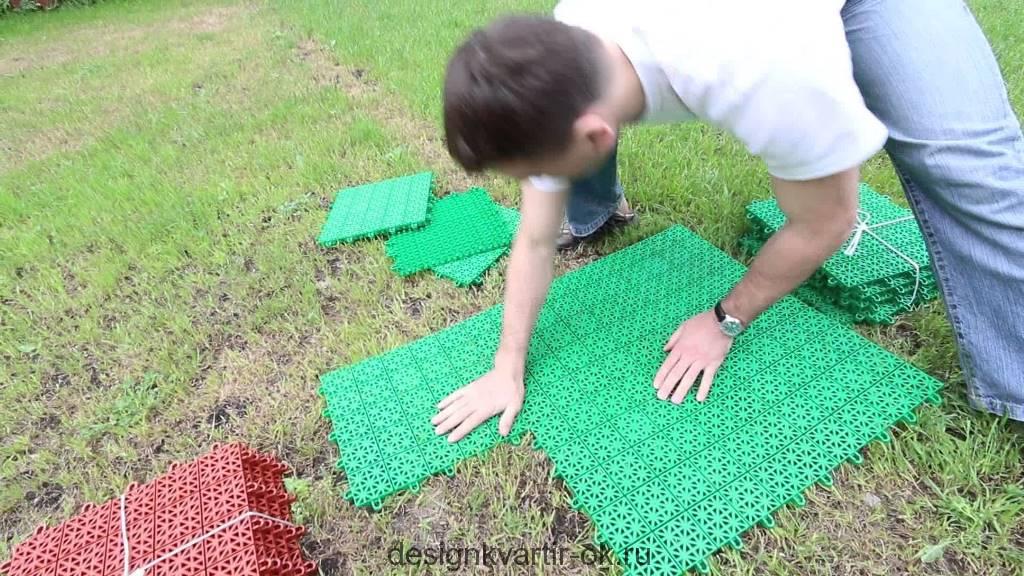
- Plastic. Such tracks are an excellent economical option for many summer residents. Most often on sale you can find flooring size 30 X 30 cm, which are easily connected to each other.
- Ceramic tile. The main advantage of this coating is its decorative appearance. The surface of the tile is covered with a glaze of different colors, which makes it possible to make paths with various patterns. There is a huge selection of tiles that imitate natural stone. As in the case of natural stone, do not forget about the slipperiness of the tile and choose more corrugated options if necessary.

- Decorative concrete. This material is suitable for those who can not choose between tiles and ordinary concrete. The composition of this material includes various additives that make it resistant to temperature changes, mechanical damage and ultraviolet. However, each year such paths will have to be treated with moisture-proof solutions. The price of decorative concrete on average is 2 times higher than that of paving slabs, which also reduces the demand for it.

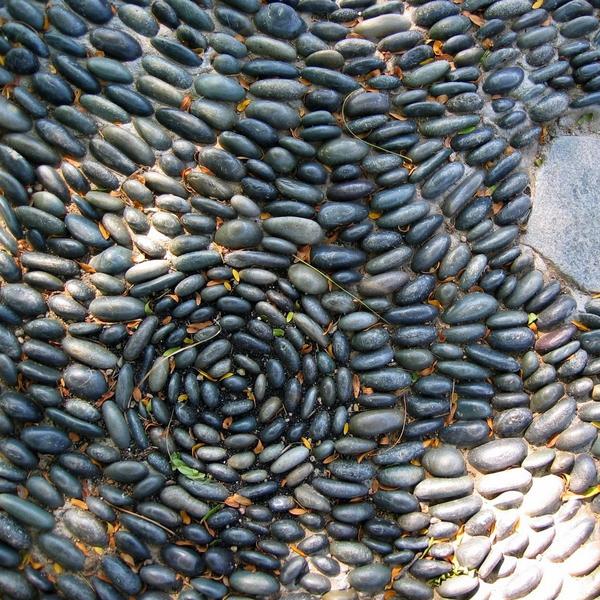
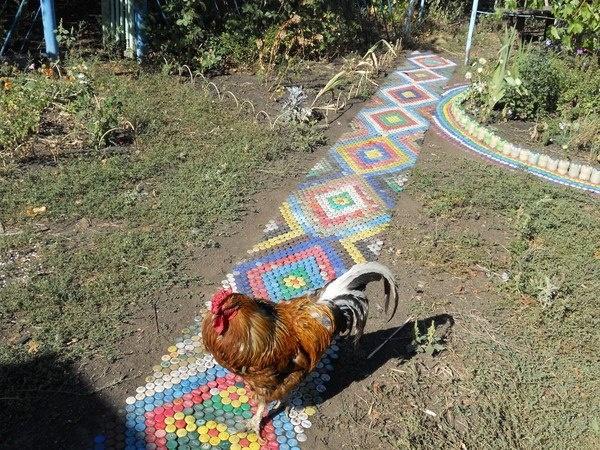
- Paths from improvised materials. This kind of track today is gaining popularity. Creating such a track will cost you inexpensively, but it will bring a lot of positive emotions. That's why the tracks from improvised materials are becoming more popular today. You can make a path from self-made segments, the so-called steppingstones, from the logs, lay a mosaic on a pebble path, from plastic caps. The number of options is limited only by your imagination.
 After choosing the cover of the garden path, think about where they will be located. The starting point of planning is the house. It is desirable that the main routes go without twisting bends. It is best to pull the thread along the path of the tracks. Do not forget to determine the width of the track. There is one basic rule: two people going to meet you must calmly miss each other on your path. Optimal to make garden paths 1-1,5 m wide, and trails - no more than half a meter. Do not forget about the slope of the track. It is necessary that water does not stagnate on it. If the path bends around the flower garden, it is better to make the elevation a few centimeters. This will help keep it dry after watering the flower garden. It does not matter what kind of material you make a garden path - from concrete, natural stone, wood, brick, plastic - do not forget, this is a creative process. Your opportunities are limited only by your imagination. A variety of materials on sale today can satisfy the most unexpected requests. Dare, and you will succeed!
 Lyudmila, Kiev
I will propose one more variant of paving, which can be done independently. I put it all in plans for myself, but I can not get my hands on it. This is done so. In the ground or on the lawn, a part of the soil is removed under one plate. It looks good form, simulating a piece of flat stone. This recess is about 10-15 cm deep with a flat bottom. Pour a little sand on the bottom, centimeter 3. Then pour concrete with a large gravel. We let the plate "grab" and after 30-40 minutes gently wash the surface, freeing the cement from the surface of the pebbles. We dig holes in the order in which small plates would be laid. you can under every step, under every leg. It is advisable to pre-walk along the path with a natural step to properly mark the layout of the plates. At the end of the work and after full hardening of the plates I recommend to open them with a primer of deep penetration. This applies to any other cement tracks. in them, then less moisture penetrates and in winter the frost is not so destructive. And if you take the primer is not acrylic, but polyurethane, the tracks will be protected by 100%. But it's expensive and it's not so easy to find it. But the usual impregnation gives a good result. Last edited on July 24, 2013, 13:27Olga
Plastic tile is suitable if you need to quickly and milletly make a path, for example, tile Ekoplast size 50/50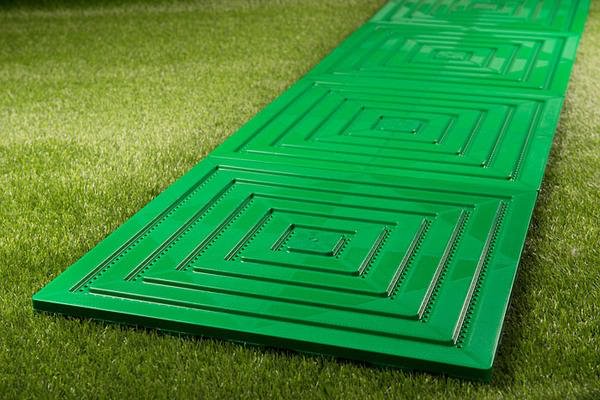 Last edited by 9 April 2015; 15:49
 Marina, Nekrasovskoye
Write, please, how cheaply to repair concrete paths, which began to crumble, crack, partially to exfoliate.Shinkevich Andrey
About repair and restoration of garden paths we have a whole article - including, there in detail described how to repair concrete paths for different types of damage. The author is a practitioner, so I think I can answer your questions if you need to clarify something about the described technology or the materials used to repair the tracks.Elena Vakho, Ulyanovsk
 Garden tile PlastDor, very convenient for fast and extremely simple installation of garden paths, checked by long-term operation, still bought a convenient size for the tracks between the beds called PlastDor-Mini. High-quality plastic.
  Last edited by 23 Mar 2016, 11:55
 Nekrylova Oksana, Shelekhov
And you can find out the price of both tiles. I really liked this ideaTatyana, Tyumen
And I want to lay out the paths with cells from the eggs. I think for one year it will be enough then to plow for the next year. Tell me, wood rings from pine need to be processed before packing in the path?7dach.ru
Cheap garden path by own hands
Make the path of your dreams with your own hands - now not only easy and simple, but also very cheap!
How? SEE: http://goo.gl/7RjijY
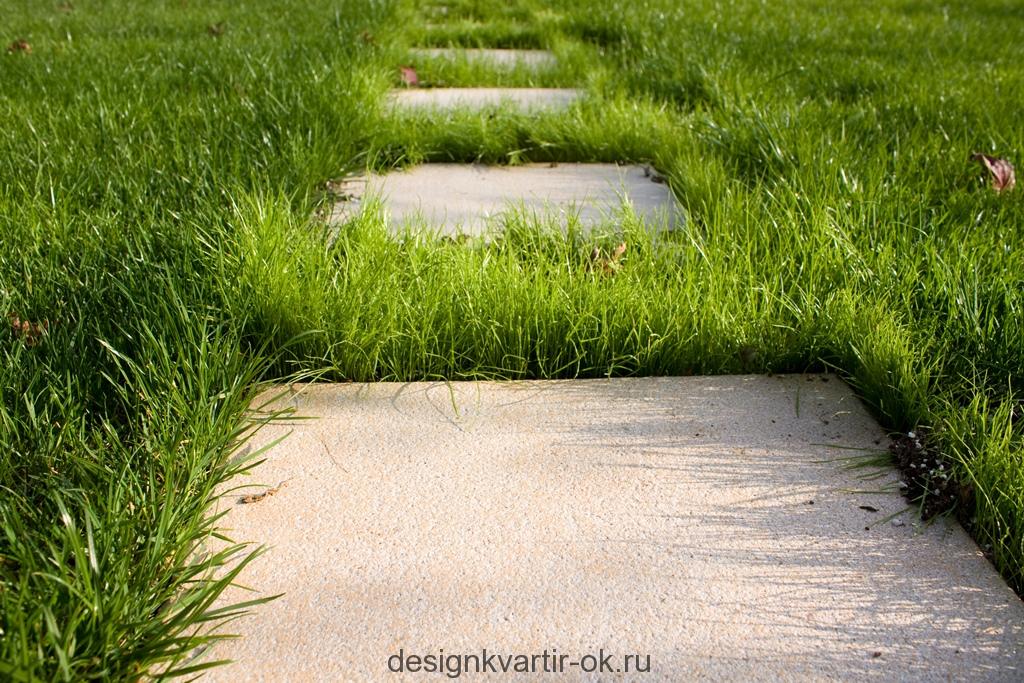
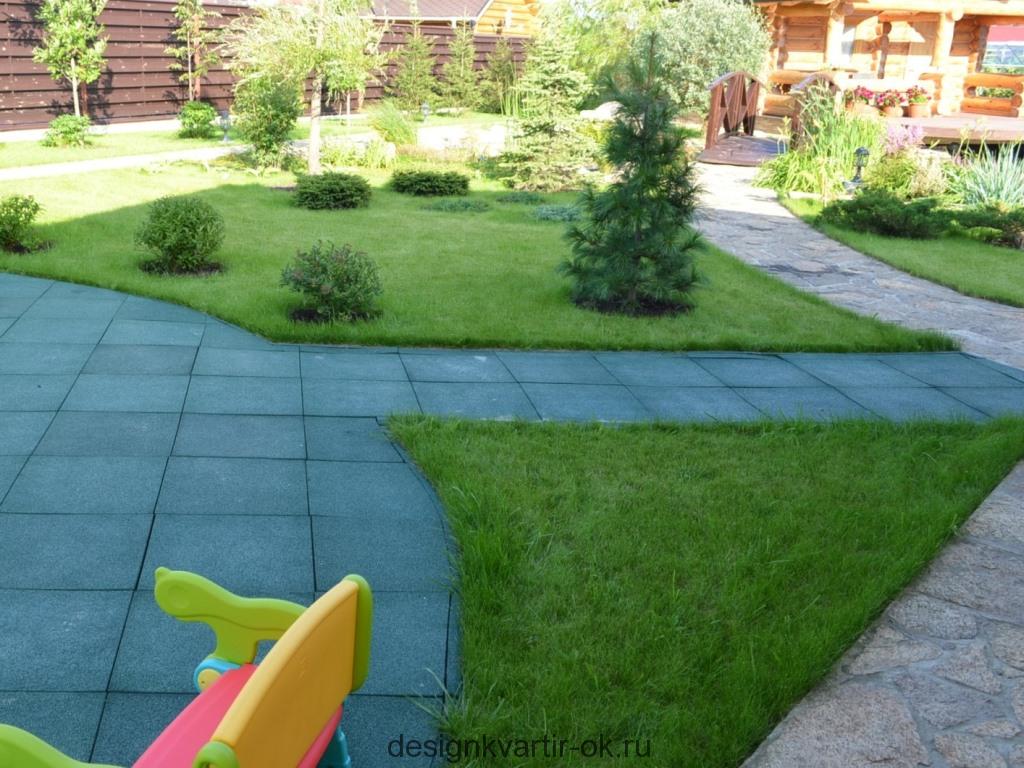
Such a garden path is very decorative, invisible, if the grass is high and perfectly in harmony with the lawn, garden.
We are on VKontakte
With my own hands for giving
Machinery and equipment
Shovels for snow with their own hands, which will save your back
It would seem that it could be simpler than a snow shovel, but it is also possible to perfect this simple tool with your own hands and make a snow shovel convenient, functional, and above all significantly [...]
Gasoline generator for the dacha, which is better
Unexpected power outage is a pretty familiar picture for our truckers. Therefore, to buy a generator for the dacha will not be superfluous, that would not be dependent on the vagaries of the wind, cutting wires or other [...]
Submersible pump, types, circuit
Water in most suburban areas, as a rule, is extracted from wells and wells. Therefore, many owners for convenience, try to automate this process by applying a submersible pump. Some models of pumps are installed on the surface, while others [...]
How to choose a lawn mower
How to choose a lawnmower for a dacha, because there is nothing better than the smell of freshly mowed grass in the spring and the look of a healthy, bright green lawn. But the mowing of the lawn can not always be pleasant if your mower will leave ragged edges, get stuck in the tall grass, or [...]
Chain saw chainsaws
Chainsaw is an indispensable tool in the country, regardless of the size of the plot and the age of the garden. But it's not enough to be the owner of a good tool, you still need to make sure that it works correctly. The most difficult point is [...]
It's nice when the territory of a country house or cottage is refined. To move it was convenient, it is necessary to make paths and paths. It is important that they fit into the landscape design, those. performed not only practical, but also decorative functions. It is important to take into account many things: material, form and style. The path at the dacha, created by own hands, can transform a few acres of land.
Types of garden paths
Pathways and paths in the suburban area are made of different materials. Virtually all the known materials used in construction and decoration can be applied. Let's consider the most popular variants.

A natural stone. The main differences are natural beauty and nobility. It is worth noting the high strength, which, of course, plus, and high cost, which can not but grieve. Using this material, you can lay out the path of a curved shape, as the stone elements, located in a chaotic order, easily form smooth bends.
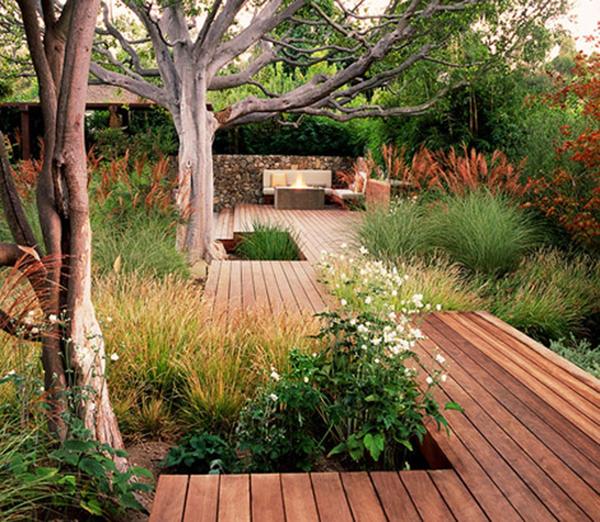
Tree. If the landscape design is made in a rustic style provence or country, then the tree is suitable for decoration. To preserve the material it is recommended to use special impregnations and varnishes.
Brick. A common material for the construction of houses and outbuildings. But it is also suitable for the construction of paths in the country territory. A typical brick has an unattractive appearance, so it is better to give preference to special types that look aesthetically pleasing, are not afraid of moisture and low temperatures.
Paving stones and paving slabs. Thanks to the large assortment and variety of colors paving slabs you can lay out the path according to the scheme, in order to get a certain pattern or ornament.
A budget option. With proper laying, the path will last a long time. In addition, the gravel will look good in the far corner of the garden or near artificial pond.
![]()
Concrete. The original a path of concrete can be done using special forms. They are made of plastic and are sold in construction stores. You can make them yourself and have previously familiarized yourself with the technology.
In order to achieve a stylish correspondence of tracks with surrounding natural and artificial objects, it is recommended to use combinations of materials and styling techniques. For example, apply stone and colored gravel, wood and pebbles, brick and concrete.
If you want to use color schemes, you should be careful: the chosen pattern should blend in harmoniously with the created landscape design and approach the style.
Features of the location of trails
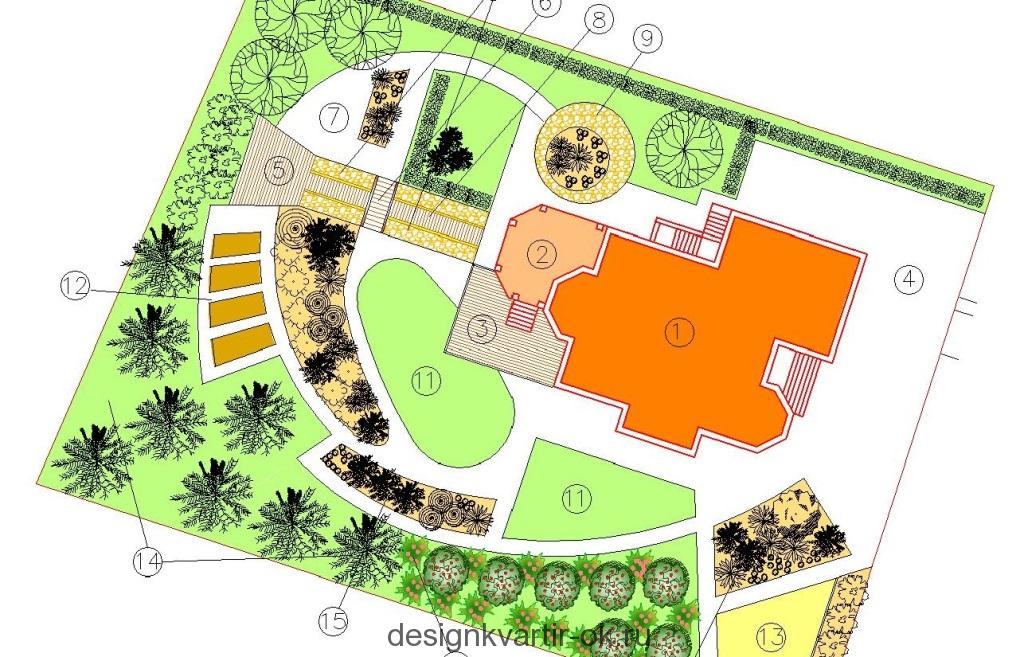
After the material has been determined, it is necessary to decide how to arrange the tracks taking into account the landscape. To make everything look harmonious, it is necessary to take up paper and a pencil to draw up a plan and sketches. The computer program for the design of landscape design will facilitate the process. There are applications that are designed to design paths and tracks. Hints and tips will help to lay the right and convenient route, through which you can quickly reach a certain place. At this stage, you should take into account such important points:
- points determine the main places to be reached, and then they are connected by straight or curved lines;
- in the plan should also be noted all the available facilities: a gazebo, a greenhouse, a sauna, a garden, a garden and flower beds;
- it is not necessary to use the same type of tracks: on any site, solid and step-by-step, straight and curved versions will perfectly blend;
- if the area is often raining, then the path should be planned with a thoughtful drainage system and drainage of water from the edges.
When composing the scheme, indicate the varieties of plants and shrubs that are planned to be planted. This approach will allow you to quickly determine the material for the arrangement of tracks.
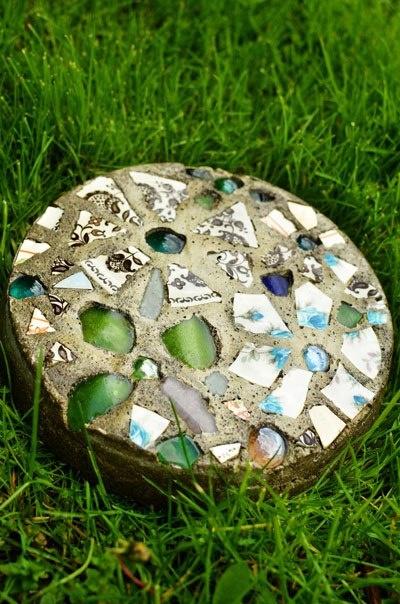
A path from cement leaves
More popular are budget options, which can also be original and attractive, like natural stone. If your garden area contains a solid and neatly trimmed green lawn, then it is not worth sharing it with a large number of tracks. There is a better option in the form of a kind of small path of cement leaves. Do it yourself will not be difficult.
The basis is taken of decorative concrete tiles, which in shape can be not only in the form of sheets, but also:
- traces of a person;
- geometric figures;
- silhouettes of animals.
The list of necessary materials and tools is quite simple:
- Cement mortar (cement, water and sand).
- Form (for our option, large burdock sheets).
- Capacity for batch solution.
- Rubber gloves (for convenience of work).
- Master OK.

- In a container in a small amount, according to the instructions, knead cement slurry . Stir thoroughly so that no lumps or air bubbles remain.
- A ready dense mass is applied to a pre-washed burdock leaf with a small layer of 2-3 cm.
- Leave the form to dry, preferably in the sun.
- After the mixture is fully seized, the sheet is removed and we get a decorative tile.
- In the process of laying ready tiles, it is necessary to remove the top layer of turf to form a small pit. A leaf will be placed in it. Similar actions are repeated for the following elements.
When working, the mixing of the cement slurry is very important. The necessary consistency should be obtained, since too thick a solution will go badly, and the liquid will not retain the desired shape.
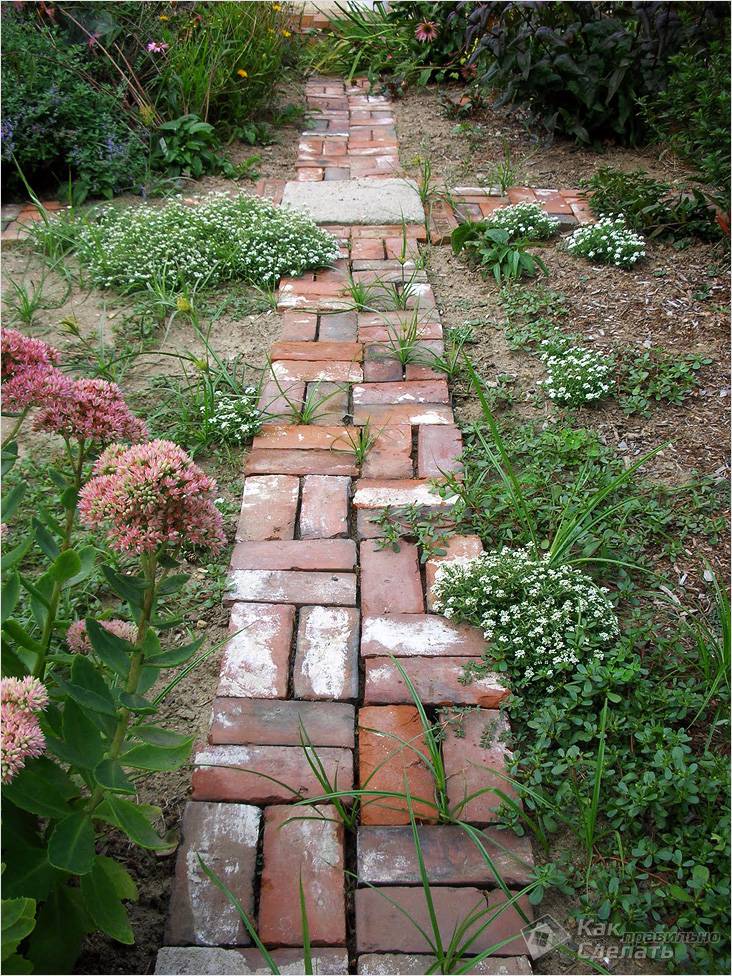
A path made of brick or paving slabs

A more thorough path can be made of a simple brick, which remained after construction and idle in the shed or garage, occupying the necessary square meters. Regardless of how the landscape design is planned, the brick path will be an excellent addition.

The whole process of work is divided into several stages:
- determination of boundaries and removal of the upper layer of the earth;
- preparation of sand and gravel pillow;
- laying of bricks;
- filling the seams with sand.
The minimum width of the brick track must be 90 cm. Calculate the parameter based on the size of the brick and the pattern to be laid out. On the edges of the future path, pegs are stuck and the construction cord is pulled. In the space obtained, a shallow trench is torn out, and the edges are strengthened with boards so that excess soil does not pour.
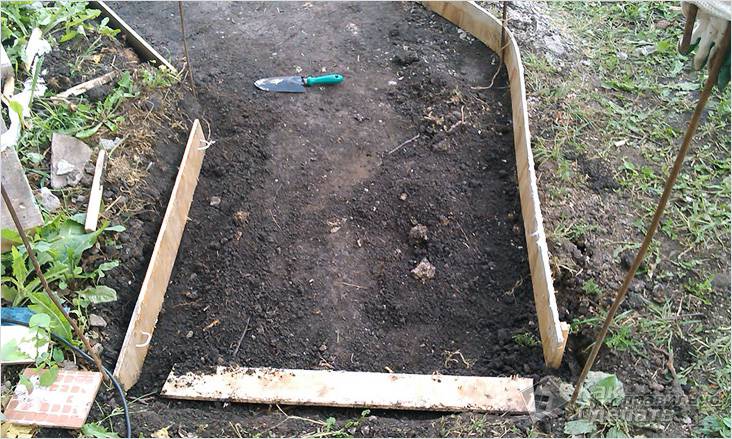
A mixture of sand and gravel is poured into the prepared trench, which is then leveled and rammed. After it is necessary to fill everything with sand, which is also compacted. In this case, the base will be better, and the track will last longer.
Lay the brick start along the boards. Correct the position with a wooden or rubber hammer. To make a curb, the extreme rows of bricks are laid on the butt. The gap between the edges is filled with bricks according to the chosen scheme. Constantly check the horizontal position of the bricks using a water or ordinary level. At the last stage, all gaps between the bricks are covered with sand. After the path watered and repeat the operation.
The path of their wooden spills
Of course, the longevity of the tree loses to other materials, as it is afraid of moisture, which means that additional processing and protection will be required. But wood saws are also popular. With their help, you can add a decorative path in a rustic style.

When registering, follow a few tips:
- When choosing a tree, pay attention to the diameter of the trunks, it should be from 10 to 20 cm.
- It is not necessary to discard small twigs, since small roundwigs can perfectly fill the voids between large elements.
- You can use flat cuts or hemp.
Arrangement of the path does not take much time and effort. On the marked site remove the top layer of turf or dig a shallow trench. The Earth should not be taken far away, as it will be needed to fill the voids.

For the pillow will be enough sand layer of 5 cm thick, which is rammed. Prepared hemp is laid out on the spot, which will immediately present the final result. Gaps are filled with earth or sand, and fine gravel will also go.
When selecting a tree, you can simultaneously solve several problems: the design of the site and disposal of old spilled trees.
To decide what material to make trails, walk through the territory. Undoubtedly, you will have an old brick, and the remains of cement, and unnecessary trees. Experiment and combine by equipping your site.
A photo


Garden paths in the country play not only a practical, but also an aesthetic role. They give the landscape design a special refinement and grooming. The presence of tracks always indicates that the owner of the house inherent good taste, and he cares about the comfort of movement on the site.


Materials from which you can make garden paths
The process of manufacturing tracks at the dacha should not only preserve the design harmony of the garden, but also not go beyond the budget. To do this, you need to select the optimal material that will be combined with the style of the garden and cost relatively inexpensively. Therefore, before we consider how to build tracks on the dacha with your own hands, you need to pay attention to the variety of materials and their characteristics.

So, today the garden paths in the country house can be made of: stone, pavers, clinker bricks, wood, concrete or crushed stone. Let's consider the features of each material separately.
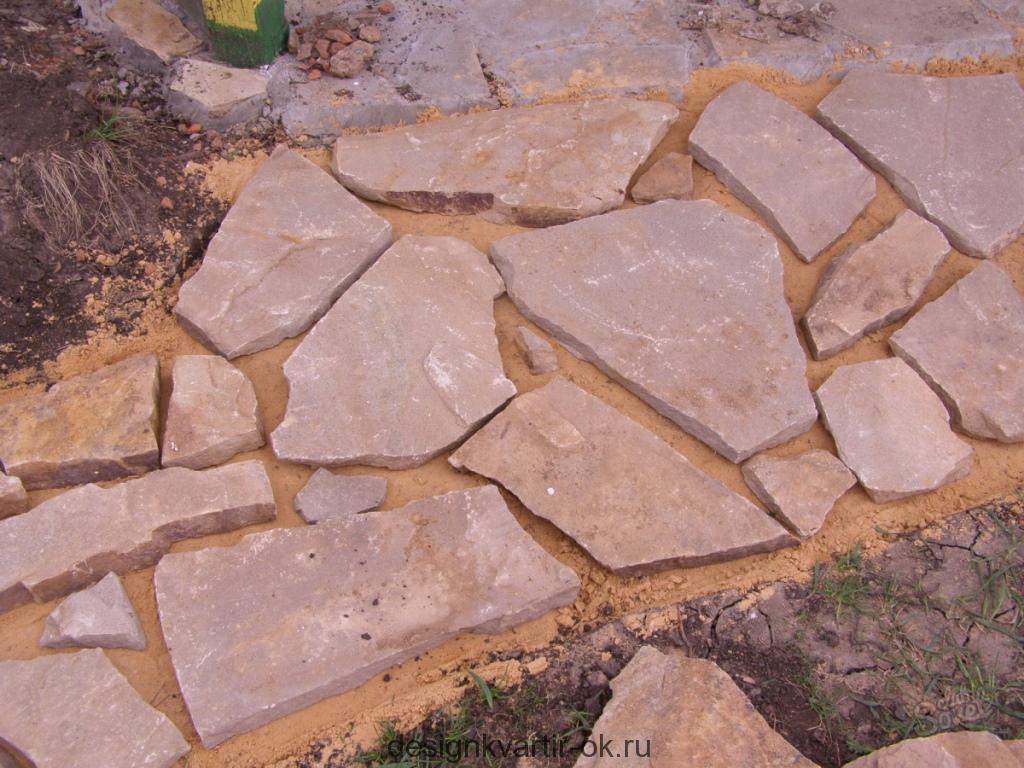
A natural stone You can use granite, marble, labradorite, basalt, sandstone or any other stone. This material has a long service life, resistance to wear, strength, high aesthetic properties. However, it has a high price, so not everyone can afford it.
Paving stones Sidewalk tiles are a versatile material in terms of design. It is suitable for a garden, designed in any style direction. This is made possible by the wide variety of shapes and colors available. Among the shortcomings of such a material is the complexity of laying. When a professional does not take action, there is a high risk of skewing.

Clinker brick This material is ideal for arranging paths in gardens, decorated in a modern style. Brick differs in a wide variety of colors and sizes. It can last for many years, but for its installation it is necessary to use an expensive concrete solution. Normal sand can not provide good fixation.
Wood This material can not be called durable. However, modern impregnations can significantly increase its service life and resistance to an aggressive environment. The natural tree fits perfectly into the landscape design, and the material itself is relatively inexpensive.
Concrete If you want to get frost-resistant, durable and durable tracks, then concrete is the optimal solution. But such material has a significant drawback. For the construction of footpaths will need to build a formwork. In addition, concrete after a few years of operation may crack. This will cause great damage to the design, because sloppy tracks will spoil the pleasant impression of the dacha.
Crushed stone From it you can make original and simple paths in the country. Crushed stone is very simple in laying and is quite inexpensive. The disadvantage of tracks from rubble is the need for constant care. On such paths grass and weeds easily germinate.
Once you decide on what to do tracks in the country, you can proceed to the next step - creating a plan and markup. It is common for making tracks from any material.
Drawing up a plan and marking on the site - the first step when creating tracks
To make tracks yourself, you need to make a detailed plan. For this, no special computer programs and skills are needed. It is enough to take a sheet of paper and a pencil. On the plan, it is necessary to schematically represent all types of buildings on the site: not only the house, but also the shed, if there is one. All the buildings should be connected with each other by paths. When sketching the tracks, do not be afraid to experiment. You can make tracks of unusual shape and length.
Important! To make the garden and backyard as practical as possible, the paths should connect with each other and pass in the most frequently visited places.

The widest path should be planned to the main and emergency entrance. Track sizes can be any. When the project is compiled, you can proceed to the calculation of the required materials, and this will depend on your choice. For example, if you select a brick, you should consider its dimensions so that you do not have to use the trimming. And only after this it is necessary to start marking on the site.
Layout on the site
The marking of tracks can be performed using a conventional measuring tape (if the width of the track is clearly regulated), pegs and cord. To visually evaluate the direction of the tracks, the edges can be sprinkled with lime.
Important! The width of the markup should be slightly larger than the one set so that you can then set the border. The border will significantly extend the life of the path, regardless of the materials used.

During the markup it is very important to refine those details that were not taken into account in the plan. For example, mark the position of plants, flower beds or trees. Also at this stage, you can make some adjustments to the initial plan, because after earthworks it will be already problematic.
Substrate preparation
The base is also common in the arrangement of any paths in the country. To ensure that the path does not crumble or become overgrown with grass, it is necessary to prepare a quality foundation. For its arrangement, proceed according to our instructions:
- Removal of the fertile layer. Usually it has a depth of 200 mm. To the pit was the same along the entire length, the depth can be controlled by small bumps.
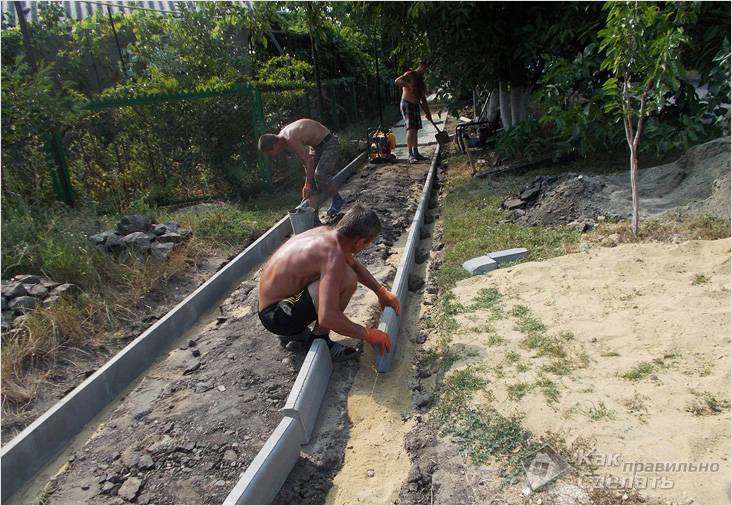
- Installation of curbs. To dacha paths made by themselves, served a long period, setting a curb - this is a prerequisite. The height of the curb should be greater than the height of the walls of the excavation by about 70 cm. The curb should be set according to the building level, and the reinforcing bars will help fix them.
- The construction of the "pillow". To do this, you need to mix sand, gravel and gravel. The thickness of the materials should be approximately 70 mm.
- Tramping. The cushion should be tamped. To do this, you can use a homemade device. You need to choose a thick wooden panel and attach a handle to its middle.


Important! Before installing the curbs, the bottom of the pit should be lightly sprinkled with sand.


The most important thing when creating a foundation is work in dry weather. Rain should not fall into the pit, so you should know the weather forecast in advance. Water is useful after installing the tracks, because it will help to better tamp the material and make the construction denser.
Installation of the brick path step by step
So, how to make a garden path with your own hands? Let's consider the step-by-step process of arranging a brick path:
- Backfilling of sand. The sand layer should be about 50 mm. After filling, sand must be compacted and leveled.
- Installation of bricks. First side bricks are laid. They are mounted on the edge and driven into the sand with a rubber mallet. The same way fits the middle of the path. If a design is provided, it is important to observe the location of the brick according to the plan.
- Fixation of bricks. To ensure that the path lasts a long time, the brick must be fixed with adhesive solution. It can be purchased at any construction store. You need to choose a solution on the basis of cement, which is designed for street work. A solution is needed a little. It must be inside the masonry.
- Filling the slots. Cracks in honey can be filled with bricks with ordinary sand. For this, it is most convenient to use a sweeper brush. Remains of sand should be removed at the end of work.
- Primer and varnish coating. To make the brick paths in the garden, made by yourself, last a long time, you need to treat them with a primer and cover with a special varnish.


Path from wood round timber
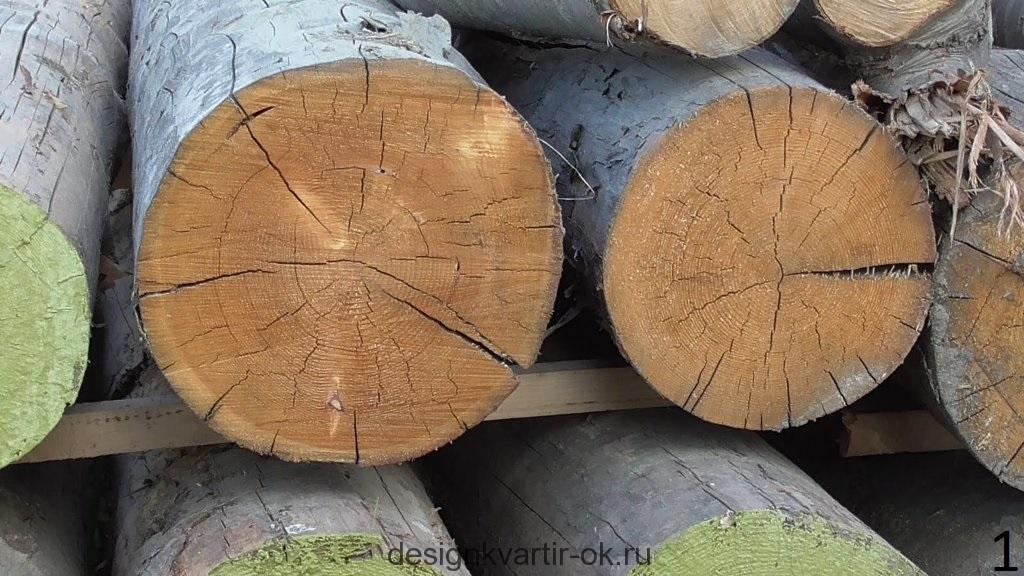
If you do not know how to make original tracks in the country, then be sure to pay attention to this option. Wood logs not only last long, but can also emphasize the unusual design of the garden. To create such a path, you first need to prepare the roundels themselves.
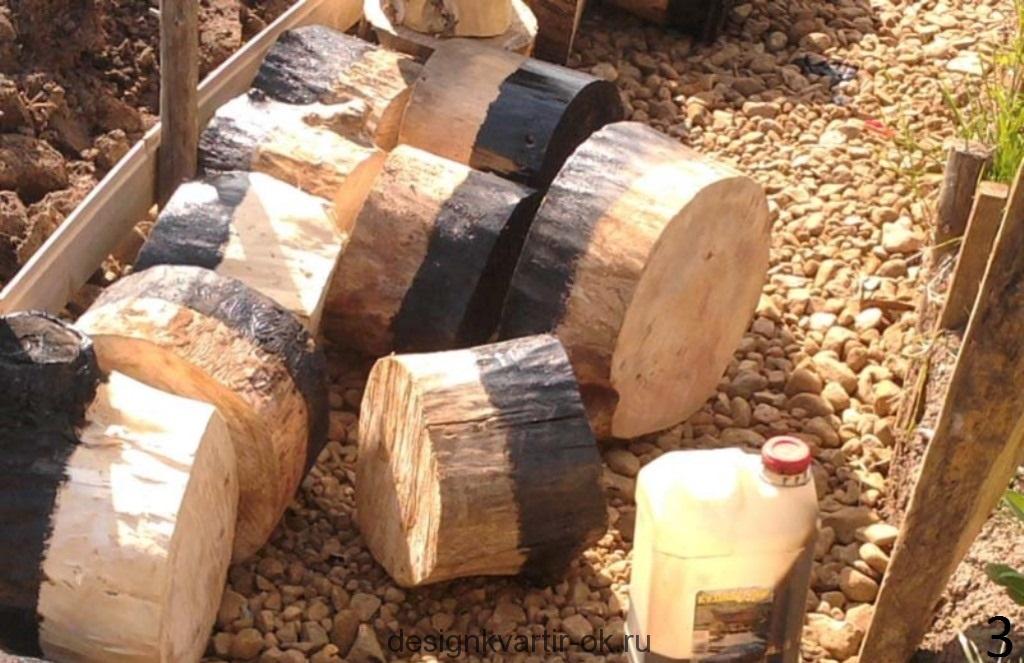
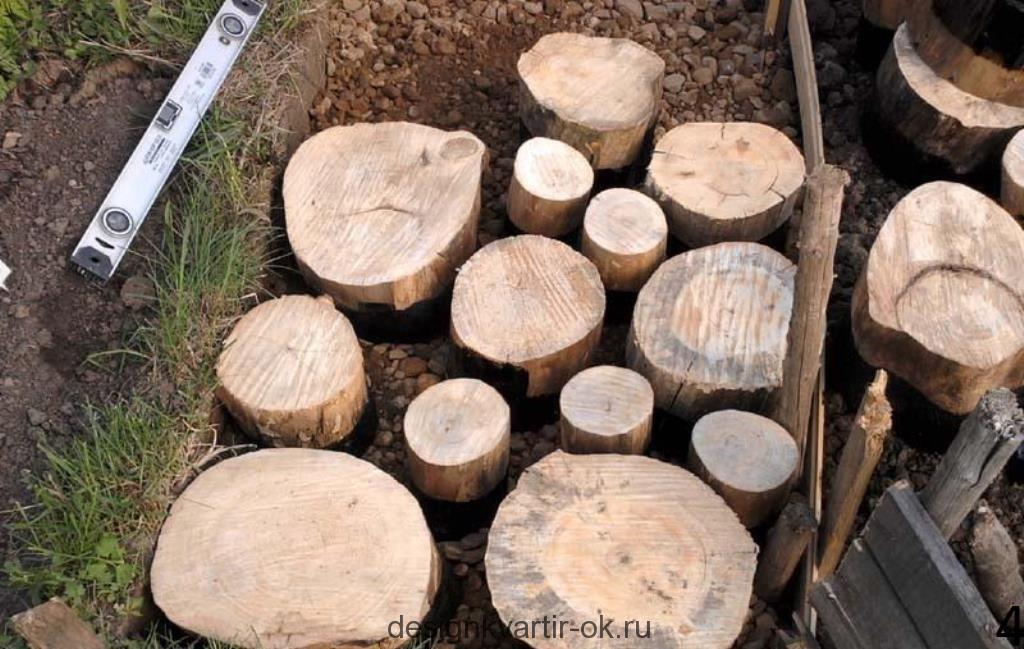
The process of creating logs is simple enough, but time-consuming. To do this, you need dry logs, which you need to cut into small bars. The height of the columns should be slightly higher than the height of the prepared pit. Logs need to choose different diameters to fully fill the foundation pit and make the design of the tracks more interesting.
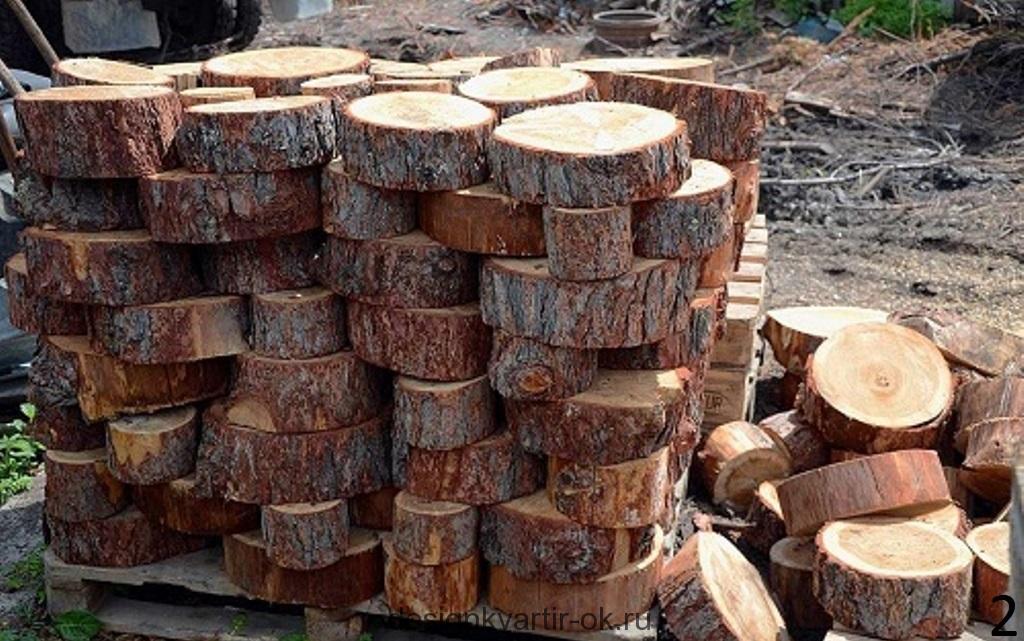
When the logs are sawn, each column must be prepared for installation: clean, align with a grinder, treat with antiseptic and dip into "Kuzbass lacquer". Antiseptic will protect the material from pests, and varnish - from moisture. Save on processing is strictly prohibited, because otherwise, after half a year of operation from the path, practically nothing remains.
Only after qualitative processing it is possible to proceed directly to the installation itself. First, the bars are set at the edge. The bottom of the pit should be sprinkled with sand and put the columns in the first row. Masonry should be as tight as possible. The gaps between the rods are filled with sand. Such manipulations should be repeated until the tracks are laid out over the entire width.
Helpful Hints:
- the wooden walkway needs constant care. A layer of antiseptic and varnish from above can be updated at least once every six months;
- to diversify the design of the garden, when creating tracks, you can combine different materials. For example, a tree will look great with natural stones or pebbles.
Path from rubble in the country
The simplest and most budget option is a track made of rubble. It's done in a couple of steps. As in the previous versions, you first need to mark out the site and prepare a "pillow". Then the first layer of crushed stone is laid out on the path. It must be carefully tampered with. We also do the following two layers. The last layer of rubble can not be rammed. To diversify the design of the garden, you can use rubble of different fractions and colors.

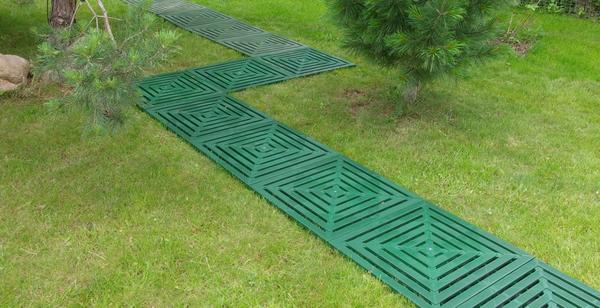
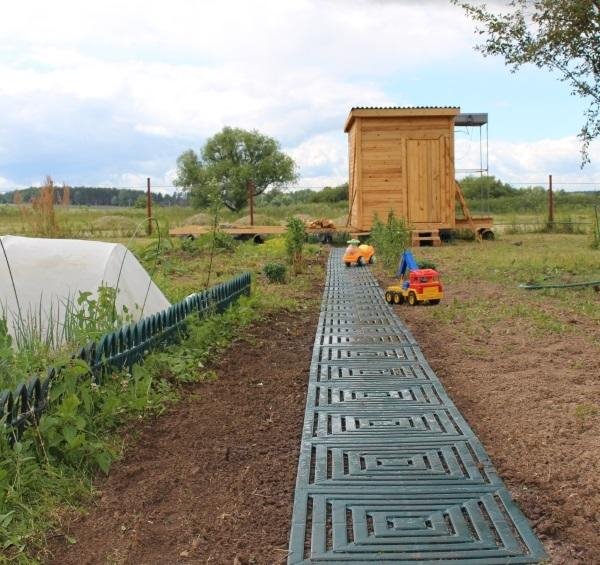
Ready-made paths for summer residence
If you do not have the opportunity and desire to dig a foundation pit and do the laying of a path, then you can safely use special plastic panels.
Such mobile paths have a lot of advantages:
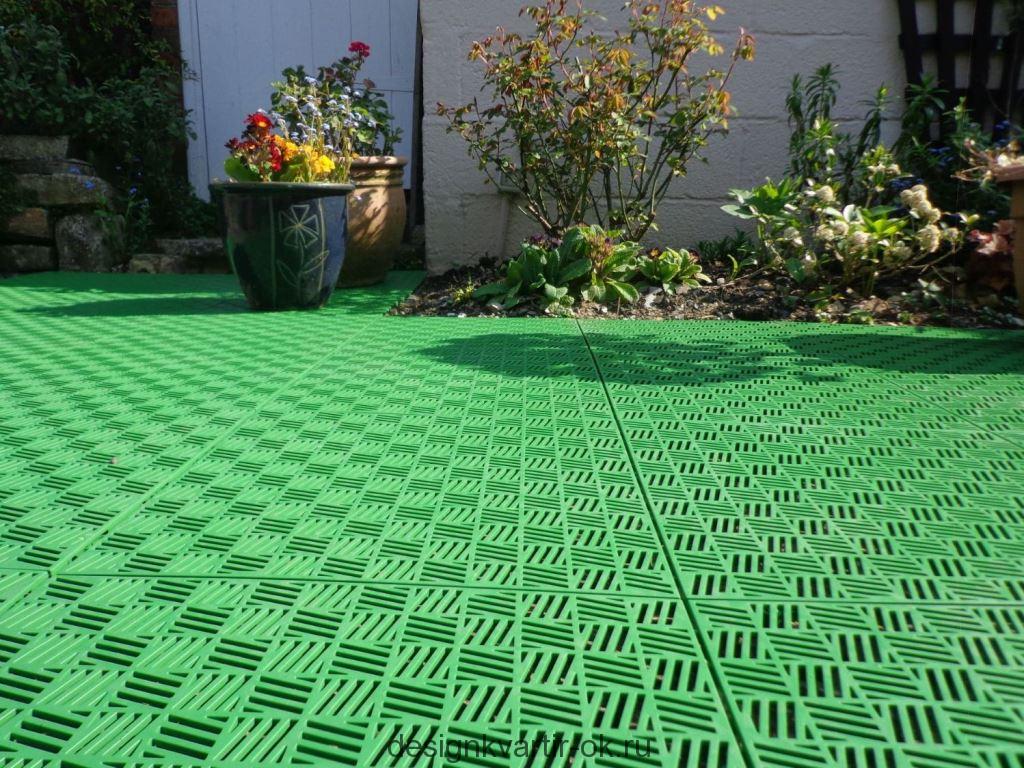
- attractive and aesthetic appearance. You can see the photo of such tracks in the country house a little lower. Plastic panels are manufactured in different forms and colors, which provides unlimited possibilities in creating a landscape design;
- the possibility of creating paths with different widths. If you expand or narrow the tracks of classical materials is problematic, then plastic is very easy. Panels have a special fastening, allowing the construction of paths of different widths;
- frost resistance. Despite the external fragility, plastic tracks are capable of withstanding heavy loads, and are also resistant to virtually any temperature fluctuation;
- ease of installation. To make such tracks yourself, you do not need to use any tools. It is enough to assemble the panels, fasten them together and lay them on the ground.

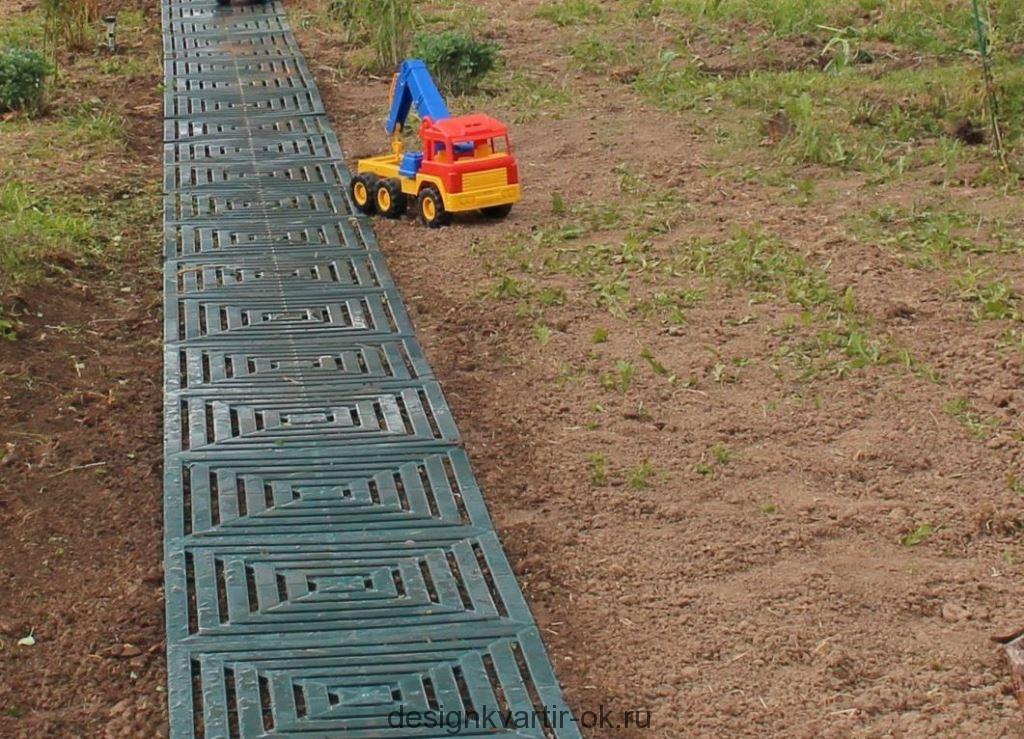
However, ready-made paths for cottages have their own shortcomings. For example, such a path can not be used near the garage. It can not stand the weight of the car and can quickly deteriorate. However, this is not a reason to refuse to use such structures at the dacha. Plastic modules can only be used in the garden, and near the garage and the house you can equip another type of path, for example, from rubble or natural stone.
Community Vkontakte
In contact with
Classmates
Total 1 Votes
0