After reading the recommendations, even those who never held a spatula can make cosmetic repairs. The article is written based on personal experience. If the non-professional woman was able to update the room, then all the more you will succeed.
Not everyone has the means to hire a construction team to carry out repairs. Besides not always found on the ad people, really will do everything on conscience. If you do not need a global reorganization of the premises, you can make a cosmetic repair yourself. This is a very fascinating and uncomplicated process. The main thing is to get everything you need, to keep the stage-by-stage works, to do everything carefully and with a soul.
Necessary materials, tools
Here's what you need to buy before beginning cosmetic repairs:
- Spatulas - wide and narrow;
- Primer;
- Shpatlevka (dry or ready);
- Wallpaper;
- Ceiling tiles and glue for it;
- Flat brush, rag;
- Skirting boards for floors and ceilings;
- Flooring (linoleum, laminate);
- Roller on long handle;
- Cuvette;
- Adhesive for linoleum (if you will put it);
- A film, an adhesive tape for furniture shelter.
Preparatory work, dismantling of wallpaper

To free space, take out the furniture. Things from the cabinets put in large bags, bags and also transfer them to another room. If the cabinet is heavy, there is no possibility to turn it into another room, disassemble, carefully folding the components. If this method also does not suit you, move the cabinet away from the wall, cover it with wide cellophane film from all sides, fix it with a stapler or tape.
After all the excess is removed from the room, start dismantling. First, tear off the old skirting boards. If they are wooden, it is convenient to remove them with a nail. If it is plastic skirting boards on the screws, a screwdriver or a screwdriver will help.
If you make repairs to the Khrushchev with your own hands, you want to save money, you can lay linoleum on the floor. To do this, it is rolled out, laid with the wrong side up, allowed to lie down, then the glue is applied, turned over and pasted to the base. If the floor is uneven, you can lay a solid substrate, for example, from plywood.

When the wallpaper is completely dry, drape the top of the ceiling with a skirting board. To do this, apply glue to the back of it for PVC tiles, attach it to the right place and hold it for 10-15 seconds. After you have glued the first, proceed to the second one.
In the wall part of the genital plinth, you remove the wires, screw it on the screws. Then put on the top of the plastic skirting board.
- Read the article about yourself.
Video about cosmetic repairs for 3 days:
Probably, before each person, sooner or later the question arises how to make inexpensive video repair lessons you could help. Inexpensive repair Khrushchev can be capital or current, which requires the gluing of new wallpaper, or replacement of sanitary ware.
Of course, if the overhaul is planned, then there can not be any talk about saving money, because this will definitely lead to big expenses. Well, if the current repair is planned, you can tell how the savings are going on, and give some useful advice. Adhering to them, it will be possible not only to save money, but also to do everything qualitatively and beautifully.

How to make repairs inexpensive and beautiful: the basic rules of saving money
First of all, what you need to pay attention to is a clear planning. Inexpensive house repairs with their own hands begins with measurements and drawings. After this, a clear plan is drawn up, which indicates what is needed. Here it is necessary to plan everything.
You do not need to include unnecessary things in it. To begin with, the owner of the premises must clearly understand what he wants to achieve from the repair, and then start planning. Ideas of inexpensive repair can be various, and most importantly you control the whole process.

You can give such a simple example. There is a desire to re-paste the wallpaper in the room. Under them, or in the wall, there may be electrical wiring, which needs to be changed. Naturally, this should also be part of planning. If a person does not understand the wires, then you need to attract a specialist, so you can automatically recall all friends and acquaintances who can change it.

And in some cases it is the other way around. There was a gluing of the wallpaper, and after a while they turned black, as the wiring began to smolder. Accordingly, everything must be restarted.
Drawing can be done on paper or directly on the wall. In the latter version, everything will be more visible. The next thing you need to pay attention to is monitoring of various discounts that are in building stores.

The discount system is extensive, and some construction companies, before buying new material, try to get rid of the old one. If you successfully get on such a sale, you can safely buy quality material, almost at the purchase price.

And of course the most valuable advice is that if you need to replace any parts of engineering systems, you first need to estimate which of the friends or acquaintances it can do, and then make an estimate, which will include the price of such works. It is this planning at the first stage that will help to save up to 50% of the cost of all works.

Doing an inexpensive home repair yourself
Carry out repairs in the apartment - a fairly responsible, important decision. Repair is an intricate, laborious work that requires patience, time, effort, and finances.


Handyman.
The cost of repair services is high, there is not always an opportunity to spend a tidy sum to pay for these services. You can solve this problem. If you have the necessary skills or knowledge, we make repairs from the beginning to the end.
It's good that now there is a lot of useful information that can be found on specialized Internet sites. On television, there are also a number of programs devoted to the topic of repair. You will spend your energy, but you will save a lot of money, which will always be found, for what to spend. How to make an inexpensive video repair, which is sure to come in handy:
Golden mean.
Unfortunately, not every landlord (or landlady) can make repairs on her own. In this case, we are looking for the golden mean. That part of the work, which is difficult, beyond the power of us, is entrusted to the professional master, (by no means an amateur, more expensive)
![]()
And what we can or want to learn to do ourselves, we take into our own hands. With this option, the financial costs will be slightly higher, but our repair does not stand still and moves exceptionally forward. Inexpensive repair of the Khrushchev with your own hands is a great option, but here are a few secrets below.
The very first advice will be on wallpapering. Modern design developments in this regard have gone far ahead, and there is a combination of wallpaper. This includes a sticker for the main rolls of wallpaper of various wallpaper flaps, as well as vertical and horizontal stripes of wallpaper of other colors.
If you go to the store, and find one roll of stale wallpaper, which you want to get rid of, you can get two significant advantages. The first will consist in the fact that they will be sold much cheaper. And the second is that the room will have a unique design solution, and everyone will like it.
The second advice is to work with walls. If they are uneven, then you can spend money on buying vinyl thick wallpaper, which perfectly smooth out all small irregularities.
If on the contrary, the cavities and bulges are large, it is better to use a thick putty, and a special spatula, with which you can get a beautiful wall, without gluing the wallpaper. Combining this way, you can save on wallpaper or putty.

How to make repairs cheap and beautiful? Now everything is fashionable. If there is a brick wall, which you want to trim, and then paste wallpaper, you can come up with an original design solution. It is good to clean it, add a few beautiful elements, and open with a special lacquer. This will give the wall a beautiful view, and the room a unique designer interior.
The most recent advice is as follows. When buying materials, do not be lazy, but spend money and time visiting various stores and sites. If you spend one day, you can find a lot of quality materials, which at their price will be much cheaper.
For this, there is a system of discounts. When planning repairs, you can also turn to various sites where you can find a lot of design developments of a particular room. This will save time, as well as payment for designer services. Therefore, adhering to these three tips, you can also save a lot.
In order to save on repairs, you need to understand the two main things. The first is that you do not need to rush to call professional workers who need to pay money, but you can estimate your strength and invite friends to help, study different ideas of inexpensive repairs.

Next, this is a clear planning, what kind of interior and repair will be in the room. It is best to make drawings, according to which it is much easier to calculate the necessary amount of building materials, and consumables.
In the end, if we decided to do repairs ourselves completely, or only some of its types, we get a number of advantages. We save finances, give vent to our imagination, learn new things, and most importantly are sure that the work was done in a good and conscientious way, because they did it for themselves.
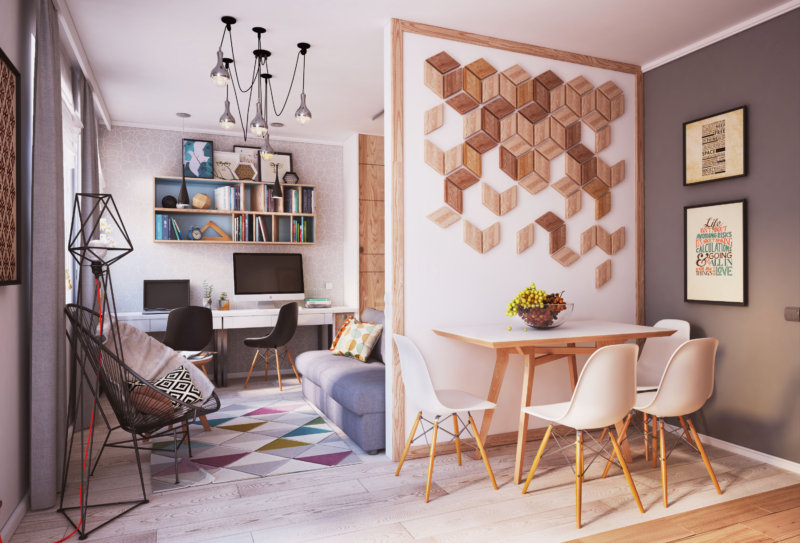
Ready to tell everyone (and show in pictures) how you can make a good repair yourself. If the hands are all right it's not difficult.
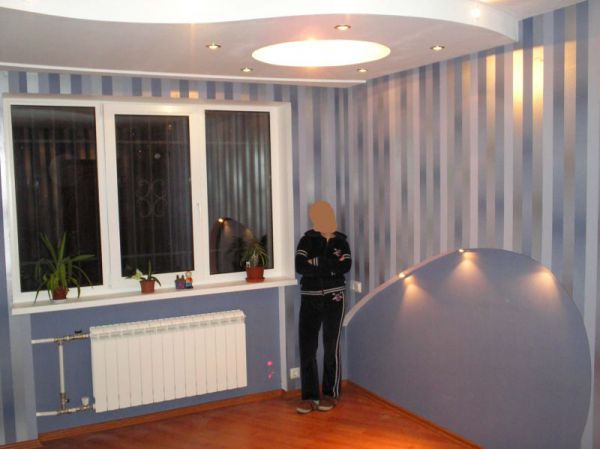
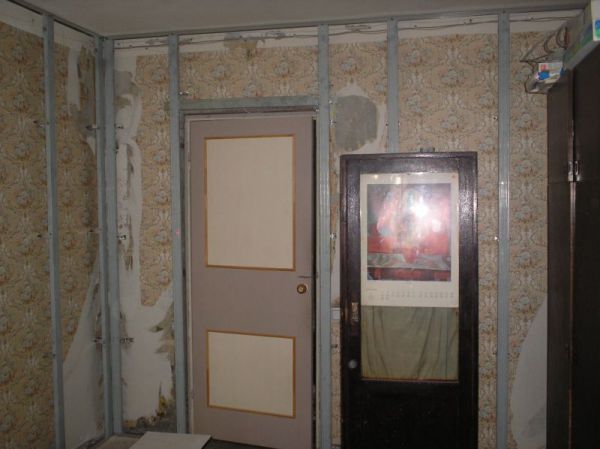
So, a concrete object. The room is 15 sq.m. The future bedroom. Rectangle 3х5м, height 2,65м. Repair in it has not been done for a long time. There are no obvious construction defects (walls, ceiling are visually even, the floor is flat on the horizon).
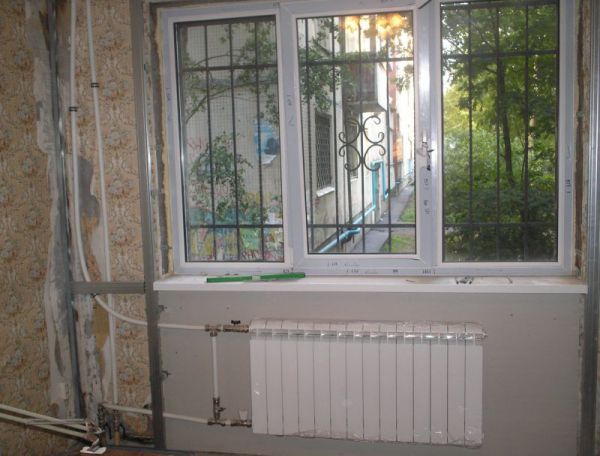
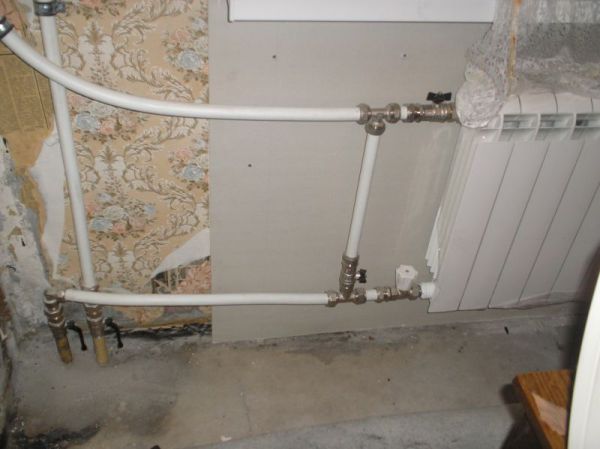
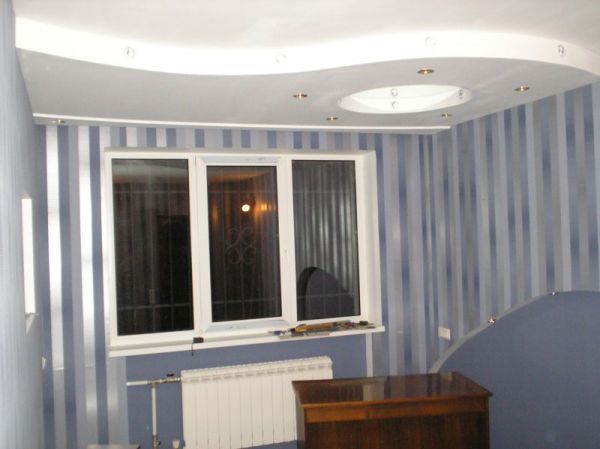
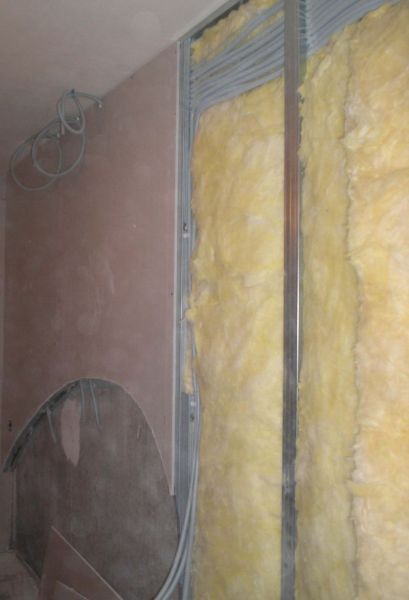
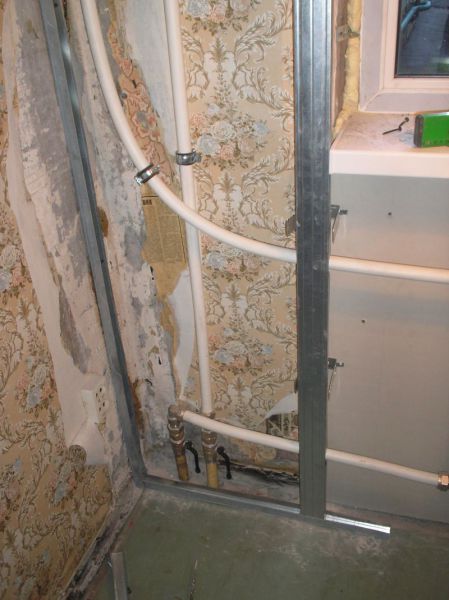
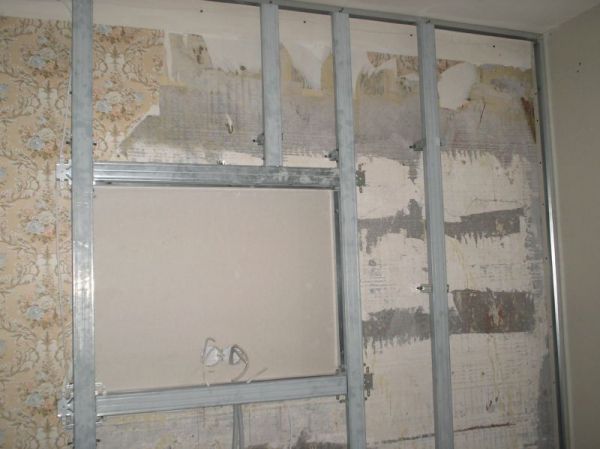
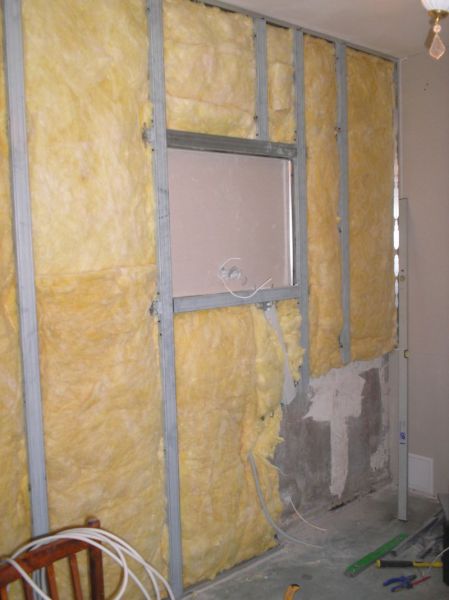
Due to the fact that the removal of furniture was gradual, then the repair a bit stretched out over time. It all began with the drafting of the future room, an approximate arrangement of furniture and original design ideas. Repair began with replacing the old wooden frame with a modern plastic two-chamber window. Made and assembled without censure. The next stage was the replacement of the radiator. The old pipe was cut down by the Bulgar, and in their place was put metal-plastic pipes with a new radiator. In the future, the pipe was to be sewn with a gyro. Paul, thank God, was in very good condition, it was decided not to touch it and do not tie down. After the removal of some of the old furniture began to make a framework for gypsum from metal profiles. First it was decided to sew an outer wall with a window. The profiles were used for ceiling PP 60x27 and profiles for directing PPN 27x28, which were used in the future. The main difficulty was in the exact measurements of the installation of the gypsum from the wall. The pipes were interfering, and the already installed window sill did not allow increasing the distance from the wall. But the level and the plumb and here they did their job. First, fix the profile on the ceiling. On the plumb bob, the place where the profile on the floor should be installed is outlined. After that, the SC was screwed onto the walls. Further, vertically installed PP and fixed them in several places to the wall with the help of direct suspensions. It turned out a ready-made frame on one wall. Laying an opening with mineral wool for heat and sound insulation, the wall was sewed with gypsum board. At the same time, the window slopes were insulated and sewn using the same metal frame for this.
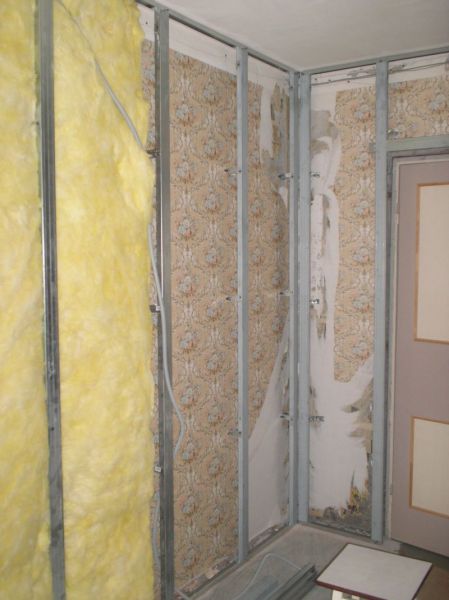
After this, we began to make a frame on the neighboring walls. We determined the angle from which all the measurements were made, parallel lines on the ceiling and on the floor were drawn on the ceiling and on the floor, after which it is necessary to fasten the PPN guides. The walls were marked with niches, which should be according to the project. Fixed PPN on the floor and on the ceiling, began to make vertical racks of PP 60h27. Cut the profile by 7-10 mm less than the height of the room, inserted into the PN every 60 cm and fastened to the wall in three places after about 70 cm with the help of straight hangers. In places where niches, at first to the wall, a PN was attached to the marked line, cutting and bending it as it should be in place.
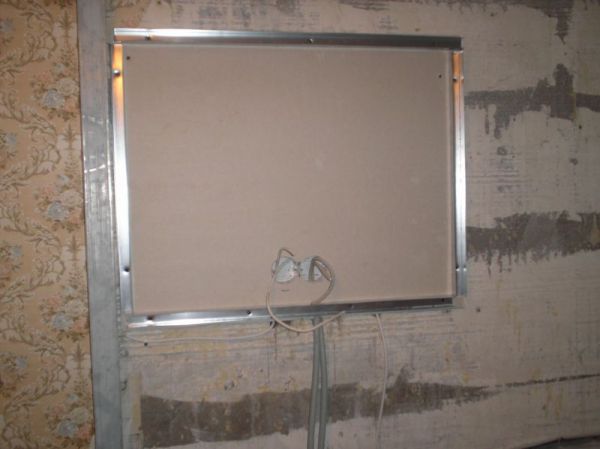
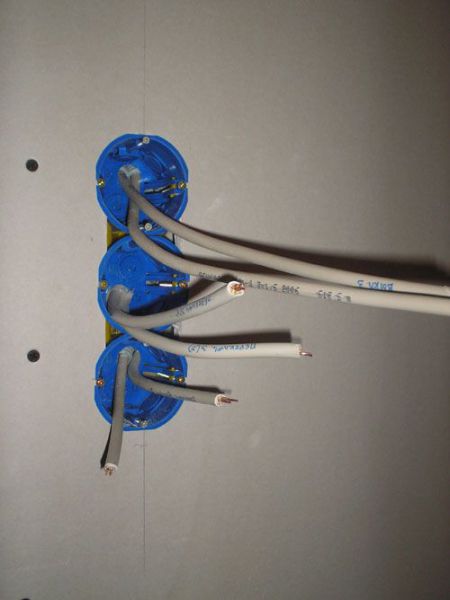
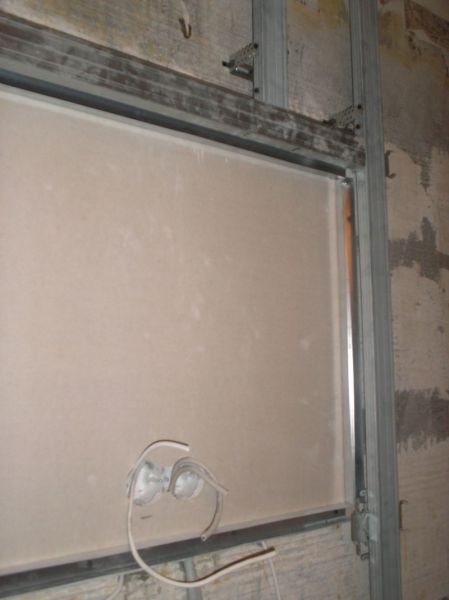
At the same time, in the places of future outlets, the wall was tied under the mounting boxes. The bulk of the outlets and all the switches were planned to be made on a gyroplane wall, so the walls had to be shut at a minimum in two places, under a TV outlet and a socket in a niche.
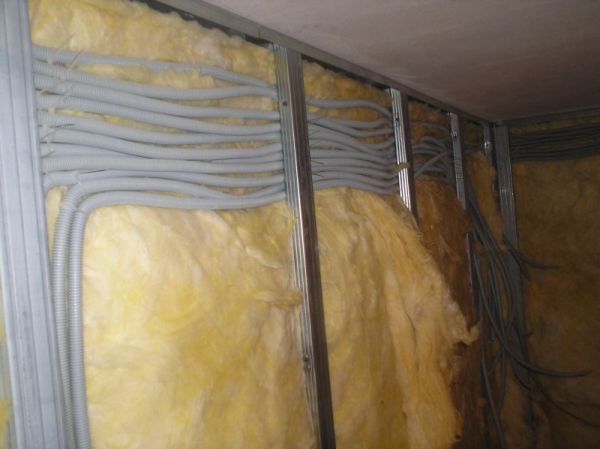
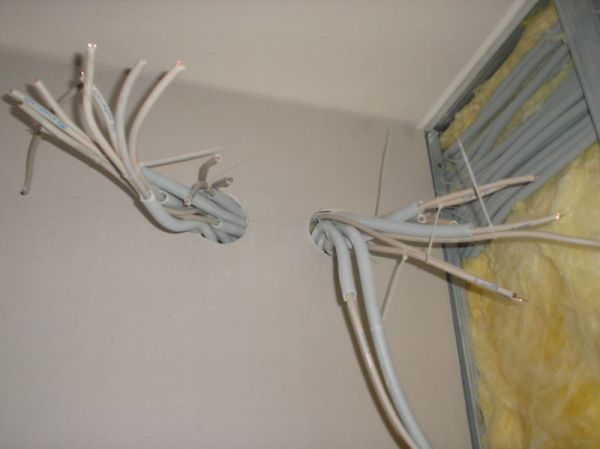
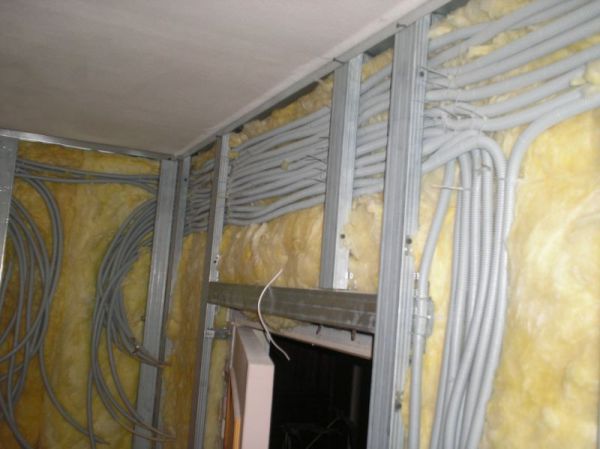
After the main frame was made, threw low-current wires - telephone, Ethernet, TV. The little one walked along the top in 3-5 cm from the ceiling. The power cable was later laid a little lower, about 10 cm from the ceiling.
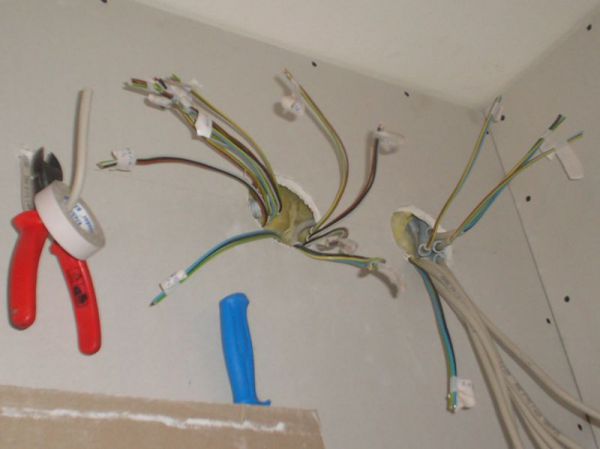
While construction was going on, the old door was not dismantled. It was removed at the last moment, when all the dirty and dusty work was done, almost before the wallpaper was pasted. And while the frame was being erected, the Ursa-100 insulation was laid between the guides. At first it was kept on the wall due to the fact that it was supported by the frame itself, and later on, power wires were poured over the top, which the heater was pressed against the wall quite well, so that it did not fall under its own weight. All the power wires were NYM 3x1.5, NYM 3x2.5 and NYM 4x1.5 was used on the pass-through switches. All power cable for reinsurance was laid in the corrugation. The electric scheme was rather complicated and the cable took a lot. A 15-meter room took about 150 meters of power cable and about 50 meters of a weak point. The power cable was fixed to the metal frame from the inside with clips, and with each other using plastic ties. Junction boxes were planned in the corners of the room, one on the rosette group, two on the lighting.
After a while all the walls were insulated and the whole cable was thrown. The frame was stitched with plasterboard. The usual drywall (not waterproof) 1200x2700mm was used. I cut it in height, put it, fastened it with screws. On the spot I marked the holes for the sockets, switches and drilled them with a bit, immediately installed the mounting boxes and pulled the wires out. Niches in giprok also sawed with an electric jig in place. After sewing all the walls, sewed giprokom and sidewall niches. In the semicircular niches, the sidewalls soaked and bent in place.
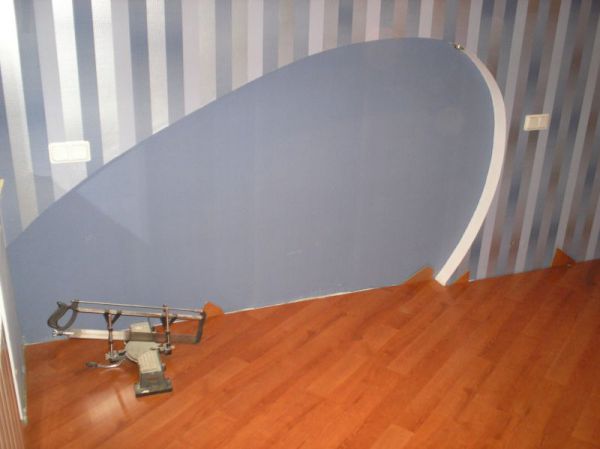
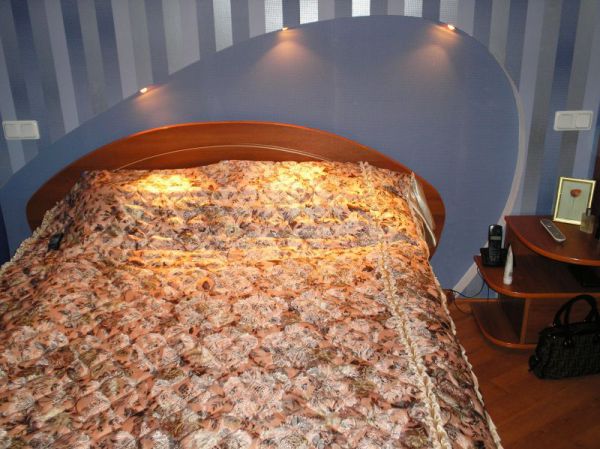
When the walls were all protected by plasterboard, I began to make a multi-level ceiling construction. The ceiling was made all the markings, drawn contours of the ceiling, the location of lamps, mirrors. Based on this markup, in the future, the skeleton of the ceiling was made. The entire sequence of work can be seen in the photographs. In parallel, electrical junction boxes were assembled, the wires twisted and welded.
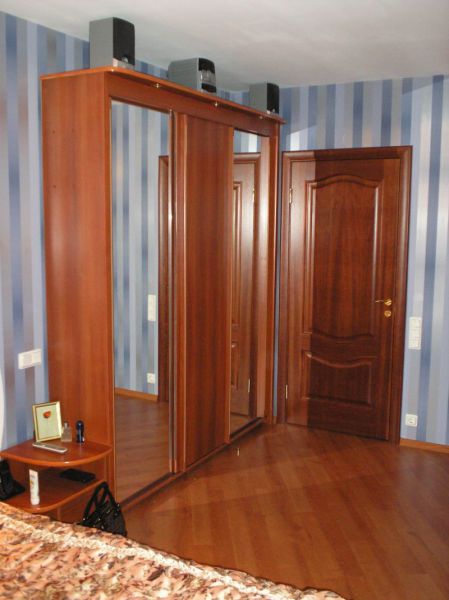
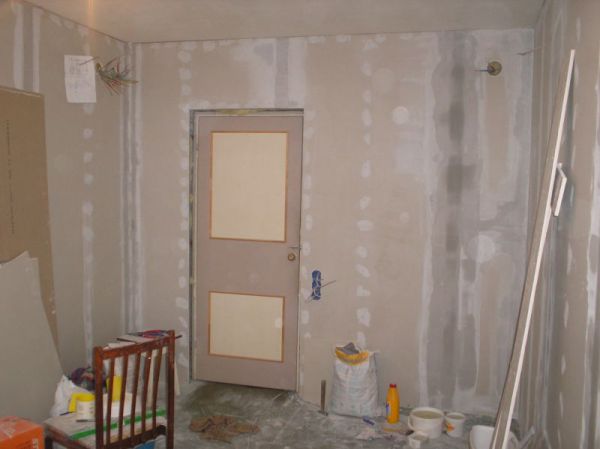
After the ceiling was ready, all the joints were plastered, using Fugenfüller, Vetonit KR, a serpian and a corner paper tape. The bends of the niches and the ceiling were reinforced with plastic flexible corners, which later zashpatlevali. After the shpatlevochnyh work the old door was dismantled, and in return a new one was put. Before the wallpapering, the window slopes and the side walls of the niches were painted with white washable Delux paint. The ceiling was painted with water-based paint several times.
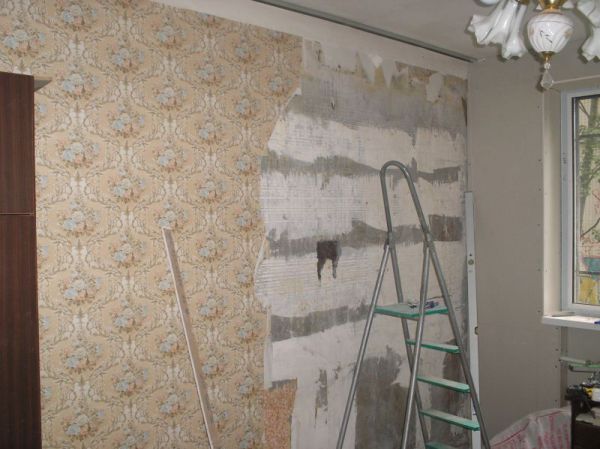
Wallpaper gluing took one day. After that, they cleaned the floor for a while in the room, took out the remaining pieces of gypsum in the trash, and partially took out the instrument.
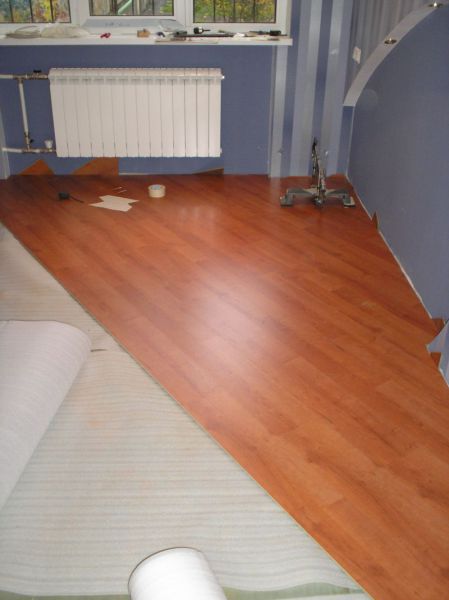
On the floor it was decided to put German laminate Tarkett. Thank God, the floor was flat and we decided not even to remove the old linoleum, and put it directly on it, using a 2-mm substrate. Waterproofing is also not done because the linoleum itself does not let moisture pass. Laminate on the project had to lie diagonally, so it was put. After the floor was made, it remains to finish the trivia. To fix the plinth, here and there to cut wallpaper, wash the mirror on the ceiling from the scotch, zasilikonit the joint of the window and the slope, etc. The room is ready, it remains only to wait for the ordered furniture to be brought.
Naturally, after everything was ready, there are ideas, how it was possible to do better, more correctly. You understand how to do it was not necessary. Here also. It was necessary to bring the heating pipes to the radiator differently. The current of water through the battery goes from bottom to top, but vice versa. Because of this, there is no 100% efficiency in heating the radiator. The second minus in the repair is that due to laziness the old wallpaper was not completely ripped off. Can under a heater to become wet. The third minus was not a vapor barrier. And the last fault is the lack of ventilation. Sealed windows do not let air in and there is a stuffy feeling in the room. I would like to install the KIV valve in the future. This can be corrected, although it would be easier to think about this at the very beginning of the repair process.


![]()