Linoleum is a practical and attractive outdoor floor covering, which occurs in houses, apartments, cottages, offices, shopping centers, public institutions ... Almost everywhere. How to lay linoleum, how to do it correctly - read on.
On what grounds
Even when choosing floor covering there is a question on what to put linoleum. Is it necessary to prepare the basis and, if so, how seriously. The answer is simple: linoleum can be applied to any substrate. The main thing that it was smooth, durable and clean. Preparation takes place and it can be easy and fast if the foundation is level. In this case, the floor is simply cleaned and dried. If the floor with potholes, large irregularities, preparation takes more time. For correction, screed or self-leveling mixtures can be used, dry screed building material (plywood, OSB, MDF boards). It all depends on the type of foundation.
Concrete and wood floor
You can easily bed linoleum on the concrete floor. In general, on the surface there may be swings, the main thing is that they are not local - small and deep holes and hillocks are excluded. Differences can be, but smooth. If there are significant unevenness, before laying linoleum, it is better to fill the leveling screed.
Lay this finish coat and on a flat wooden floor. Many people think that under it the wood will rot. If the wood is dry, without signs of infection with fungi and mold, then nothing will happen to it. When properly laid, a sealed layer is obtained, so that moisture does not penetrate inside. If there are seams, they are welded, so that penetration of moisture in them is unlikely. So that water does not fall under choose wide models and press them well to the floor. A more reliable way is to lay under the linoleum around the perimeter a self-adhesive tape for sealing.
If the boardwalk itself is made correctly, with normal ventilation, then there is nothing to rot him. If you are very worried, before laying linoleum, treat the floor with antiseptics.
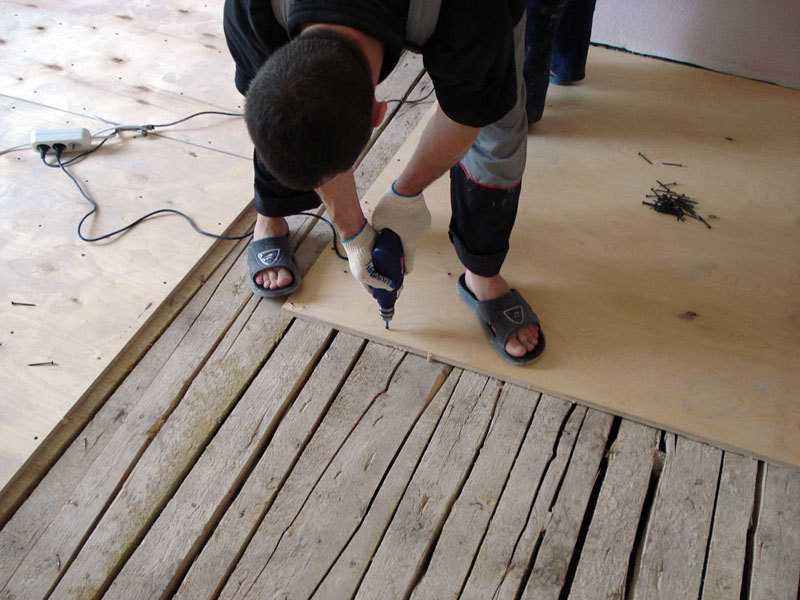
If there are noticeable cracks in the plank floor, they will be visible on the surface after a while. If they are small, they can be puttied, and with the help of grinding, level the surface. Sometimes the floor boards arched, slightly rising at the edges. To polish such a floor will not work - a lot of nails. In this case, or if the slots are too large, it is recommended to put sheet material on top of the boards - plywood, OSB, MDF. They are good in that they do not have a very large thermal expansion, and the OSB does not absorb moisture (you can take a moisture-proof plywood), and this is important in wet rooms (in the kitchen, for example).
Particleboard and fiberboard as a base for linoleum is not a very good option - when the humidity rises, they swell, the fiberboard goes in waves. After drying, the original form is not restored, so that the linoleum laid on top is hunched and wrinkled.
Before laying linoleum, you need to put OSB or plywood. This is necessary if the boardwalk "plays", boards bend. If you lay the cover directly on the boards, it will crack in places of deflection, and quite soon. And this means - replacing the floor covering, and there are possible problems with the boards - moisture can seep into the cracks.
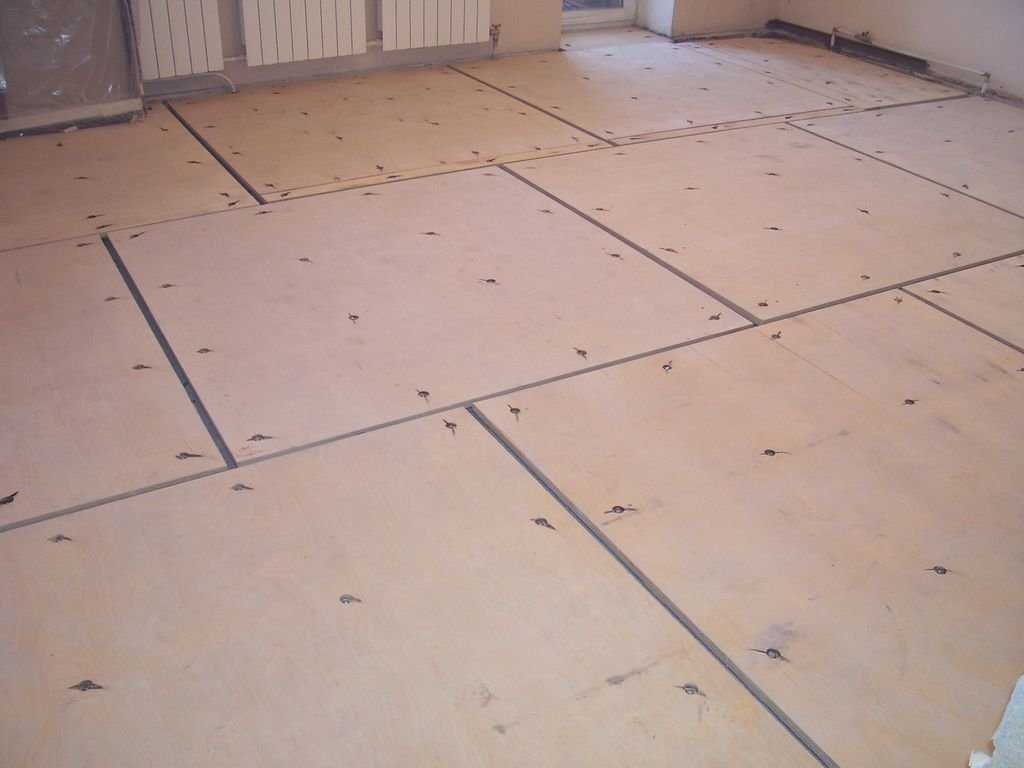
This is what it means "with the diversion of seams"
When laying any sheet material for leveling the floor under the linoleum, it is laid out with a seam breakdown - so that they do not coincide (like brickwork). Leave small seams between the sheets, which are then filled with elastic (non-hardening) mastic.
Can I put a new linoleum on the old coating
At once we shall tell, that before how to lay linoleum an old covering it is desirable to remove. But this is problematic and then the flooring is allowed to overlay the already existing one. The truth is only if the old floor - even or unevenness can be sealed. The new linoleum is laid on the old, on the tile, on the parquet. If there are defects in the base - chipped, dented, protrusions - they are eliminated, ground with putty, stiffen, the seams between the tiles are wiped so that the surface is even.
Lay linoleum on a parquet, a tile or other linoleum. But only on one condition - the ground must be level
With old linoleum, as with a substrate, problems usually do not happen. If there are mounds, they pierce, fill with glue, cracks are smeared with repairing compound - cold welding for linoleum of type "C" or hermetic. When laying a new linoleum on the old one there may be another problem - it will turn out too softly and considerable grooves can form under the legs of the furniture.
On a parquet, as well as on a board floor, it is desirable to lay a substrate of sheet material - the bars can also "walk", ripping the coating.
Glue or not
Before you put linoleum, you need to decide whether you will glue it or not. There is an opinion that in houses and apartments it is not necessary to glue it. It is pressed with plinths, furniture, large-sized equipment, etc. All this "holds" it in place. Sometimes it works, sometimes it does not. It usually works on rigid semi-commercial and commercial types of coverage, but does not work on softer - household ones.
It's a matter of thermal expansion. In the summer, when it's hot, the linoleum expands "creeping out" from under furniture and machinery. In autumn, it shrinks to its former size, but under furniture it does not return. Waves and mounds form. Therefore, most agree that it is necessary to fix it.
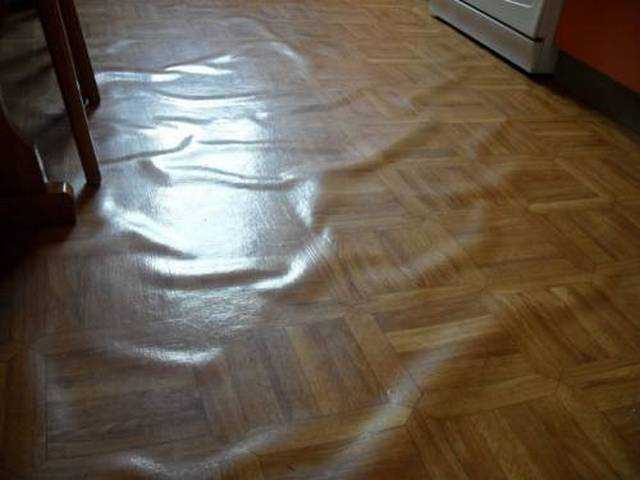
If you do not paste, maybe this is the kind
Just remember that linoleum or not need to glue at all, or glue completely. Glue in some places - almost guaranteed to receive after a while the hump and swelling.
How to glue
Before you put linoleum, you need to figure out what to glue it with. If the room is small, one linoleum is laid in one piece on a smooth base (sheet material, old linoleum, etc.), you can fix it on a double-sided scotch. It is fixed securely, but because of the temperature expansion between the tapes tape can form hump. Therefore, if you glue linoleum, then glue.
There are two types of adhesives:
The first option is more familiar to us, but when changing the cover, you have to suffer for a long time, tearing off the coating and the remnants of the glue from the base. Fixation keeps "on the shift" no less reliably, but allows it to be easily transfigured several times (from 5 to 8 depending on the composition).
Fixation
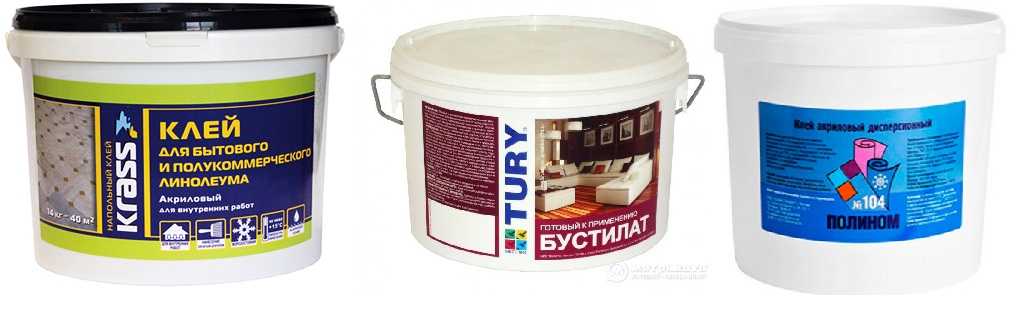
Fixation is used for laying household and semi-commercial linoleum. If we talk about the price per liter, the fixation is much more expensive. But its consumption is much less (100-180 g / square), so gluing one square meter will be cheaper. From all points of view this is the best option. Here are some normal fixatives with which you can work:
There are other manufacturers, every day there are new products. But, before buying, carefully read the instructions. See that you can use on your base, with your type of cover.
Adhesive for linoleum
Definitely it is not necessary to apply glue with a solvent (neoprene). Technologies have changed so that such glue gives a color change (red spots appear). This glue can be a cage only marmoleum (material based on natural components).
If you decide to use glue, here are the brands that give good results:
If you need to save, household linoleum "with a pile," on a jute or foamed basis, can be glued to PVA or Bustilat M. If it is placed on concrete, screed or other similar coating, first glue is diluted with water (1 to 1), this composition is primed with a surface (you can twice). After applying PVA or Bustilat and "on wet" roll out the coating.
How to glue the joints of linoleum
To join the joints of linoleum there is a special glue. It is called "cold welding for linoleum." These are small tubes with a sharp spout, with which the composition is filled directly into the joint. It not so much glues, how much dissolves adjoining sites of a covering, creating a tight seam.
There are two types of cold welding for linoleum:
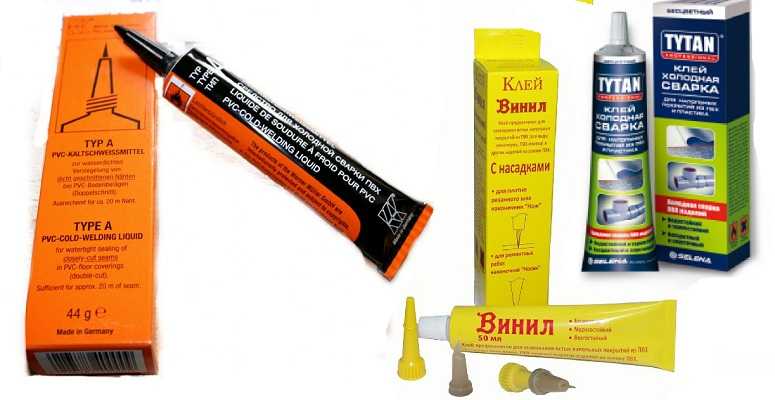
When flooring linoleum, of course, use type A. Pay attention to the instructions for use. There are different types, they require different time to dry.
If previously with cold welding for linoleum joints did not work, practice beforehand on trimming. When you work out the technology, and understand what and how to do, you can start gluing the joints in the room.
Another point: the adhesive for joining the joints of linoleum until it is polymerized releases harmful substances. Because in the room open the windows and doors, providing ventilation. Work better with gloves, and the respirator will not hurt.
How to lay linoleum with your own hands
To self-linoleum matched eye, did not swell and frown, it is necessary to fulfill several mandatory items. The first is connected with the preparation of the foundation. About what it's worth, but be even, you already know. In addition, it must be dry and clean. Neither dust nor any grease or other stains. We collect everything with a vacuum cleaner, we remove the stains with a suitable remedy, we carefully dry everything. All this is done carefully: the dust worsens the adhesion to the base, the debris particles will eventually penetrate through the coating.
The second mandatory condition: before laying linoleum, it should "lie around" for a while in the straightened state. It is desirable, on the site of styling. It is rolled out, left for at least 2 days, but better - for 5-7 days. So he straightens out, takes "working" sizes. Then you can start cutting.
How to crop
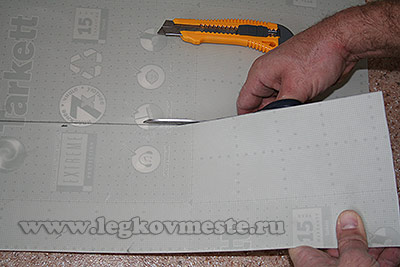
Let's start with how to cut linoleum. There are two options - a knife and scissors. Both of them, you can work normally, but they must be sharp.
It is more convenient for someone to use a clerical knife, but a shoemaker or sharpened kitchen, though there are special ones, will do. They have a retractable blade, like a clerical knife, but the handle is curved and the blade is almost not bent.
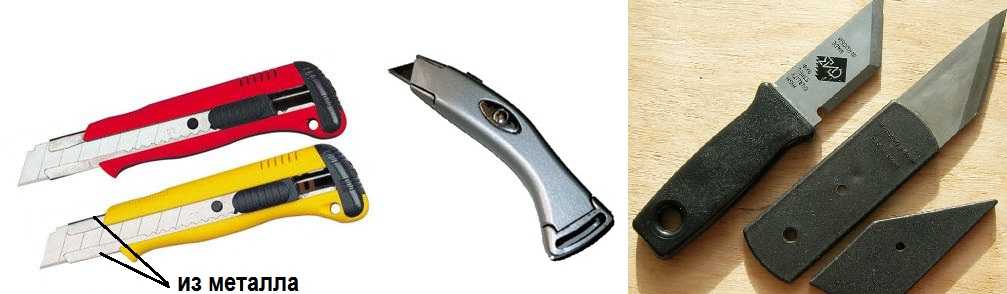
On the clerical knife, the projections that hold the blade must be iron. In this case, the blade is more elastic and less likely that the cut will go to the side. That's because the blade can "lead" some masters prefer powerful scissors. To cut easier, they make an incision, and then, without making cutting motions, just rip open the coating along the intended line.
Now about where to trim. Roll out the linoleum so that it comes to the wall a little. If the canvas is a few, at the junction make an overlap of at least 5 cm. In the presence of a picture, lay out the canvases so as to achieve a coincidence. Then the junction will not be noticeably visible.
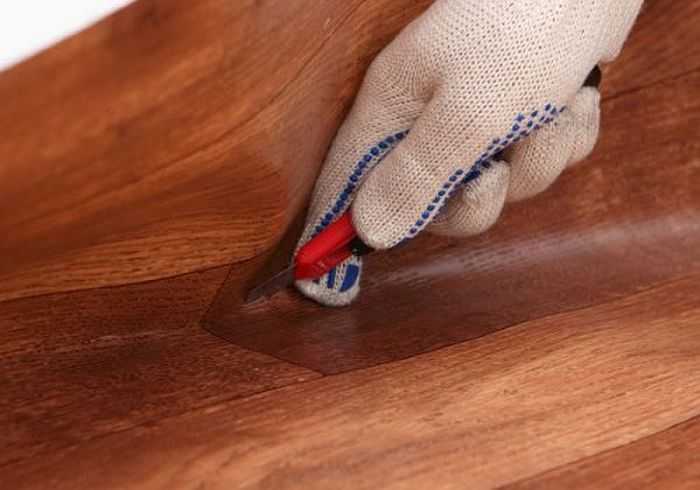
Cut linoleum in the corner, the joint remains overlapped and is cut off after gluing the main part. Cloth pressed to the floor, knife or scissors cut off. Please note that if the work is carried out in a cool room, in summer the coating from high temperatures will increase in size. If you cut the blade close to the wall, in the summer a roller is formed near the skirting boards. He then, at lower temperatures, can stretch out, but spoils the view in the summer. Therefore, by cutting off, retreat from the wall about 1 cm.
We glue to the base
If you decide to lay linoleum without gluing, it is usually fixed along the skirting boards onto a double-sided scotch. The same material is glued in the vicinity of the doors. In this case, turn the edges, paste on the base of the tape. The edges are returned to the place, carefully leveling the cover. Making sure that it is flat, without distortions and waves, remove the protective tape from the adhesive tape and glue the coating.
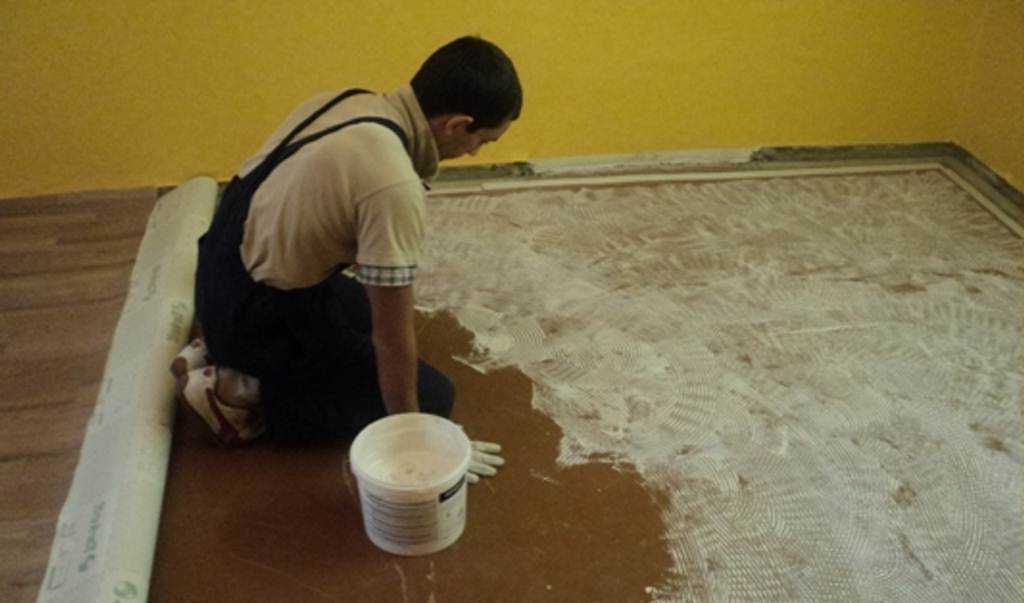
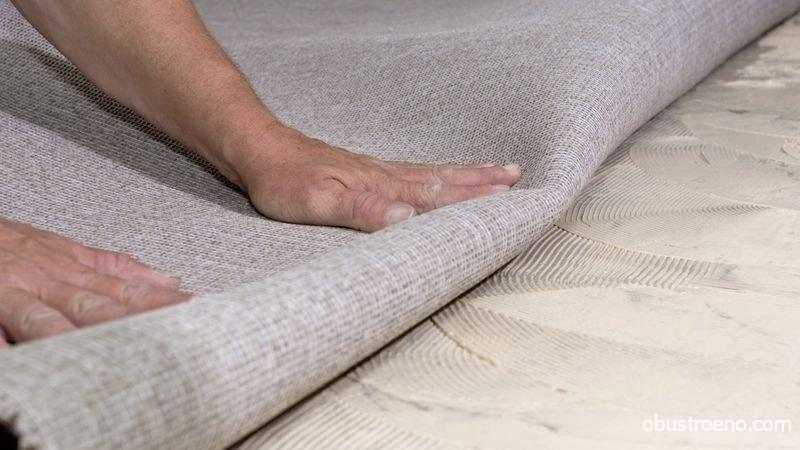
If you work with glue, act a little differently. Twist the coating to half the length. The composition is applied to the floor (strictly according to the instructions). If there is a joint, a band with no glue about 35 cm wide is left on either side of the joint. After waiting for the prescribed time, the linoleum is rolled out again and squeezed well.
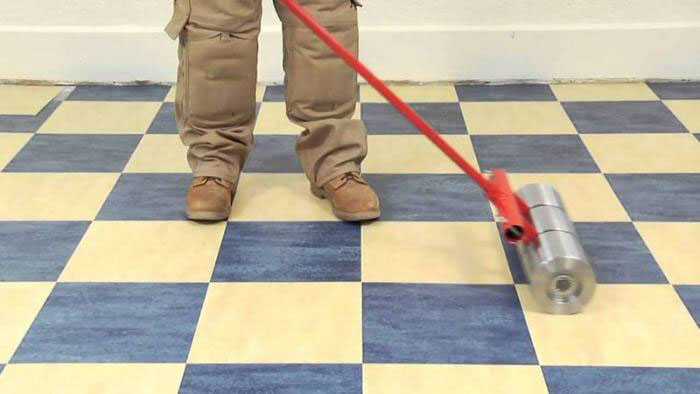
The technology requires a pressure roller - a heavy cylinder (about 50 kg by weight), movably attached to the handle, which squeezes the air and presses the coating to the base, ensuring good gluing. If there is no roller, take a plastic trowel, which is used when and it is all well pressed. You can use a felt-covered felt board or something like that.
Then glue the other side. If the linen was laid uniform, it can be considered that the laying of linoleum is over. It remains to fix the skirting board. If there are, joints, we continue.
Seam processing
If the canvas was two or more, the seams would have to be processed. There is an easy way - to take a T-shaped metal bar and fix it at the junction (it is attached to screws or dowels, depending on the type of foundation). The method is not very aesthetic, but reliable. This is the case if two pieces of linoleum with different colors are joined under the door.

A more aesthetic way is to use the adhesive "cold welding for linoleum". To begin with, you need to trim the excess material at the junction. We take a metal ruler (the level or right will fit), we put it in place of the joint, along it we cut with both knife the two canvases, we delete the extra strips. It is very important to cut both canvases at once. In this case, if the drawing was selected correctly, the connection is invisible, since the two canvases coincide perfectly. If the base under the linoleum is hard, you can put something soft under the joint - a piece of felt, linoleum, etc. Then it will be easier to cut both paintings at a time.

We turn off the non-glued parts of the coating along the seam, apply the glue, wait, if necessary, the time according to the instructions, glue the coating in place, roll with the roller. We wait for the time necessary for the glue to dry (according to the instructions).
Next, we take a cold welding for linoleum joints and a wide paint tape. With this adhesive tape, we glue the joint site, then, with a clerical knife, cut it at the joint. This is necessary to protect the coating from accidental ingress of the compound. It is chemically active and will melt the coating, leaving an ugly stain. Further actions are:

If everything is correctly done, the joint is almost invisible. While it is not necessary to test it - several hours are required for the final polymerization. But that's all. Linoleum is laid out and you know how to put it yourself.
Kind time of the day dear readers!
Cement-sand screed - this is the most optimal version of the base for laying linoleum.
Due to its leveled surface, it does not create differences in heights, and its strength allows you to choose a linoleum of any structure.
Such a basis (if done according to all rules) will not collapse with time and will not require repair.
Work on the flooring of linoleum on sand-cement screed does not require special preparation and any special knowledge. But, conducted not according to the rules, they may require alteration, which will increase the time and financial costs of repairs.
Before buying a linoleum, you need to correctly determine its need, for which you need to measure the length of the room (not from the baseboard, but from the wall to the wall) and add another 10 cm to the unaccounted moments.
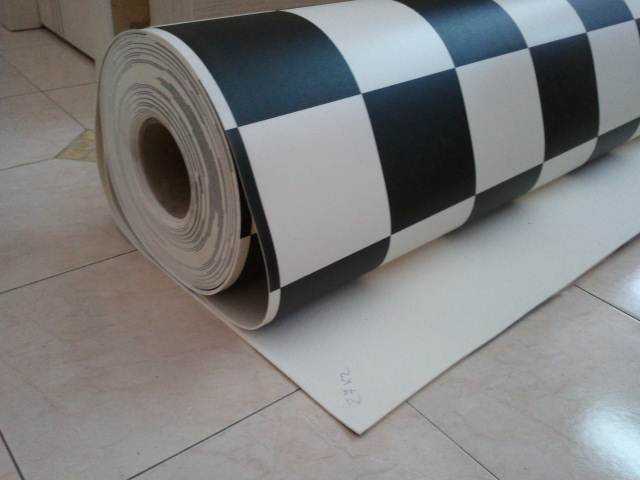
Linoleum is produced by rolls with a standard width of 2, 2.5, 3, 3.5, 4, 4.5 meters. If the room is small, with a width of up to 4 meters, it is better to take the canvas with one piece.
If you still need to put 2 strips, then you need to choose the width of the linoleum, taking into account the location of the joint in the middle of the room. When measuring, it is necessary to take into account the width of the threshold when it is present.
Linoleum is baseless and with a base of various materials. Neither in the first variant, nor in the second under it is required to lay no substrate.
The roll brought from the store must be left indoors for a day, if it happens in the summer, to balance the temperatures of the material and the room and for three days if the work is carried out in the winter.
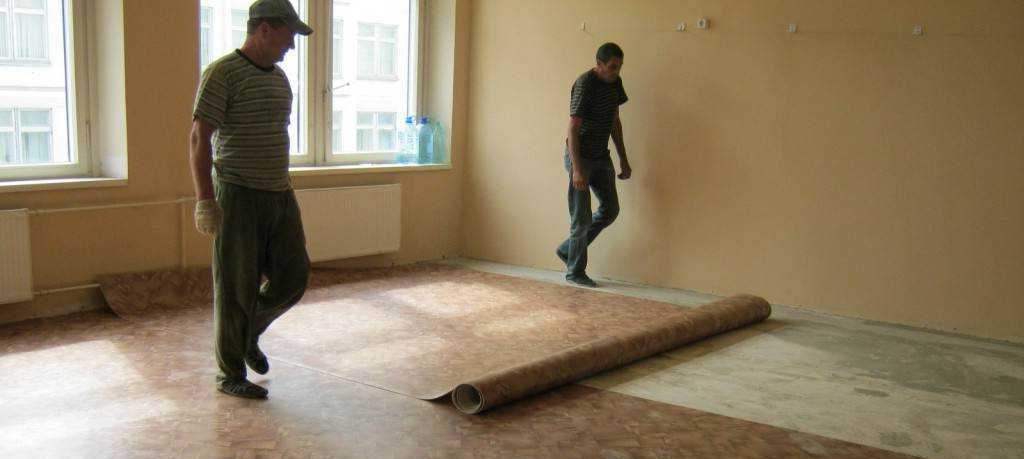
Then the roll needs to be rolled out and the material laid as it should lie after the flooring. In no case is it necessary to load or crush material, it must be freely straightened.
If two or more strips are laid, the linoleum should be cut lengthwise at this stage. In this form, he remains for another day. Directly to the work on the flooring you can start the next day.
First you need to cut linoleum properly. To do this, a sharp knife cuts off excess material around the perimeter. Cut should be so that from the edge of the linoleum to the beginning of the wall the gap was at least half a centimeter, but it was no more than 1 centimeter.
The fact is that linoleum has the property of expanding and contracting under temperature fluctuations. So with the help of this gap, he gets some freedom of action and does not create, in the future, trouble in the form of waves and unclosed plinth.
If the room has protrusions or niches, they need to be cut with a small stock of material, which is gradually removed during further fitting. Similarly, the cutoff of the corners, both internal and external, is done.
Particular attention should be paid to joints. This is the last step after trimming the entire perimeter. It should be recalled that the position of linoleum should not change during the cutting process. In order to make the joint perfectly smooth, it is necessary to lay adjacent sheets overlapping a couple of centimeters wide before starting the work.
When joining, you need a sharp knife, using a flat bar (better metal), make a cut along the entire length of the overlap through both strips.
After removing the cut parts at the junction point, an ideal connection is obtained. The cutting of linoleum ends with a threshold or a junction with another floor material.
If the area of the room is small, within 20 m2, then you can not glue the linoleum to the base. With a larger area, as well as in the presence of joints, this procedure must be done necessarily.
For these works, mastic or special glue is used, depending on the type of linoleum. The process of gluing is simple, but requires care.
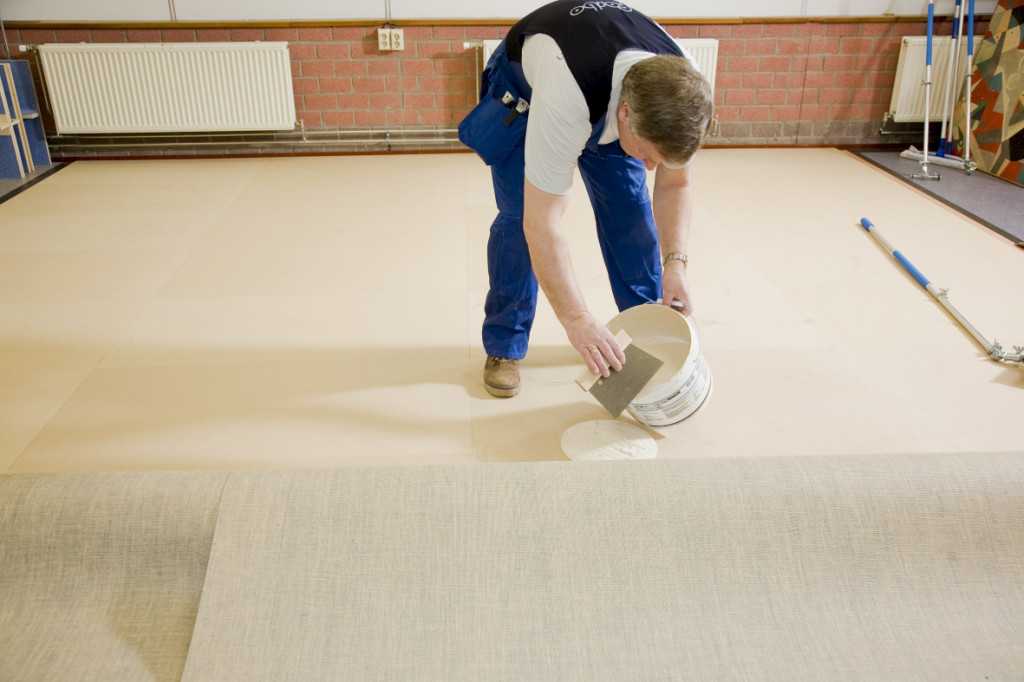
First you need to turn the canvas off the half of the room (it is recommended that the second part is temporarily "planted" on the scotch tape). Then apply the mastic on the floor in accordance with the recommendations of the manufacturer of this mastic printed on the package.
Then unfold the canvas to its original place and smooth it with a board wrapped in sacking. Do the same with the second half of the material. For final leveling, it is recommended to use a roller or roller with a weight of at least 50 kg.
You can, of course, use a bag filled with sand, but in this case there is a danger of shifting the linoleum from its place. Therefore, this method should be used with caution.
When deciding to glue only the joints, you can use a special welded cord or double-sided tape. For this, the substrate must be dust-free, primed and dried.
Scotch tape is glued to the floor, then one strip of material is attached to it. The same is true for the second page. At the same time, it is necessary to watch closely that there is no gap in the junction.
Once the glue dries, you can install skirting boards. To use the welded cord, you will need a qualification and a special apparatus into which this cord is refueled. The process is called hot welding and is carried out with large amounts of work.
Linoleum floor covering has good technological characteristics and is suitable for use on various substrates.
Its styling is a simple matter, but it requires some attention. Nevertheless, even a person far from building professions can cope with such works.
The floor of linoleum is certainly very practical. It looks, of course, simpler than the currently fashionable laminate, but it does not get dirty and is not afraid of scratches. Yes, and it is much cheaper than laminated parquet, and lay it simply enough independently, without attracting hired workers. This will save money in your wallet, allowing them to spend on something more useful and useful. Next, you can read how the linoleum is laid with your own hands, and that you need to prepare for this. The main thing is to cut the material so that it matches the configuration of the room.
First of all, we prepare the basis
To prevent the linoleum from drying quickly, it should lie on a flat plane. After all, even small tubercles or pits are capable of giving the floor a non-aesthetic appearance. In addition, the elastic linoleum will in these places either stretch or sag, quickly wearing out, which is not very good.
Before you put linoleum coating, you must carefully remove all plinths - after all, linoleum must lie close to the walls. Sometimes skirting boards are still quite fit, and they can be put back. In this case, removing them, we must try not to damage. In order not to confuse, where to attach something, each strip of skirting boards, removing, it is necessary to number. At the bottom of the wall we put the same number - this simple method will save a lot of time.
1. First, consider how to lay linoleum on a wooden surface. This can be, for example, a parquet that has lost its appearance with fallen parquet, or painted flooring from boards, which have become wavy from time. Basically, these two types of wooden bases are found under linoleum. They, alas, can not boast of smoothness, so laying linoleum on them requires a mandatory leveling of the base. There are several options for this:
- Wooden floors can be treated with a planer or a grinding machine. All the cracks and irregularities are covered with putty, and then polished.
- On the floor from above, you can lay a new cover, it can be a plate of hardboard, chipboard or multilayer plywood.
- Parquet strips, which are absent, can be restored, and then the parquet is parsed.
- Ideally a smooth surface can be achieved using the technology of the filler floor. For this, a special composition called leveling is used.
2. The base of concrete also requires alignment. The methods used are different.
- The base is covered with plywood flooring (wood-based or wood-fiber boards can also be used for this purpose).
- Used concrete screed, which has the properties of self-leveling.
3. If the linoleum is to be placed where there was carpet, then you need not only to remove this coating, but also to clean the base well of the nap and dirt. Those places where the floor remains not very smooth, it is necessary to process a special solution until the proper result is achieved.
4. The ceramic tile before laying linoleum, on the contrary, it is not necessary to remove. But if several tiles have disappeared, they should be glued to the place. After that, the surface is poured with an equalizing mixture, which has good adhesion properties.
5. Linoleum coating can be completely put on the old one. But only on condition that it does not have holes and cracks, and also if it is not too thick. The main thing is to degrease the entire old linoleum well, and then dry the glue completely. If you see that the old coating is very worn out, then it is better to remove it, and then align the base.
Remember the main thing: whatever the basis, be it wood, concrete, parquet or tile, you need to dry it well before you cover it with a piece of linoleum. After all, through this sealed material moisture can not evaporate. And so an undried substrate, being wet for a long time, may well become moldy or become covered with a fungus.
And more: do not neglect the thorough cleaning of the ground before flooring. After all, even tiny pebbles, grains of sand or other debris can speed up the wear process of the coating. Especially if people constantly go there. The same applies to small hollows and protrusions on the surface of the base - try not to leave them.
We stock up the tool and prepare the material for styling
It is best to put linoleum at a temperature from plus 15 to plus 25 degrees. After all, in the cold, this material from the elastic turns into brittle, and it is easy to damage. Therefore, in winter, a cold roll of linoleum is not deployed immediately, but let him lie down at room temperature for 12 hours, no less. And before you lay this floor covering, roll it over the floor and leave it alone for a while. Now it is necessary to avoid undulation.
While the rolled up roll of linoleum lies on the floor and is leveled, it's time to prepare the necessary tools. Let's list what we need.
- A shoe knife, well ground or any other knife with a short blade;
- a simple pencil;
- scissors;
- roulette;
- a ruler of a long length, which can be replaced by a flat strip or a building level.
Stilm linoleum correctly
In rooms of up to 25 square meters, linoleum is spread without the use of glue. Naturally, this is only permissible if the pieces of this material not more than two. In this case, it will be sufficient to fix the floor covering with plinths. And in those places where the joint will get, it will be necessary to use two-sided adhesive tape.
Step 1. So, we see that the unwrapped roll of linoleum spent too much, and no waves can be seen on it. We lay a sheet of linoleum almost in front of one of the walls - the gap between them should be from 3 to 5 millimeters. As for the other three walls of the room, then we put the linoleum so that it overlaps them a little overlap. If the room has an uneven distance between the walls, then the overlap must be done on each wall.

Dispatched linoleum with the necessary overlap on the walls.
Step 2. Now let's talk about how to lay linoleum in a room with a large area, where there will be several joints between the sheets. First it will be necessary to fit these joints nicely and neatly, and then lay the pieces of linoleum around the perimeter (again with a slight overlap).
When this flooring has a pattern or ornament, there is a need for an additional operation - combining this pattern. First, try to combine the pattern on the joints between the sheets in the middle of the room. And if in the next room this pattern repeats, it is necessary and in the doorway to achieve the maximum coincidence of the ornament. To do this, we shift one sheet of linoleum relative to the other until we get the desired result.
Step 3. Next, a few words about the pattern itself. Often it simulates a parquet or a tile, and consists of straight lines. To make the floor look neat, keep in mind that these lines should not cross the walls of the room at an angle. If they are parallel to the walls of the room, the picture really pleases the eye. Try to achieve this by slightly turning the sheets of linoleum, either clockwise or against it.
Step 4. Fitting the linoleum to different niches or projections. As a rule, in almost every room in the window space and in the corridor near the entrance doors there is a niche. And before proceeding to trim the material, it is necessary to accurately measure the depth of the niche in order to make the appropriate fill.
Example with a corridor:
To begin with, an overlap is made from the torons the entrance door, the size of the overlap should correspond to the depth of the niche. Just wrap and measure the necessary piece of linoleum, and then cut off one and the second side of the slope. Unfortunately, I did not have a photo with the self-tapping, one object where I performed the laying of linoleum in the corridor. But there is a picture on which I just cut the necessary size for the niche. I hope you understand what I mean. Similarly, a trimming is performed for the niche under the window. And, first of all, always start marking and pruning from these areas.

Marking and initial pruning of linoleum.
Example with kitchen:
The second example is a kitchen in which there is a ledge. To accurately size linoleum in this situation, you need to put it to the protrusion and tuck it. After that, change the depth of the ledge and put aside the distance on the linoleum. Then make a pruning.

Layout of linoleum under the ledge.
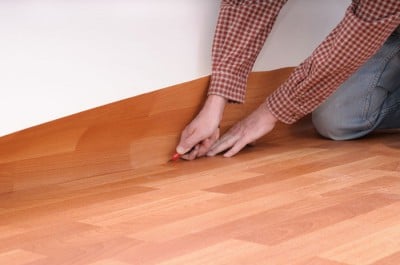
Step 5. Next we have to cut all the rest of the material in a circle. Before pruning, bend the sheet of linoleum along the wall so that it comes closer to the wall. Armed with a knife, neatly on a ruler, an even rake or just a wall cut material. Cuts on the wall I recommend especially if the linoleum is laid in apartments Soviet construction. There are very often curved walls. The main thing is not to overdo it and not cut off excess! It is better to do this operation several times a little, than once with an excess.

Trimming linoleum on the wall.
Step 6. To successfully connect the seam between two pieces of linoleum, use a double-sided adhesive tape. To do this, you can draw a line along one of the pieces. Then, just in the middle of this line, stick an adhesive tape. After that, remove the protective paper from the adhesive tape and glue first one, and then another sheet.
Step 7. Now you can put in place the old skirting boards, or mount new ones. The linoleum sheet will be perfectly pressed by them, and you do not need to glue it. Of course, if you plan to constantly move heavy furniture around the room, maybe it's worth using glue. Although such loads can not withstand a well-glued floor covering.
In some sources, one can find the opinion that linoleum should lie without skirting boards for a long time, a month or even more. In fact, modern PVC linoleums do not shrink, so you can lay linoleum and install skirting boards on the same day.
When using linoleum to apply mastic or glue
In various non-residential buildings, it is better to glue the linoleum. And even if this room is very small. But in apartments and apartment houses gluing of this flooring requires only rooms with an area of more than 25 square meters. At the same time, you must first clean the base very well.
Before you start to apply glue the sheet of linoleum is rolled into a roller, but not completely, but approximately to the middle of the room. This is done on one and the other side.
Mastics and adhesives for a material such as linoleum, are in great choice in the construction market. Try to find them correctly. So, for example, if you chose this floor covering on a warm basis, then the adhesive mass, buy the corresponding one: for a material that has a fleecy basis. The glue pack usually indicates which layer it should be applied. In this case, it is most convenient to do this with a notched trowel, the teeth of which are higher the larger the layer of glue is needed. Glue we put on the basis in a direction from the center to walls.

Application of glue with a spatula for gluing linoleum.
Then start slowly roll out our movie. After the roll has to be rolled through the entire length of the sheets, while you need to move from the center of the room to the walls. Thanks to such actions, all excess air is squeezed out between the base and the floor covering, and the adhesive mass is distributed evenly.

Roll and glue linoleum.
When joining two or more sheets of linoleum, a welding method is used, which can be both cold and hot. Which one to choose in this case, determine such parameters as the complexity of the joint and the type of linoleum coating. Let's consider these two methods in more detail.
Welding hot type - more reliable and durable connection. It is advisable to use it where there are large loads on the floor. It requires a welding torch, a compressor and bars of various profiles, which are melted by the burner and fill the joints. Welding pieces of linoleum can be a day after he was laid.
Welding cold type does not require special equipment, perfectly suitable for domestic needs. It only needs glue. If the linoleum is just laid, then take a more liquid type A glue. To repair the floor covering, which has been lying for a long time, apply a type C adhesive that has a thicker consistency. Since there may be a large gap between the sheets of linoleum (a few millimeters), liquid glue will not work.
Linoleum is one of the most beautiful and durable floor coverings, which is also very practical. It is an unusually warm, hygienic and very durable material. To maintain its performance characteristics, it is sufficient to simply avoid the long-term contact of linoleum with chemicals, such as mineral oils, soda, alkali and acids. Such a floor covering is perfectly washed with ordinary warm water and soap, and it is very easy to return it to its former gloss by rubbing with mastic. Indisputable, as well as playing a significant role in choosing the basis, the advantage is the ease of laying linoleum. Any person can handle this work, and we, in turn, will try to facilitate this process and give several useful advice, how to lay linoleum.
Before laying linoleum, it is necessary to carry out a number of preparatory works. This stage can not be avoided for any kind of flooring. After all, the correct preparation for the foundation flooring is the guarantee of a remarkable appearance and long life of the floor.
Determine the amount of material
To determine exactly how much material is required for the flooring, it is recommended that you first draw a floor plan of the room with the most accurate indication of the location of all doorways and pipes entering the floor. Further on this drawing it is necessary to put all sizes:
- length and width of the room;
- area;
- distance to the communication inputs into the room;
- width of doorways.
Now you can go for buying linoleum.
Tip: buy linoleum better in a specialized construction shop, because there, mainly consultants are specially trained people who can help with the selection of material and give expert advice, as well as pick up the necessary fittings (joints, corners) and plinth.
When choosing linoleum, special attention should be turned to the width of the coating, trying to choose it so as to avoid the formation of internal seams or reduce their number to a minimum. In some shops, they practice not only the selection of material for the layout of the room, but also the correct cutting in size. You will only have to bring it home and properly spread it.
To buy linoleum is better in specialized shops in which together with recommendations of experts it is possible to get accompanying materials and to cover a covering
Advice: when buying linoleum, you should immediately purchase new skirting boards, best of all from soft plastic (they are more closely connected even to uneven walls) with a cable channel. Do not forget also the dowel-nails for fastening and the rapids.
Free up space for work
First, you should fully prepare the room in which the change of coverage is planned. In order to make your future work as easy as possible, you should take out of the room all pieces of furniture and interior, located on the floor. Linoleum - a very soft material, because of which the dragging of objects from the uncovered area to the finished base is fraught with the emergence of a number of difficulties:
- firstly, each time, rearranging furniture or other elements of the interior, it will be necessary to take care of special substrates, which allow to avoid punching of linoleum;
- secondly, heavy objects when moving over the surface of a new coating will necessarily leave scuffs or scratches, and you risk immediately after the work to see a sloppy ground.
The path to success is the preparation of the foundation
Now pay attention to the plane of the base. As for any other flooring, it should be as flat as possible, it should not leave even minimal unevenness. Linoleum is a very soft material, its surface very quickly takes shape of the floor beneath it, so even a very small pebble can lead to large damages of the coating placed above it.
In general, it is possible to lay linoleum on any base. The main condition is the absolute evenness of the surface. Special insulated types of this material allow not using heat insulation even before laying linoleum on concrete. But the waterproofing layer still worthwhile to build. Usually, before laying linoleum on a concrete floor, an ordinary roofing felt spreads on its surface.
Many people are interested in the question, but is it possible to lay linoleum on linoleum? Of course, you can, if he is not too old. This will only benefit the new sex. It will be much softer and warmer than the old one. In houses made of reinforced concrete structures one can face the following problem: slabs serving as the basis of the floor are not always primed. In this case, the construction dust will penetrate through the coating. It is possible to avoid this by self-priming the entire surface. If you decide not to remove the old linoleum, then you can limit the priming of the edges.

In some cases it is necessary to ground the surface of the base
To avoid the appearance of a relief pattern of the board surface, before you put linoleum on a wooden floor, it should be covered with hardboard or plywood. In this case, it should also be taken into account that boards under linoleum with excess moisture may start to blow, so during the entire life of the product, care must be taken to ensure that no liquid gets under the floor covering.
How to prepare the material
Delivering the purchased material to the destination, the rolls must be deployed in the room where the linoleum is planned to bed. Here it should be in the straightened state for at least two days. This will allow him to return to his form and take real dimensions. If the coating consists of several parts, then all of them should be arranged in their places.
Advice: transport linoleum should be only in rolls. If it is folded several times in a rectangle, then it will be impossible to get rid of the folds formed as a result of this action.
What is needed for styling
Before laying linoleum, you must prepare everything you need. We may need:
roller and brush for priming;
electric jig saw;
screwdriver;
perforator;
double-sided adhesive tape or cold welding;
knife for cutting linoleum;
two spatulas for applying glue (one - ordinary, and the other with teeth).
How to lay linoleum technology
After the linoleum loops, using a special knife cut off all the excess
- Before you lay the linoleum and after it completely rest, it must be completely leveled on the floor surface and cut off any excess. Between the wall and the floor covering should leave a centimeter gap, the so-called compensating suture. This will avoid the appearance of waves on the finished base, and the gap can easily be hidden under the baseboard.
- Now one edge of the material rolls into a roll.
- Thinking about how correctly to lay linoleum, not everyone will guess that for the best fixing a covering can be pasted to the basis. We recommend doing this. On the surface of the floor, which has just been removed linoleum, apply a layer of glue with a notched trowel.
- We lay the rolled up part of the material and carefully smooth it.
- At the junctions, we cut off the coating as follows: under the linoleum we lay a sheet of plywood, from above we overlap the second piece and, using a ruler and a knife, cut through both layers of material. If the linoleum is too thick, then it is enough to cut at least one layer, leaving on the second scratch, serving as a mark for pruning.

To get a beautiful joint, two layers of linoleum cut through the ruler at the same time.
Types of welding linoleum
The pieces of linoleum can be joined together by cold and hot welding. Hot seam welding requires the use of a special tool, so it is only used for laying the coating in commercial establishments, shops, offices, etc.
In residential areas a good joint joints can be achieved by cold welding. It is a special glue that dissolves the edges of the linoleum and forms a uniform structure with a floor covering when dried.
Let's consider more in detail how correctly to lay linoleum, using a method of cold welding:
- We connect two pieces of linoleum.
- Joint paste with adhesive tape. This will prevent the adhesive from reaching other areas of the coating.
- Cut through the adhesive tape at the junction.
- We apply glue with a thickness of at least 4 mm.
- After 10 minutes, completely remove the adhesive tape together with excess glue.
Tip: if you get a glue on the linoleum, do not rush it immediately. After completely drying, this adhesive is removed remarkably from the surface with an ordinary knife.

Correct gluing of linoleum with cold welding
Rules for installing skirting boards
If we are talking about how to lay linoleum yourself, then it is worth giving some tips on installing skirting boards. After all, you will not, having done most of the work, call specialists for this stage. So,
- We remove from all skirting boards, covering the cable channel.
- We lay the plinths along the walls and cut them into size.
- Press the plinth at the same time to the floor and wall and in the groove under the bar we drill through hole (both in the plinth and in the wall).
- We fix the plinth with the dowel-screw.
- We continue these manipulations along the entire length of the plinth.
Tip: Thick cables must be laid in the cable duct at the same time as the installation. Otherwise, it will be very difficult to do this.
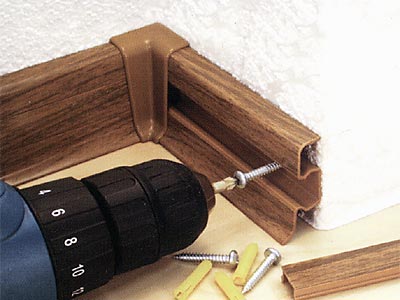
Before installing plastic skirting boards, it is necessary to remove the protective panel from the cable duct
Furnishing, interior and new linoleum
Speaking about how to lay linoleum, you can not forget about the return of furniture in the room. It is at this stage most often the new coating gets scratches, scrapes and even torn holes. Consider how this can be avoided:
- First of all, you need to check the legs of all the furniture that you plan to place in the room. They should be padded with soft substrates, which can be used as plastic or suede.
- When entering soft furniture, its objects are often placed on its side so that they can easily enter the doorway. Quite often in the side walls of armchairs or sofas there are small protruding cloves. If such furniture is dragged along the linoleum, the studs, stuck in the soft floor covering, can not only scratch it, but also tear off a large piece.
- When dragging heavy objects for them, a soft and durable material (for example, an old carpet or blanket) must be placed under them. Now, if you pull the edges of the fabric, you can easily deliver the cabinet or wardrobe directly to the destination.
- The most dangerous items of furniture are sliding chairs and sofas. As a rule, rollers intended for rolling the structure on the floor are not checked, and it is their malfunction that causes the damaged floor covering after the furniture is installed in the room.
So we noted all the main stages of the process and are sure that you are no longer interested in the question of how much it costs to lay linoleum. It remains to place a video showing the laying of linoleum in detail.
Here he, rolled up in beautiful rolls, lies in the middle of the room, bought us a linoleum. The whole family is thinking about where to get the uncle who can quickly and qualitatively bed him on the floor.
Postpone meditations in the back box and do all the work yourself - save your family money and get a moral pleasure from the work done. Approaching this issue without haste and thoroughly, after everything has been thought through and provided for all the nuances, your gender will change beyond recognition.
Preparation of premises
Step 1. We release the premises.
As always, all repair work begins with the most unpleasant and heavy - we take out of the room all the large-sized furniture and various household items. We clear the space for activity as much as possible. If laying linoleum is done in the room where you live, for example in two-room apartmentthen we steal linoleum alternately - first in one room, then in another. Furniture and household utensils, respectively, we transfer to the room where the work is not conducted.
If the furniture is too heavy for lifting, and you want to lay linoleum, without shifting anything, you will have to make careful measurements and cut out the material for each furniture in the room. It is worth considering that, for example, to put a heavy cabinet directly on the material without lifting you will not come out - you'll have to be content with a neatly carved linoleum under the legs.
Step 2. Preparation of the floor surface.
The room is free, we proceed to prepare the very surface of the floor. No matter what floor you previously had before laying linoleum, you need to ensure that the surface on which we make the linoleum is smooth and clean.
We remove all skirting boards along the entire perimeter of the room, tk. in the process of work we will cut the coating directly to the wall.
If the plinth is planned to be used again, over the covered covering, we do it carefully, trying not to break it. Consistently remove each bar, number it from the back, the same number is put on the wall so that during installation it is not necessary to solve the rebus, where a piece was.

If the floor has been repaired for a long time, the floors are painted many times, then it is almost impossible to remove the plinths intact. And if you still take into account that it used to be used to nail a skirting board in the gap between the floor and the wall with nails 100 mm long, it is definitely better to buy new plinths. Yes, and look at the new coating, they will be much prettier.
With the baseboards figured out, go to the floor itself.
Of course, if you make a complete overhaul in the apartment, then the best option is to make the floor perfectly flat - use.

For a base of concrete or cement-sand screed this is generally the most optimal option.
But, basically, the floor, which is necessary to make it up, or typed sheet pile or old parquet, which has dried up from old age. The punctured board bends in time in the transverse direction and "waves" are obtained on the floor, the old parquet falls and has large differences between the plates.
If you do not plan to completely remove the old floor, then you can choose one of the many options for how to remove all these irregularities and make the surface even:
to lay the floor with sheets of wood chipboard;
otsiklevat and fix the drop-down bars;
to make a bulk floor, using technology designed for this type of work and special leveling compounds.
Often, with such a floor, there is another problem with prolonged use - it starts to creak very strongly. In this case, you will additionally have to perform operations to eliminate the squeak.
The whole point of the preparatory operations should be reduced to achieving an even surface and cleanliness of the floor. Dips, ledges, pebbles left on the floor and other debris after covering the floor with linoleum will definitely appear, and in places of intense wear (for example, on the aisles) the coating will rub or tear.
Surface smoothness is achieved in the above ways, and cleanliness - thorough cleaning - vacuum cleaner and my floor before laying linoleum.
Step 3. We prepare the necessary tools and conditions for laying linoleum.
Laying linoleum can be made only at positive temperatures. The optimum temperature is from 15 to 25 ° C. This is due to the fact that when cooling this floor covering loses its elasticity and becomes brittle. Because of this feature, you need to give a full warm up roll, if you brought it home in the winter. At negative temperatures on the street, the warm-up time inside the room should be at least 12 hours.
Before cutting the sheet to the walls of the room, it is desirable to roll out the roll and allow it to lie in this state until the "waves" are removed.
The most necessary tools and materials
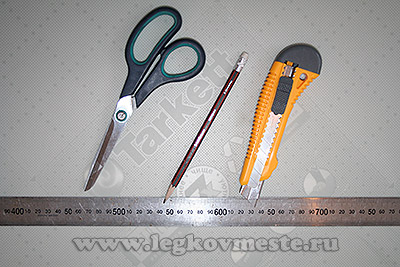
While the cover is lying down, we prepare the instrument. For marking and fitting a piece we will need:
Ruler and ruler;
Pencil;
Scissors;
Stationery knife.
If laying linoleum on the floor will be produced in a large room (more than 25 square meters), you need to purchase glue and tools for its application to the floor and the coating. In premises of a smaller area, no gluing of the coating is required, so-called "free" laying is performed.
Correct laying of linoleum with your own hands in the room, the toilet of the apartment (on a wooden, concrete floor or tile)
Step 1. Positioning the sheets.
Our sheets are "littered" and you can start laying linoleum. We place the sheet in such a way that the gaps do not form along the perimeter, but rather a uniform overlap along the whole perimeter of the room. You can immediately join one side of the sheet to the wall, provided that the wall is straight and between the line of linoleum and the wall a uniform gap of 3-5 mm is formed. In this case, the work is simplified, and you only need to cut a piece into three walls.
If you have a large room, covered with several sheets, first combine the joints of the sheets, and then equalize everything relative to the perimeter of the room until the uniformity of overlapping on the walls.
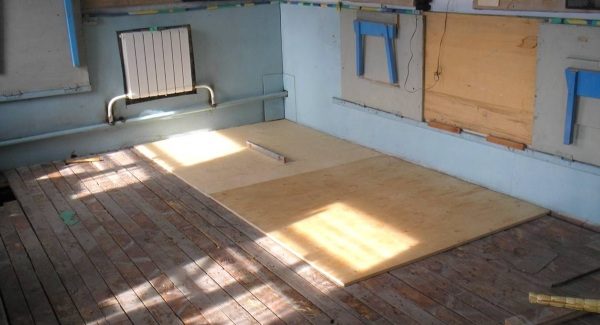
Before laying linoleum on a wooden floor, it is necessary to lay it with sheets of plywood
Another important point, before you start to cut linoleum around the perimeter of the room. If you lay a linoleum with a pattern (for example, a linoleum pattern imitates a parquet laid with symmetrical squares), after all the alignment of the sheets, pay attention to the drawing. If it forms straight lines along the cover, these lines must be parallel to the walls of the room and the wall should not "cut off" part of the pattern. If this happens, you need to rotate the entire plane of the put sheets along or counter-clockwise and achieve parallelism.
Step 2. Cut the sheets to the walls.
The last time we check that sheets of linoleum lie overlapping on the walls and nowhere crevices are formed between the edge of the sheet and the wall and between the sheets themselves. If all is well, proceed to pruning.
We start from any convenient angle. Slightly bend the linoleum along the wall and make pencil marks from the back side of the coating so that when cutting an excess strip between the coating and the wall, a gap of 3-5 mm remains. (see photo below)
![]()
Moving along the wall, make such marks in steps of 20-30 cm.
We bend the linoleum completely, use the ruler to connect our marks and cut off the excess strip.
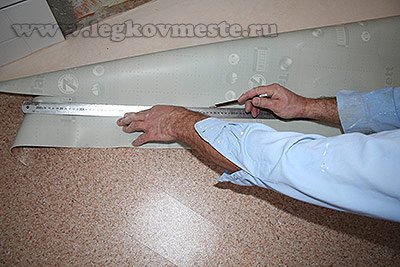
It was easier for me - on the reverse side of the cover was a picture in the form of a cage, which made it possible to make a cutting without joining the marks, but to navigate along the lines on the canvas itself.
As long as there are no skills, it is necessary to put marks to get a small overlap of the coating on the wall, than a large gap between the wall and the coating. Better then make another cut and accurately fit the edge of the linoleum to the wall. After 10 meters of cutting you will have experience and marks will start to put very accurately from the first time.
Thus, we pass along the entire perimeter of the room and customize our sheets of cover.
Step 3. We cut the cover on the outer corners.
If there is a large projecting angle in the room (as in the diagram below), the prism should be started from this angle. And it is necessary first to cut out the angle first, and then to do the exact trimming as described in step # 2.
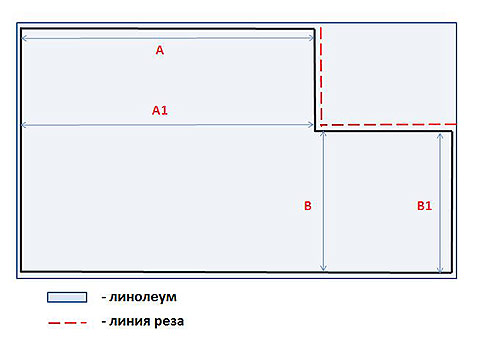
For this, after positioning the sheet with a uniform overlap across all walls, measure 2 dimensions A and A1. Add to each size of 2 cm for an accurate cutting and connect the points with a line. This is a preliminary cut line along one corner wall.
Similarly we measure the size B and IN 1 at the second wall of the projecting corner, add to each size 2 cm. This will be the preliminary cut line along the second wall of the corner. We cut out the projecting angle from the resulting markings.
Since we cut the linoleum from the stocks, we have to overlap the walls of the protruding angle of 2 cm, so that the sheet lies down to the corner and could be cut accurately, it is necessary to make a cut, as shown in the photo below
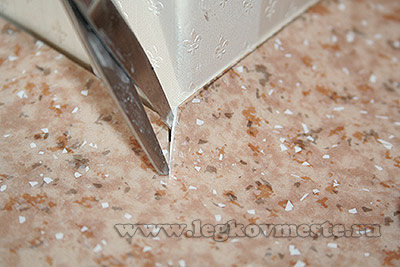
After this reception, the sheet will just lie down to the corner, and the extra floor covering will go to the wall.
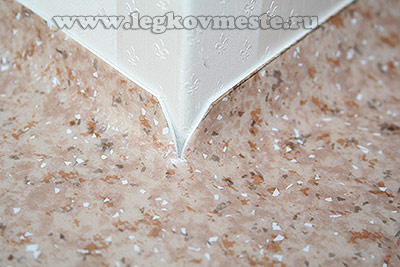
We make the marking along the cut-off walls of the corner, as described in step # 2, bend the corner and connect the marks with a ruler.

According to the exact marking obtained, we cut off the excess strip along one wall and likewise along the other.

This completes the process of fitting the floor sheet to the walls of the room. It remains to make joints on the threshold, at the junction of pieces of different rooms. If you used to lay linoleum several strips to weld them and the place of joints on the sashes. For the production of all these final works, it is necessary to cover it for 1-2 days, so that it finally lays down in its new place.
Video: Linoleum on the floor in the kitchen
In the end, I propose to watch a small video "Laying a linoleum video", evaluate our work and express our opinion on the result in the comments.
Yours faithfully,
Ponomarev Vladislav.